


1
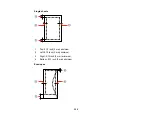
Left: 0.12 inch (3 mm) minimum
2
Bottom: 0.20 inch (5 mm) minimum
3
Top: 0.20 inch (5 mm) minimum
4
Right: 0.78 inch (20 mm) minimum
Parent topic:
Ink Cartridge Specifications
Note:
We recommend that you use genuine Epson cartridges and do not refill them. The use of other
products may affect your print quality and could result in printer damage.
The printer ships with full cartridges and part of the ink from this first set of cartridges is used for priming
the printer. Yields vary considerably based on images printed, print settings, paper type, frequency of
use, and temperature. For print quality, a variable amount of ink remains in the cartridge after the
"replace cartridge" indicator comes on.
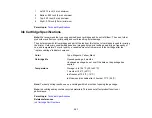
Color
Cyan, Magenta, Yellow, Black
Cartridge life
Opened package: 6 months
Unopened package: do not use if the date on the package has
expired
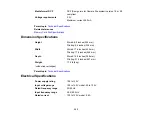
Temperature
Storage: -4 to 104 ºF (-20 to 40 ºC)
1 month at 104 ºF (40 ºC)
Ink freezes at 10.4 ºF (-12 ºC)
Ink thaws and is usable after 3 hours at 77 ºF (25 ºC)
Note:
For best printing results, use up a cartridge within 6 months of opening the package.
Note:
Ink cartridges may contain recycled materials. This does not affect product function or
performance.
Parent topic:
Related references
321
Содержание WorkForce 545
Страница 1: ...WorkForce 545 645 Series User s Guide ...
Страница 2: ......
Страница 13: ...WorkForce 545 645 Series User s Guide Welcome to the WorkForce 545 645 Series User s Guide 13 ...
Страница 29: ...4 Slide the edge guide shown below to your paper size 29 ...
Страница 34: ...2 Pull out the paper cassette 3 Slide the edge guides outward 34 ...
Страница 39: ...2 Pull out the paper cassette 3 Slide the edge guides outward 39 ...
Страница 52: ...Parent topic Placing Originals on the Product Related topics Copying Scanning 52 ...
Страница 112: ... Normal preview Click the Auto Locate icon to create a marquee dotted line on the preview image 112 ...
Страница 116: ...3 Adjust the scan area as necessary 116 ...
Страница 123: ...123 ...
Страница 131: ...3 Adjust the scan area as necessary 131 ...
Страница 164: ...You see this window 5 Select Fax Settings for Printer You see this window 164 ...
Страница 175: ...5 Select Fax Settings for Printer You see this window 175 ...
Страница 176: ...6 Select your product if necessary 7 Select Speed Dial Group Dial List You see this window 176 ...
Страница 193: ...2 Insert your memory card into the correct slot making sure the card is oriented correctly 193 ...
Страница 249: ...249 ...
Страница 254: ...254 ...
Страница 281: ...5 Remove any jammed paper from the rear cover 6 Open the rear cover and remove any additional jammed paper 281 ...
Страница 282: ...7 Remove any paper jammed in the rear of your product Avoid touching the paper feed rollers 282 ...
Страница 285: ...3 Remove any jammed paper inside the cassette 4 Remove any paper jammed inside the paper cassette slot 285 ...
Страница 286: ...5 Carefully follow all paper loading instructions when you load new paper 6 Replace the paper cassette 286 ...
Страница 290: ...6 Lower the document cover 7 Raise the ADF input tray 8 Carefully remove the jammed paper 290 ...