26
Making Prints From Your Memory Card
10. Use the
l
or
r
button to select the photo you want
to use.
11. Press the
x
Start
button to start printing.
If you need to cancel printing, press the
y
Stop/Clear Settings
button.
Writing a message or drawing on
the template
On the template, use a dark pen or pencil to fill in the
ovals and make your selections.
1.
In section 1, select the type of handwritten
drawings you want to use. Fill in the oval to the
left of your selection.
2.
In section 2, select the number of copies you want
to print from 1 to 10. Fill in the oval to the right of
your selection.
3.
In section 3, write the message or drawing you
want to add to the photo using a dark pen. The
handwriting area differs depending on the layout
you choose.
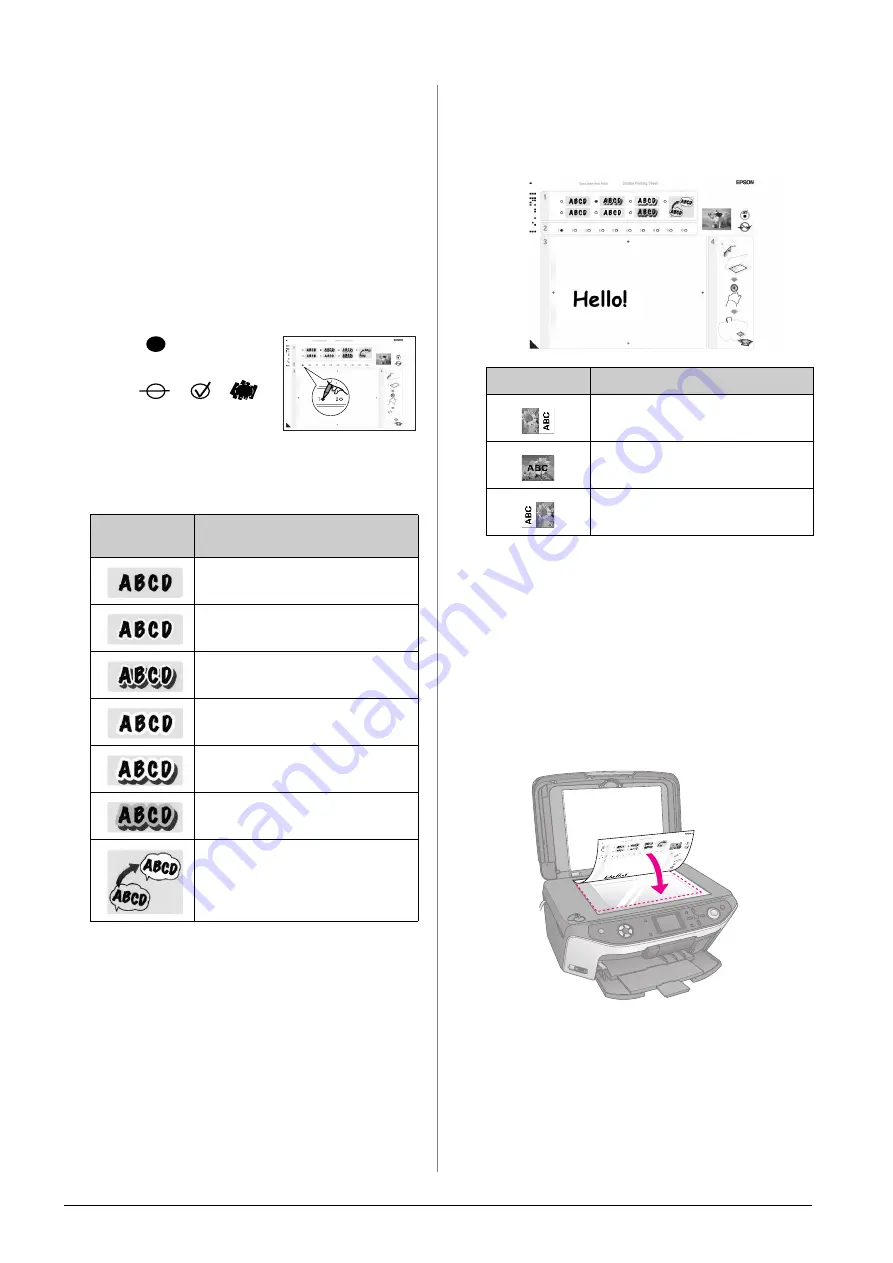
Scanning the template and printing
the photo
1.
Load 10
×
15 cm (4
×
6 in.) Epson photo paper you
selected. Load enough sheets for the number of
photos you want to print.
2.
Place the template face-down on the document
table, so that the triangle mark on the bottom left
of the template is aligned with the top left corner
of the document table.
3.
Close the document cover.
Handwritten
Drawings
Descriptions
Your message or drawing is printed
with no border.
Your message or drawing is printed
with a thin border.
Your message or drawing is printed
with a thin border and a shadow.
Your message or drawing is printed
with a thick border.
Your message or drawing is printed
with a thick border and a shadow.
Your message or drawing is printed
with a gold border and a shadow.
Your message or drawing is printed
with a speech balloon, and the inside
of the balloon becomes white.
OK:
No
good:
Layout
Handwriting Area
Write or draw in the white box on the
right.
Write or draw on the photo.
Write or draw in the white box on the
left.
Содержание Stylus Photo RX640 series
Страница 51: ...51 English Memo ...
Страница 56: ...Printed in XXXXXX XX XX XX XXX ...