


•
Normal preview
: To create additional marquees (up to 50), click the
Copy Marquee icon to
copy the existing marquee and paste it on the preview image.
• To delete a marquee, click the marquee, then click the
Delete Marquee icon.
3.
Click inside the scan area and make any necessary settings in the EPSON Scan window.
Parent topic:
Available Image Adjustments - Professional Mode
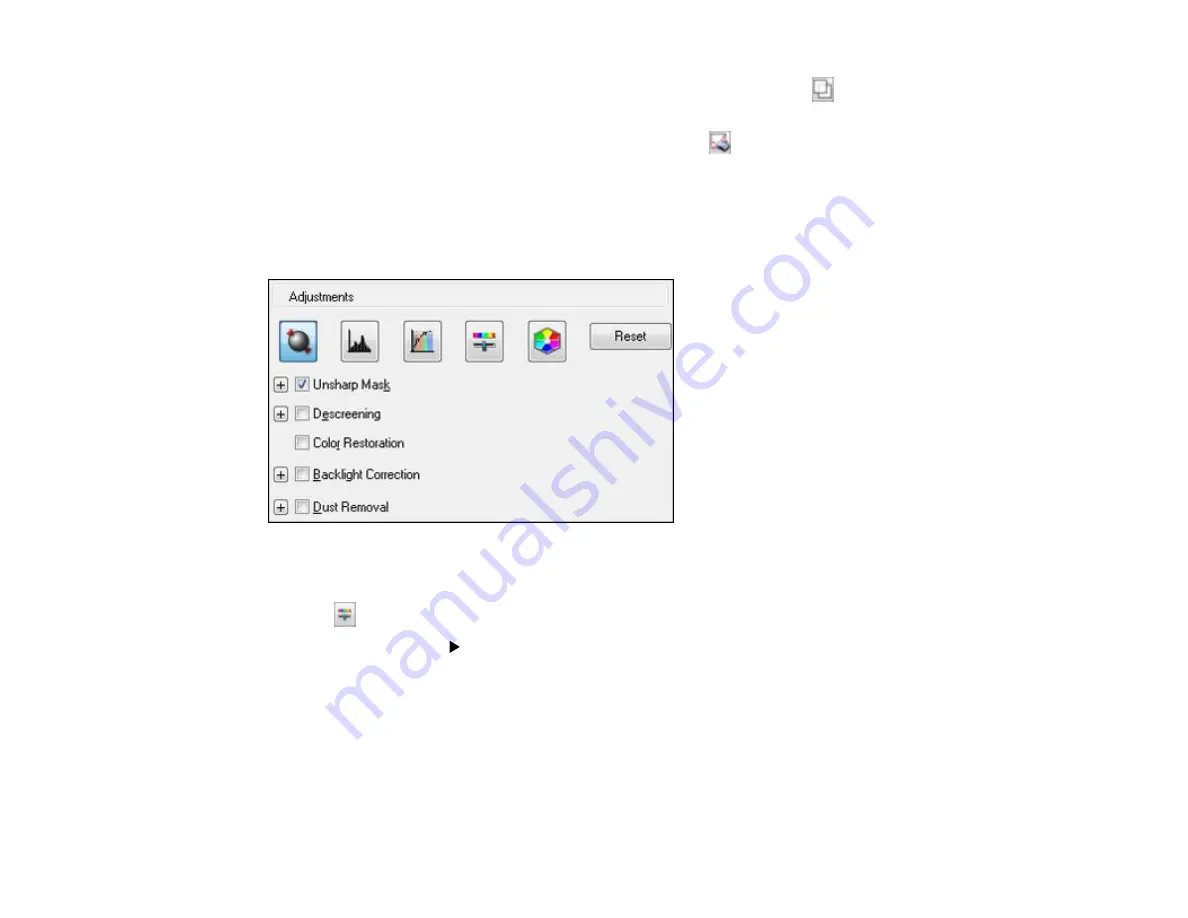
You can select these Adjustments options in EPSON Scan Professional Mode.
Note:
Not all adjustment settings may be available, depending on the Image Type setting.
Click the
image adjustment icon to access additional settings.
Click the
+
(Windows) or
(Mac OS X) icon next to a setting to change the level of adjustment.
Unsharp Mask
Makes the edges of certain image areas clearer. Turn off this option to leave softer edges.
Descreening
Removes the ripple pattern that might appear in subtly shaded image areas, such as skin tones. This
option improves results when scanning magazines or newspapers. (The results of descreening do not
appear in the preview image, only in your scanned image.)
99
Содержание Stylus NX230
Страница 1: ...EPSON Stylus NX230 User s Guide ...
Страница 2: ......
Страница 10: ......
Страница 11: ...EPSON Stylus NX230 User s Guide Welcome to the EPSON Stylus NX230 User s Guide 11 ...
Страница 17: ...Product Parts Back 1 AC inlet 2 USB port Parent topic Product Parts Locations 17 ...
Страница 29: ...Parent topic Loading Paper 29 ...
Страница 77: ...77 ...
Страница 83: ... Normal preview Click the Auto Locate icon to create a marquee dotted line on the preview image 83 ...
Страница 87: ...3 Adjust the scan area as necessary 87 ...
Страница 94: ...94 ...
Страница 102: ...3 Adjust the scan area as necessary 102 ...
Страница 108: ...4 Select your scan settings as necessary 108 ...
Страница 125: ...125 ...
Страница 136: ...136 ...
Страница 140: ...140 ...


