background image

6

Loading Paper

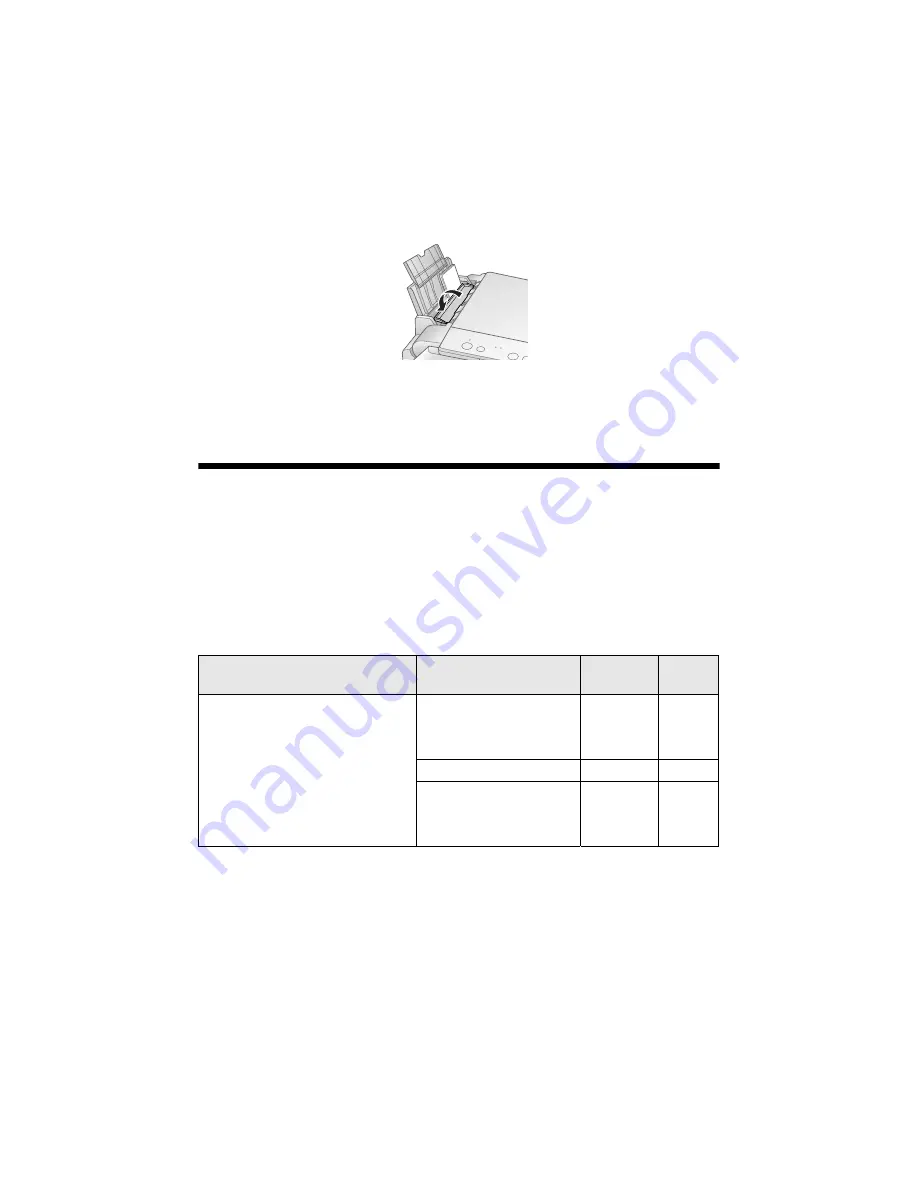
6. Flip the feeder guard down.

Note: 

For instructions on loading envelopes, see your on-screen 

User’s Guide

.

Using Special Papers

Epson

®

 offers a wide array of high quality papers, making it easy to maximize the 

impact of your photos, presentations, and creative projects.

You can purchase genuine Epson ink and paper at Epson Supplies Central

SM

 at 

www.epson.com/ink3 

(U.S. sales) or 

www.epson.ca 

(Canadian sales). You can 

also purchase supplies from an Epson authorized reseller. To find the nearest one, 
call 800-GO-EPSON (800-463-7766). 

Paper type

Size

Part 
number

Sheet 
count

Epson Ultra Premium Photo Paper

Glossy

Borderless 4 × 6 inches

S041934

S042181

S042174

50

60

100

Borderless 5 × 7 inches

S041945

20

Letter (8.5 × 11 inches)

S041935

S042182

S042175

20

25

50

Содержание Stylus CX7400

Страница 1: ...Epson Stylus CX7400 Series Quick Guide Basic Copying Printing and Scanning Maintaining Your All in One Solving Problems ...

Страница 2: ... From a Digital Camera 18 Printing From Your Computer 19 Printing in Windows 19 Printing With a Macintosh 21 Scanning a Photo or Document 24 Basic Scanning 24 Restoring and Correcting Photos 25 Maintaining Your All in One 26 Checking the Print Head Nozzles 26 Cleaning the Print Head 27 Checking the Ink Cartridge Status 28 Replacing Ink Cartridges 29 Solving Problems 34 Checking for Software Update...

Страница 3: ...o do most of these things without ever turning on your computer Of course your CX7400 Series can do a lot more when you connect it to your Windows or Macintosh computer For additional instructions see the on screen User s Guide by double clicking the icon for it on your desktop Please follow these guidelines as you read your CX7400 Series instructions Warning Warnings must be followed carefully to...

Страница 4: ...nd photos on a variety of paper types and sizes For details see page 6 1 Open the paper support and flip up the extension Then open the output tray and pull out the extensions 2 Flip the feeder guard up 3 Press in the tab on the edge guide and slide it left ...

Страница 5: ...s of photo paper Load other special papers one sheet at a time Note The type of paper you choose affects the way your printout looks If you are just making a copy or printing a rough draft plain paper is fine However for the best results you ll want to use one of Epson s special ink jet papers designed for your printer For example your photos will look great printed on Epson Premium Photo Paper Gl...

Страница 6: ...s You can purchase genuine Epson ink and paper at Epson Supplies CentralSM at www epson com ink3 U S sales or www epson ca Canadian sales You can also purchase supplies from an Epson authorized reseller To find the nearest one call 800 GO EPSON 800 463 7766 Paper type Size Part number Sheet count Epson Ultra Premium Photo Paper Glossy Borderless 4 6 inches S041934 S042181 S042174 50 60 100 Borderl...

Страница 7: ...etter 8 5 11 inches S041141 S041649 S041271 20 50 100 Epson Bright White Paper Letter 8 5 11 inches S041586 500 Epson Premium Presentation Paper Matte Borderless 8 10 inches S041467 50 Letter 8 5 11 inches S041257 S042180 50 100 Epson Premium Presentation Paper Matte Double sided Letter 8 5 11 inches S041568 50 Epson Presentation Paper Matte Letter 8 5 x 11 inches S041062 100 Legal 8 5 x 14 inches...

Страница 8: ...rrectly on the glass and make color or black and white copies Placing the Original on the Glass 1 Open the document cover and place your original face down on the glass with the top facing into the front right corner Move the photo or document slightly away from the edges 2 Close the cover gently so you don t move the original ...

Страница 9: ... number is displayed in the Copies window To make 10 to 100 copies press the Copies button until appears in the Copies window Then load only enough paper for the copies you want to make For example for 12 copies load 12 sheets of paper Be sure to change this setting back to 1 when you re finished 5 Press the x Start B W for black and white documents or x Start Color for color documents to start co...

Страница 10: ...make 10 to 100 copies press the Copies button until appears in the Copies window Then load only enough paper for the copies you want to make For example for 12 copies load 12 sheets of paper Be sure to change this setting back to 1 when you re finished 5 Press the x Start B W for black and white photos or x Start Color for color photos to start copying The CX7400 Series automatically sizes your ph...

Страница 11: ...om 1 to 9 copies The number is displayed in the Copies window To make 10 to 100 copies press the Copies button until appears in the Copies window Then load only enough paper for the copies you want to make For example for 12 copies load 12 sheets of paper Be sure to change this setting back to 1 when you re finished 5 Press and hold the y Stop button as you press either the x Start B W for black a...

Страница 12: ...e memory card slots and you re ready to print If your digital camera supports DPOF Digital Print Order Format you can pre select the photos you want to print while the card is still in the camera Then when you insert the card in the CX7400 Series you can print them See these sections Compatible Cards and Image Formats on page 13 Inserting the Card on page 14 Printing Photos From an Index Sheet on ...

Страница 13: ...rint in black and white Media format DCF version 1 0 or 2 0 compliant File format JPEG Supports Exif version 2 21 Image size 80 80 pixels to 9200 9200 pixels Number of files Up to 999 Right slot Adapter required Slot Type of card Right slot CompactFlash Type I II Microdrive Left slot SD SDHC miniSD miniSDHC microSD microSDHC MultiMediaCard Memory Stick Memory Stick Duo Memory Stick PRO Memory Stic...

Страница 14: ...correct slot as shown The memory card access light flashes and stays lit Now you can Print an index sheet so you can select which photos to print see page 15 Print photos pre selected on your camera using DPOF see page 17 When you want to remove the card make sure the memory card access light is not flashing then pull the card straight out of its slot Caution Do not remove the card or turn off the...

Страница 15: ... the computer is turned off If you see a message on your computer screen when you insert a card cancel the operation and close the screen Printing an Index Sheet 1 Load several sheets of plain letter or A4 size paper see page 4 2 Insert a memory card in a memory card slot see page 14 3 Press the Print Index Sheet button to print the index sheet The most recent photos are printed on the first index...

Страница 16: ...hoto was taken on each photo fill in the Print date on photos circle Fill in one circle beneath each photo you want to print The numbers indicate how many copies you want of that photo If you want to print one copy of all the photos on the index sheet fill in the All circle 2 Open the document cover 3 Place the index sheet face down on the glass in the lower right corner so that the top of the she...

Страница 17: ... photos you want to print while your memory card is still in your camera Then you can insert the card in the CX7400 Series and quickly print them Note See your camera manual for instructions on selecting photos with DPOF 1 Insert a memory card containing photos selected with DPOF in a memory card slot A d appears in the Copies window 2 Load the type of paper on which you want to print your photos ...

Страница 18: ...efore you connect your camera make sure your CX7400 Series is turned on but not printing 2 Remove any memory cards from the slots 3 Connect the USB cable that came with your camera to the USB connector on the front of your CX7400 Series 4 Load the paper on which you want to print your photos see page 4 5 Press the paper size button to select the size and type of paper you loaded If you select Lett...

Страница 19: ...onnected the CX7400 Series to your computer as described on the Start Here sheet Tip It s a good idea to check for updates to your CX7400 Series software see page 34 for instructions Printing in Windows 1 Load paper see page 4 2 Open a photo or document in a Windows program 3 Open the File menu and select Print You see a window like this one 4 Make sure EPSON Stylus CX7400 Series is selected then ...

Страница 20: ...f you want to reduce or enlarge your printout or print double sided click the Page Layout tab and select settings as necessary 7 For more printing options click the Advanced tab Note For more information about print settings click Help or see your on screen User s Guide 8 Click OK to save your settings Select your document Orientation Select your paper Size Select your paper Type Click here for bo...

Страница 21: ...lication 3 Select Page Setup from the File menu Select the following settings For borderless printing choose a Sheet Feeder Borderless option in the Paper Size list for your paper size US Letter 8 10 in 5 7 in or 4 6 in 4 Click OK to close the Page Setup window Cancel printing Pause or resume printing Check ink cartridge status Select Stylus CX7400 Select your Paper Size Select your document or im...

Страница 22: ...s For more information about printer settings click the button 7 Choose any other printing options you may need from the pop up menu See your on screen User s Guide for details 8 Click the Advanced button to change additional settings Note For more information on advanced settings click 9 Click Print Select Print Settings Select Stylus CX7400 Select your Media Type see page 23 Select Color or Blac...

Страница 23: ...lect this setting Plain paper Epson Bright White Paper Epson Presentation Paper Matte Plain Paper Bright White Paper Epson Ultra Premium Photo Paper Glossy Ultra Premium Photo Paper Glossy Epson Premium Photo Paper Glossy Premium Photo Paper Glossy Epson Photo Paper Glossy Photo Paper Glossy Epson Premium Photo Paper Semi gloss Premium Photo Paper Semi Gloss Epson Premium Presentation Paper Matte ...

Страница 24: ...scanning instructions see the on screen User s Guide Basic Scanning You can scan from any TWAIN compliant application such as ArcSoft PhotoImpression using Epson Scan Or you can start Epson Scan directly from your computer and save your image to a file 1 Open the document cover and place your original face down on the glass in the front right corner as shown on page 8 2 Close the cover gently so y...

Страница 25: ...ecting Photos You can automatically transform a faded dusty or badly exposed color photo into one with true to life color and sharpness as you scan Use the Color Restoration and Dust Removal options in Epson Scan s Full Auto Mode In Home and Professional Mode you can also select Backlight Correction to remove shadows from images with too much background light Note For more information see the on s...

Страница 26: ...t or have gaps in them some of the nozzles in the print head may be clogged or ink may be running low in one or more of the ink cartridges Follow the steps below to check the print head nozzles 1 Load letter size paper in the sheet feeder 2 Hold down the y Stop button as you press the P On button Hold down both buttons until the P On light begins to flash then release the buttons 3 Check the nozzl...

Страница 27: ...ton for at least 3 seconds until the P On light starts flashing then release the buttons The CX7400 Series runs a head cleaning cycle which takes about one minute Caution Never turn off the CX7400 Series during head cleaning or you may damage it 3 When the P On light stops flashing run a nozzle check as described on page 26 to verify that the print head is clean 4 If there are still gaps or lines ...

Страница 28: ... a screen asking if you want to receive these Epson offers the first time you try to print when ink is low Click Accept or Decline Note To disable checking for ink offers or updates from Epson see the instructions in your on screen User s Guide Tip If a cartridge is more than six months old print quality may decline If necessary try cleaning the print head see page 27 If printouts still do not loo...

Страница 29: ...six months of opening the package Replacing Ink Cartridges Make sure you have a new ink cartridge before you begin You must install new cartridges immediately after removing the old ones Caution Do not open ink cartridge packages until you are ready to install the ink Cartridges are vacuum packed to maintain reliability Note Leave the expended cartridge installed until you have obtained a replacem...

Страница 30: ... head by hand this may damage your CX7400 Series Always press and release the y Stop button to move it 4 Press the y Stop button again If another cartridge is low or expended it moves to the _ position Press the y Stop button again to see if any more cartridges are low or expended If no other cartridges are low or expended the print head moves to the replacement position ...

Страница 31: ...Warning If ink gets on your hands wash them thoroughly with soap and water If ink gets into your eyes flush them immediately with water Keep ink cartridges out of the reach of children 7 Before you open the new cartridge package shake it four or five times Then remove it from the package Caution Do not touch the green chip on the front of the cartridge This can damage the ink cartridge ...

Страница 32: ...ridge Caution Do not remove any other labels or seals or ink may leak 9 Insert the new ink cartridge into the holder and push it down until it clicks into place 10 Once you replace all the cartridges that need replacing close the cartridge cover and push it down until it clicks into place ...

Страница 33: ...ies while ink is charging or you ll waste ink If the B ink light flashes press the y Stop button and press down all the cartridges securely Note If you replaced a cartridge while copying a document or photo cancel printing and make sure your original is still placed correctly on the document table Then copy your original again If you remove an expended ink cartridge or a cartridge after the low in...

Страница 34: ...ically it s a good idea to check Epson s support website for free updates to your CX7400 Series software Open your on screen User s Guide and select Download the Latest Software or visit Epson s support website at epson com support U S or epson ca Canadian With Windows you can select Driver Update on the Maintenance tab in the printer settings window You can also click Start or select Programs or ...

Страница 35: ...d correctly Press the y Stop button to move the cartridges to the replacement position Press down on all the installed cartridges then press the y Stop button to continue b paper light flashing Copies window The inserted memory card is not supported or does not contain compatible photos Remove it and insert another card see page 14 b paper light flashing Copies window The index sheet is not positi...

Страница 36: ...e sheets a little Then reload the paper against the right side and slide the left edge guide against the paper but not too tightly Do not load too many sheets at once Load up to 20 sheets of photo paper 80 of matte or 120 sheets of plain paper Load other special papers one sheet at a time Do not load paper with holes punched in it b paper light flashing Copies window The connected USB device is no...

Страница 37: ...type of paper you loaded matches the paper size and paper type settings in your printer software see page 23 For the best print quality use Epson special paper see page 6 and genuine Epson ink cartridges see page 28 If you notice light or dark bands across your printouts or they are too faint you may need to clean the print head see page 27 This unclogs the nozzles so they can deliver ink properly...

Страница 38: ...ct name Epson Stylus CX7400 Series Product serial number located on the label in back Proof of purchase such as a store receipt and date of purchase Computer configuration Description of the problem Then call U S 562 276 4382 6 AM to 6 PM Pacific Time Monday through Friday Canada 905 709 3839 6 AM to 6 PM Pacific Time Monday through Friday Toll or long distance charges may apply Purchase Supplies ...

Страница 39: ...Where To Get Help 39 Other Software Technical Support ArcSoft PhotoImpression Phone 510 440 9901 Website www arcsoft com ...

Страница 40: ...o make sure the total ampere rating of all devices plugged into the wall outlet does not exceed the wall outlet s ampere rating Avoid locations that are subject to rapid changes in heat or humidity shocks or vibrations or dust Leave enough room around the CX7400 Series for sufficient ventilation Do not block or cover openings in the CX7400 Series case or insert objects through the slots Do not pla...

Страница 41: ...careful when you handle used ink cartridges there may be ink remaining around the ink supply port If ink gets on your skin wash it off with soap and water If it gets in your eyes flush them immediately with water Do not put your hand inside the CX7400 Series or touch any cartridges during printing Install a new ink cartridge immediately after removing an expended one Leaving cartridges uninstalled...

Страница 42: ...ing measures Reorient or relocate the receiving antenna Increase the separation between the equipment and receiver Connect the equipment into an outlet on a circuit different from that to which the receiver is connected Consult the dealer or an experienced radio TV technician for help WARNING The connection of a non shielded equipment interface cable to this equipment will invalidate the FCC Certi...

Страница 43: ...ass B digital device Each product marketed is identical to the representative unit tested and found to be compliant with the standards Records maintained continue to reflect the equipment being produced can be expected to be within the variation accepted due to quantity production and testing on a statistical basis as required by 47CFR 2 909 Operation is subject to the following two conditions 1 t...

Страница 44: ...er to Epson or its authorized service center where the printer will be fixed and sent back to you You are responsible for packing the printer and for all costs to and from the Epson authorized service center When warranty service involves the exchange of the printer or a part the item replaced becomes Epson property The replacement printer or part may be new or refurbished to the Epson standard of...

Страница 45: ...THER PERSON OR FIRM ARE VOID EXCEPT AS PROVIDED IN THIS WRITTEN WARRANTY NEITHER EPSON AMERICA INC NOR ITS AFFILIATES SHALL BE LIABLE FOR ANY LOSS INCONVENIENCE OR DAMAGE INCLUDING DIRECT SPECIAL INCIDENTAL OR CONSEQUENTIAL DAMAGES RESULTING FROM THE USE OR INABILITY TO USE THE EPSON PRODUCT WHETHER RESULTING FROM BREACH OF WARRANTY OR ANY OTHER LEGAL THEORY In Canada warranties include both warra...

Страница 46: ...structions Seiko Epson Corporation shall not be liable for any damages or problems arising from the use of any options or any consumable products other than those designated as Original Epson Products or Epson Approved Products by Seiko Epson Corporation Responsible Use of Copyrighted Materials Epson encourages each user to be responsible and respectful of the copyright laws when using any Epson p...

Страница 47: ......

Страница 48: ...CPD 23790R1 Printed in XXXXXX XX XX XX XXX ...

Отзывы: