96
Publishing Discs
Creating labels
Follow the steps below to create a label design in the label view of EPSON Total Disc Maker.
In the label view, an image of the print results of the label appears. You can edit the label while checking the image of
the print results.
This section describes how to create labels using one of the templates provided by EPSON Total Disc Maker. See
“Creating labels using your own images” on page 120 in this guide to use your own image data.
Selecting a template
EPSON Total Disc Maker is provided with various types of template. Using templates allows you to easily create labels
with sophisticated designs.
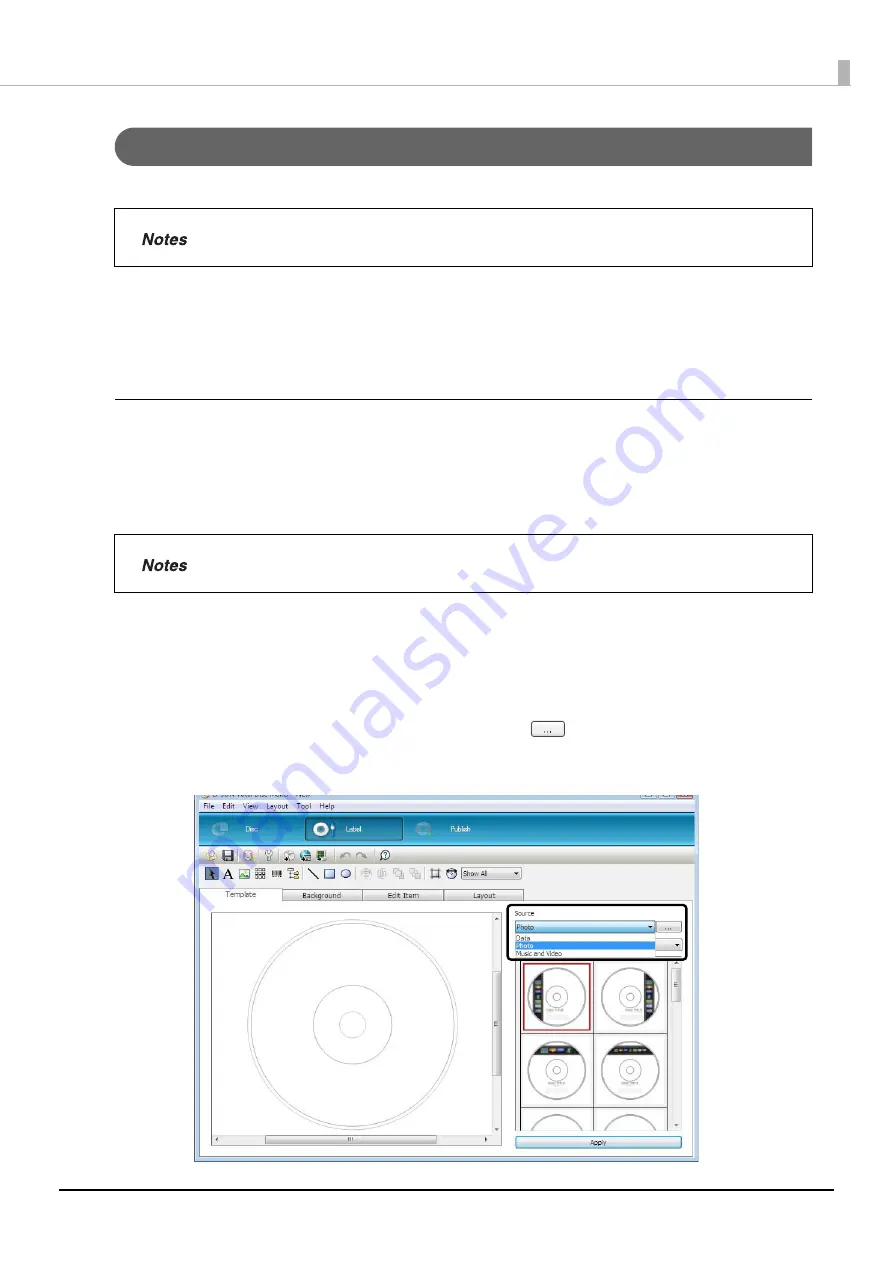
In the [Template] screen, you can select a template from [Data], [Photo], and [Music and Video] in accordance with
the type of data to write.
In this example, we use a template for photos.
1
Click [Label].
The label view appears.
2
Select [Source]. To use a template you created, click
, and specify the folder in which
the template is stored.
In this example, we select [Photo].
There is no need to create a label if you only want to write data to discs.
If you save the created data as a template, you can also select that template. See “Creating
label templates” on page 123 in this guide for the procedure to create templates.
Содержание PP-100NII
Страница 1: ...User s Guide M00133200EN ...
Страница 6: ...6 Ink and Disc 194 Ink cartridges 194 Discs 194 ...
Страница 72: ...72 How to Use the Printer Driver 8 Click Print in the File menu 9 Click the Preferences button ...
Страница 130: ...130 Publishing Discs 4 Click Republish ...
Страница 148: ...148 Publishing Discs Next follow the normal procedure for publishing discs see page 108 in this guide ...


