


20
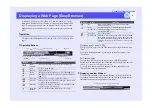
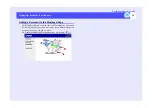
Setting EasyMP.net Options (EasyConfiguration)
EasyMP.net Operation Guide
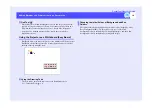
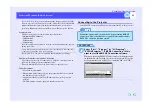
"Network" - "Wireless LAN"
The following networking parameters must be set if a wireless LAN card is
inserted into the PC card slot of the projector and used for networking.
The wireless LAN cannot be set if the wireless LAN card is not mounted
on the projector.
"Network" - "Mail notification function"
The following parameters must be set if a projector error is sent to the PC
by mail using the Mail Notification function (
)
"Network" - "SNMP"
The following parameters must be set if Simple Network Management
Protocol (
) is used for projector status monitoring between the
projector and a PC through network connection.
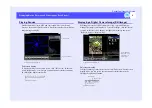
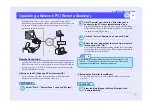
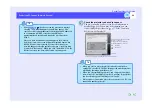
Establishing the Wireless LAN
Display the MAC address
automatically
using the DHCP. Select "OFF" to set the IP address
manually.
Enter the fixed IP to be assigned to the projector.
Enter the the IP address of the subnet mask.
Enter the IP address of the default gateway.
Primary DNS
Enter the primary IP address of the DNS.
Secondary DNS
Enter the secondary IP address of the DNS.
WINS1
Enter the primary IP address of the WINS server.
WINS2
Enter the secondary IP address of the WINS server.
DNS domain name
Enter the DNS domain name.
ESSID
Enter the ESSID of the wireless LAN unit.
WEP
Select "Enabled" and enter a cipher key for ciphering
data to be sent. If the cipher key has been registered
using WEP, data communication is allowed between
devices with the same cipher key only.
Enter a cipher key consisting of 10 to 26 ASCII
characters or 10 to 26 hexadecimal characters.
(No key ID is required because only one WEP key can
be defined.)
Adhoc Mode
Select "Enabled" to start direct communication with a
PC via the wireless LAN (but without passing through
an access point).
Set this option to "Enabled" if you wish to select
"EasyConnection Mode" (
) from the Network
Screen.
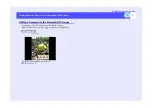
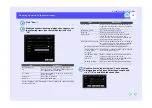
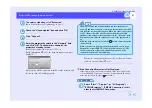
Establishing the Mail Notification Function
Mail notification
function
Select "ON" to use the mail notification function.
Destination address 1
Specify the destination mail address. The address you
have set as "Destination address 1" is also used as the
source address. Up to three destinations can be
registered.
Destination address 2
Destination address 3
IP address of SMTP
server
and the port number of the
SMTP server.
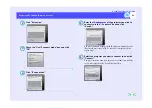
Setting a Notification
Event
Shows notification events and their numbers.
Destination address 1
Check the event and its number for each event sent to
each address. Check "All" to notify all events.
Destination address 2
Destination address 3
Test mail
When "Test" is clicked, a test mail is sent.
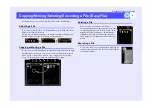
Establishing Projector Monitoring
TrapIP1
Enter the IP address of the PC to be monitored. Up to
two trap
can be registered.
TrapIP2
Community Name
Enter the community name of the SNMP. The name can
consist of up to eight alphanumeric characters.
Содержание PowerLite 8300i with EasyMP.net module
Страница 1: ......


