Epson PowerLite 737c Projector
14
-
Epson PowerLite 737c Projector
2/05
12.Verify that you’ve enabled your computer’s connection to
the access point. It should be listed as shown above, with the
small icon
next to it, indicating a connection.
If it’s not listed, click
Configure
and then type the name of
your access point.
13.When done, click
OK
. Continue with “Projecting
Checking the Gateway (Access Point’s) IP Address
If you’re entering IP addresses manually in access point mode
and need to find out the gateway IP address (the IP address of
your access point), make sure the wireless connection to the
access point is currently active, as described in the previous
section.
Note:
If you can’t identify the gateway address using this Windows
utility, use the administrator’s utility software that came with
your access point.
1. Access your wireless network Properties window. For
example, in Windows XP click
Start > Control Panel >
Network and Internet Connections
. Then
double-click the
Network Connections
icon.
2. Right-click the
Wireless Network Connection
icon and
select
Status
. Then click the
Support
tab.
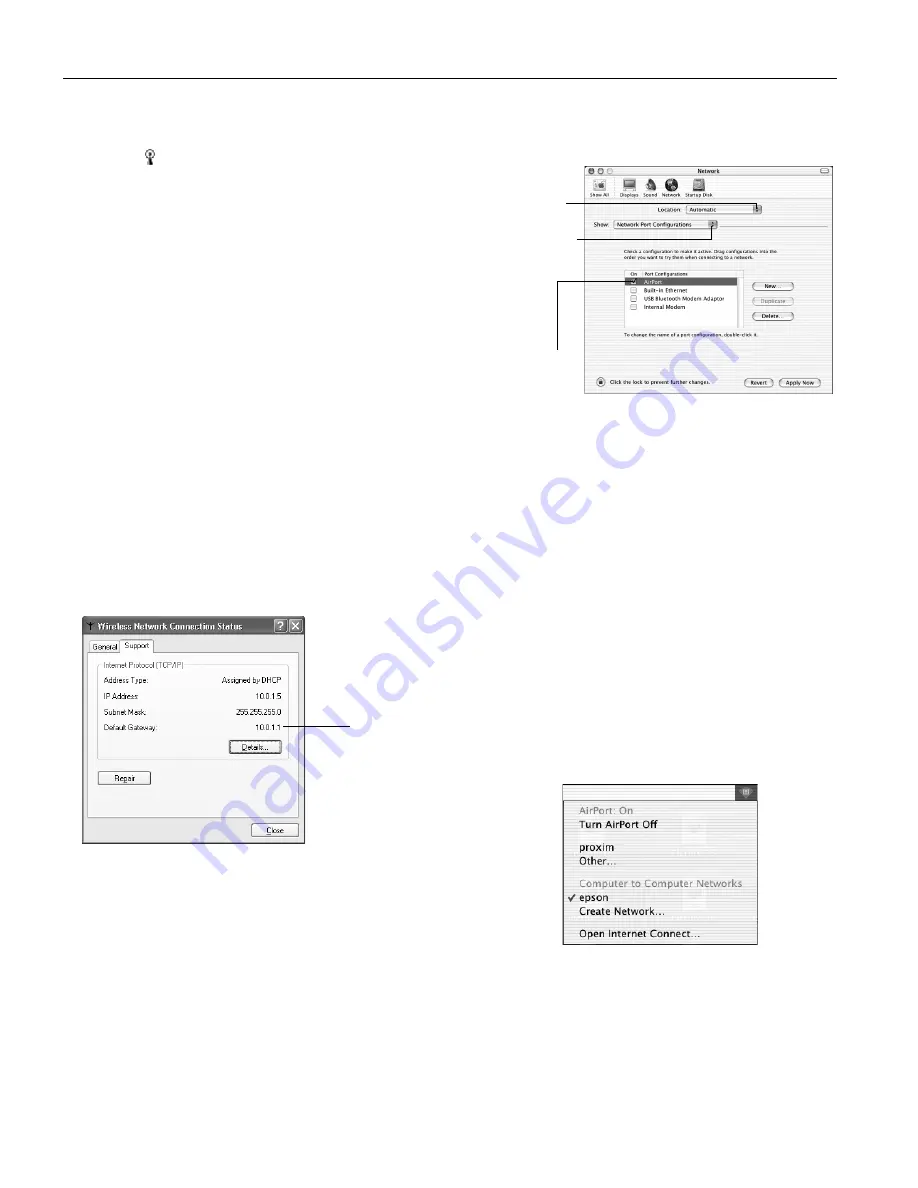
The gateway’s (access point’s) IP address is listed as shown:
Configuring the Network Settings for Macintosh
Your AirPort software is automatically configured to allow
your Macintosh to detect both computer-to-computer (ad
hoc) and access point networks.
Typically you only need to select your projector’s ESSID (ad
hoc) or your AirPort network name (access point) on the
Macintosh menu bar. If you’re having problems connecting to
the projector, follow these steps:
1. From the Apple pull-down menu, select
System
Preferences
.
2. Click the
Network
icon. You see the Network settings
menu.
3. Make sure Location is set to
Automatic
.
4. Select
Network Port Configurations
in the Show pull-
down menu.
5. Under Port Configurations, select
AirPort
.
6. Click
Apply Now
and close the window.
7.
Ad hoc mode:
Go to step 10.
Access point mode:
Start the AirPort Admin utility. Select
your base station, then click
Configure
.
8. On the AirPort tab, make sure your AirPort network name
matches your projector’s ESSID. If not, enter the projector’s
ESSID in the AirPort Network text box and click
Update
.
9. If you turned DHCP in your projector’s Advanced menu,
click the
Network
tab and make sure the
Distribute
IP
addresses
checkbox is selected. If you need to select it, click
Update
.
10.Click the AirPort icon on the menu bar at the top of the
Macintosh desktop. You see the AirPort status menu:
11.Check to make sure AirPort is turned on.
12.Select your projector’s ESSID (ad hoc) or the name of your
AirPort network (access point).
Gateway
address
Select Automatic
Select Network Port
Configurations
then select AirPort


