background image

2.

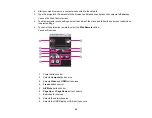
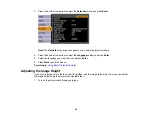
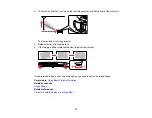
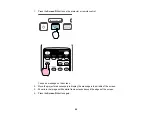
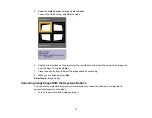
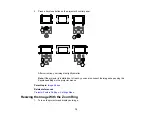
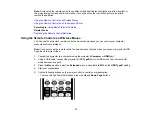
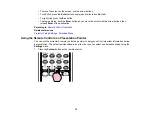
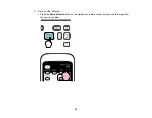
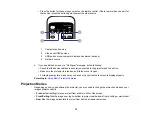
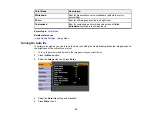
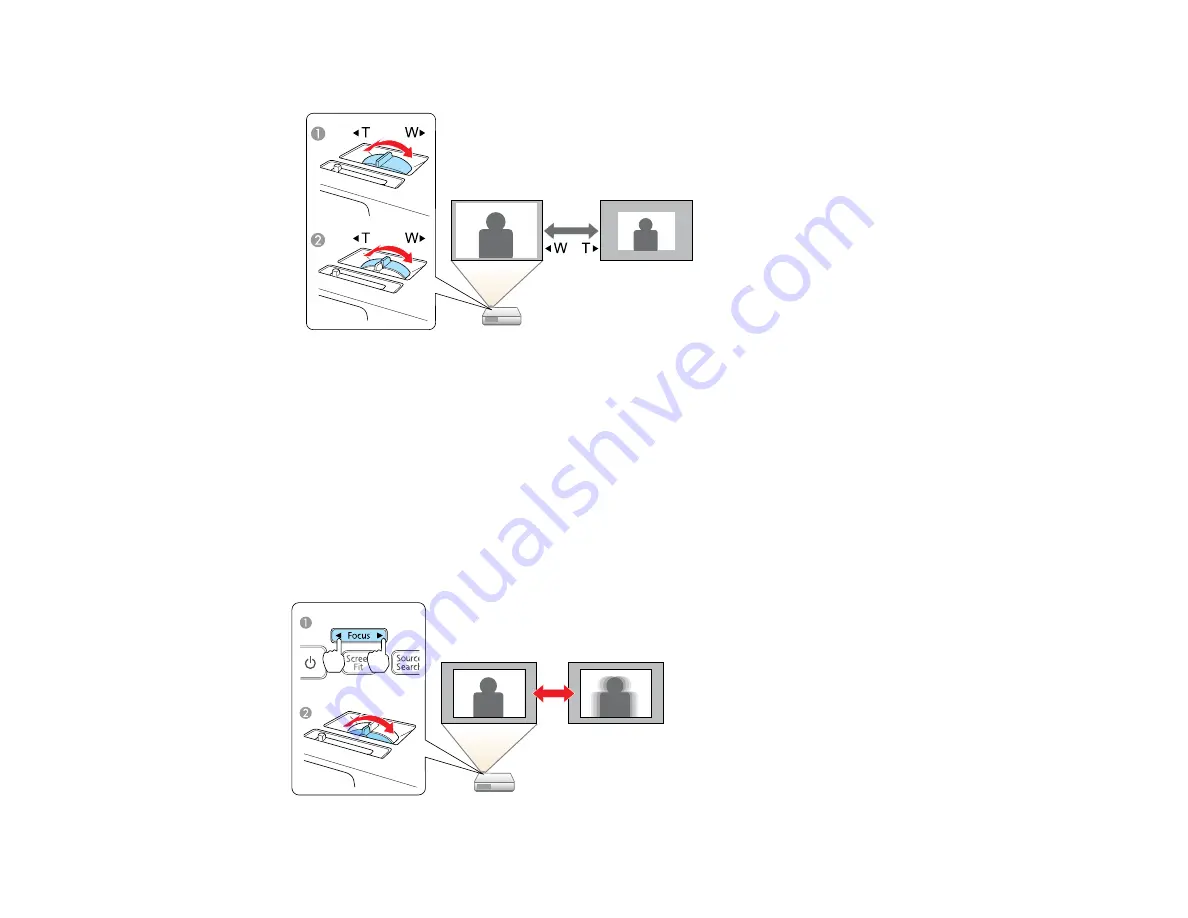
To enlarge or reduce the image size, rotate the projector's zoom ring.

1

PowerLite 1775W

2

PowerLite 1750/1760W/1770W

Parent topic:

Using Basic Projector Features

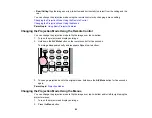
Focusing the Image

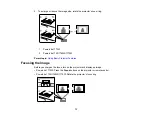
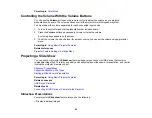
Before you sharpen the focus, turn on the projector and display an image.

• PowerLite 1775W: Press the

Focus

buttons on the projector or remote control.

• PowerLite 1750/1760W/1770W: Rotate the projector’s focus ring.

73

Содержание PowerLite 1750

Страница 1: ...PowerLite 1750 1760W 1770W 1775W Projector User s Guide ...

Страница 2: ......

Страница 3: ... Remote Control 19 Setting Up the Projector 21 Projector Placement 21 Projector Setup and Installation Options 21 Projection Distance 23 Projector Connections 31 Connecting to Computer Sources 32 Connecting to a Computer for USB Video and Audio 32 Connecting to a Computer for VGA Video 34 Connecting to a Computer for HDMI Video and Audio 34 Connecting to a Computer for USB Mouse Control 35 Connect...

Страница 4: ...lecting Wireless Network Settings in Windows 53 Selecting Wireless Network Settings in Mac OS 53 Setting Up Wireless Network Security 54 Wireless Security Menu Settings 55 Setting Up Projector Network E Mail Alerts 56 Network Projector E mail Alert Messages 57 Setting Up Monitoring Using SNMP 57 Controlling a Networked Projector Using a Web Browser 58 Using Basic Projector Features 61 Turning On t...

Страница 5: ...ntrolling the Volume With the Volume Buttons 86 Projecting a Slide Show 86 Slideshow Presentations 86 Supported Slideshow File Types 87 Starting a Slide Show or Presentation 88 Slideshow Display Options 89 Adjusting Projector Features 91 Shutting Off the Picture and Sound Temporarily 91 Stopping Video Action Temporarily 92 Zooming Into and Out of Images 92 Projector Security Features 93 Password S...

Страница 6: ... ID Code List 122 Projector Reset Options Reset Menu 123 Maintaining and Transporting the Projector 125 Projector Maintenance 125 Cleaning the Lens 125 Cleaning the Projector Case 126 Air Filter and Vent Maintenance 126 Cleaning the Air Filter and Vents 126 Replacing the Air Filter 127 Projector Lamp Maintenance 129 Replacing the Lamp 130 Resetting the Lamp Timer 134 Replacing the Remote Control B...

Страница 7: ...o Projector Power or Shut Off Problems 149 Solutions to Problems With the Remote Control 150 Solutions to Password Problems 151 Solutions When Network Alert E Mails are Not Received 151 Where to Get Help 151 Technical Specifications 153 General Projector Specifications 153 Projector Lamp Specifications 155 Remote Control Specifications 155 Projector Dimension Specifications 155 Projector Electrica...

Страница 8: ......

Страница 9: ...W Native resolution of 1280 800 pixels WXGA Flexible connectivity Plug and play USB projection Wireless network support PowerLite 1760W 1770W 1775W including video and audio transfer Wireless LAN module included PowerLite 1775W PC Free presentations via connected USB memory devices HDMI port for video devices PowerLite 1760W 1770W 1775W Port for optional Epson document camera Innovative display an...

Страница 10: ...nty Information Parent topic Introduction to Your Projector Related concepts Projector Parts Locations Product Box Contents Save all the packaging in case you need to ship the projector Always use the original packaging or equivalent when shipping Make sure your projector box included all of these parts 10 ...

Страница 11: ...1 Projector 2 Remote control 3 Remote control batteries two AA alkaline 4 Power cord 5 VGA computer cable 6 USB cable 7 Audio adapter cable 8 Carrying case 11 ...

Страница 12: ...mmercially available audio cable compatible with your device See your local computer or electronics dealer for purchase information Parent topic Projector Features Optional Equipment and Replacement Parts You can purchase screens other optional accessories and replacement parts from an Epson authorized reseller To find the nearest reseller call 800 GO EPSON 800 463 7766 Or you can purchase online ...

Страница 13: ...d Exchange Warranty EPPEXPA1 2 Year Extended Depot Repair Service Plan EPPFTPA2 Parent topic Projector Features Registration and Warranty Information Your projector comes with a basic warranty that lets you project with confidence For details see the warranty brochure that came with your projector In addition Epson offers free Extra Care Road Service In the unlikely event of an equipment failure y...

Страница 14: ...questions to Epson technical support 24 hours a day For detailed instructions on using your projector in a network environment PowerLite 1760W 1770W 1775W see the EasyMP Network Projection Operation Guide installed with this manual from your projector CD For detailed instructions on converting PowerPoint files into a slide show file format that you can display from a USB device connected to your p...

Страница 15: ...rojector Parts Front Top 1 Exhaust vent 2 Wireless LAN module indicator light PowerLite 1760W 1770W 1775W 3 Wireless LAN module cover PowerLite 1760W 1770W 1775W 4 A V Mute slide lever 5 Foot release lever 6 Front adjustable foot 7 A V Mute slide lens cover 8 Remote receiver 9 Projection distance shape sensor PowerLite 1775W 15 ...

Страница 16: ...15 Control panel 16 Lamp cover Parent topic Projector Parts Locations Projector Parts Rear 1 A C input port 2 Video port 3 Computer port 4 USB TypeB port 5 USB TypeA port 6 HDMI port PowerLite 1760W 1770W 1775W 7 Audio port 8 Remote receiver 9 Lamp cover screw 10 Security lock port Parent topic Projector Parts Locations 16 ...

Страница 17: ...Projector Parts Base 1 Mounting bracket holes 2 Rear feet 3 Front adjustable foot 4 Wireless LAN module screw PowerLite 1760W 1770W 1775W Parent topic Projector Parts Locations 17 ...

Страница 18: ...s 5 Vertical keystone adjustment buttons adjust screen shape and arrow buttons 6 Help button accesses projector help information 7 Esc button cancels exits functions 8 Horizontal keystone adjustment buttons adjust screen shape and arrow buttons 9 Menu button accesses projector menu system 10 Focus buttons PowerLite 1775W Parent topic Projector Parts Locations Related references Projector Light Sta...

Страница 19: ...onnected computer source 3 Video button cycles through connected video sources 4 Screen Fit button adjusts image shape functions only on PowerLite 1775W and when not projecting from the ceiling 5 Numeric buttons enter numbers 6 A V Mute button turns off picture and sound 19 ...

Страница 20: ...ons and controls wireless mouse functions 16 Volume up and down buttons adjust speaker volume 17 Help button accesses projector help information 18 Pointer button activates on screen pointer 19 Num button switches buttons to number function for entering numbers 20 Color Mode button selects display modes 21 ID button selects projector and remote control ID numbers 22 User button customizable for di...

Страница 21: ...these considerations in mind as you select a projector location Place the projector on a sturdy level surface or install it using a compatible mount Leave plenty of space around and under the projector for ventilation and do not place it on top of or next to anything that could block the vents Position the projector within 9 8 feet 3 m of a grounded electrical outlet or extension cord Projector Se...

Страница 22: ...Front Rear Ceiling 22 ...

Страница 23: ...ed references Projector Setup Settings Extended Menu Projection Distance The distance at which you place the projector from the screen determines the approximate size of the image The image size increases the farther the projector is from the screen but can vary depending on the zoom factor aspect ratio and other settings Use the tables here to determine approximately how far to place the projecto...

Страница 24: ...spect Ratio Image or Screen Screen or image size Projection distance 1 Offset from lens center 2 Wide to Tele 28 inches 71 cm 28 to 33 inches 1 5 inches 4 cm 71 to 85 cm 30 inches 76 2 cm 30 to 36 inches 1 6 inches 4 cm 76 to 91 cm 24 ...

Страница 25: ...05 to 246 cm 100 inches 254 cm 101 to 121 inches 5 5 inches 14 cm 256 to 308 cm 150 inches 381 cm 152 to 182 inches 8 2 inches 21 cm 385 to 462 cm 200 inches 508 cm 202 to 243 inches 10 9 inches 28 cm 514 to 617 cm 250 inches 635 cm 253 to 304 inches 13 6 inches 35 cm 643 to 771 cm 260 inches 660 cm 263 to 316 inches 14 2 inches 36 cm 668 to 802 cm 16 9 Aspect Ratio Image or Screen Screen or image...

Страница 26: ...8 cm 64 to 77 inches 1 6 inches 4 cm 162 to 195 cm 80 inches 203 2 cm 73 to 88 inches 1 8 inches 5 cm 186 to 223 cm 100 inches 254 cm 91 to 110 inches 2 2 inches 6 cm 232 to 279 cm 150 inches 381 cm 138 to 165 inches 3 3 inches 8 cm 349 to 419 cm 200 inches 508 cm 184 to 220 inches 4 5 inches 11 cm 466 to 560 cm 250 inches 635 cm 230 to 276 inches 5 6 inches 14 cm 583 to 700 cm 280 inches 711 2 cm...

Страница 27: ...cm 60 inches 152 4 cm 53 to 64 inches 2 9 inches 7 cm 135 to 162 cm 80 inches 203 2 cm 71 to 85 inches 3 9 inches 10 cm 181 to 217 cm 100 inches 254 cm 89 to 107 inches 4 8 inches 12 cm 226 to 271 cm 150 inches 381 cm 134 to 161 inches 7 2 inches 18 cm 340 to 408 cm 200 inches 508 cm 179 to 214 inches 9 6 inches 24 cm 454 to 545 cm 250 inches 635 cm 223 to 268 inches 12 inches 31 cm 567 to 681 cm ...

Страница 28: ...mage size Projection distance 1 Offset from lens center 2 Wide to Tele 30 inches 76 2 cm 28 to 34 inches 2 inches 5 cm 72 to 86 cm 40 inches 101 6 cm 38 to 45 inches 2 7 inches 7 cm 96 to 116 cm 50 inches 127 cm 47 to 57 inches 3 4 inches 9 cm 120 to 145 cm 28 ...

Страница 29: ...s 26 cm 364 to 438 cm 200 inches 508 cm 192 to 230 inches 13 5 inches 34 cm 486 to 584 cm 250 inches 635 cm 240 to 287 inches 16 9 inches 43 cm 608 to 730 cm 300 inches 762 cm 288 to 345 inches 20 3 inches 51 cm 730 to 877 cm 16 9 Aspect Ratio Image or Screen Screen or image size Projection distance 1 Offset from lens center 2 Wide to Tele 30 inches 76 2 cm 31 to 37 inches 0 2 inch 1 cm 78 to 94 c...

Страница 30: ...cm 264 to 317 cm 150 inches 381 cm 156 to 188 inches 1 2 inches 3 cm 397 to 477 cm 200 inches 508 cm 209 to 250 inches 1 6 inches 4 cm 530 to 636 cm 250 inches 635 cm 261 to 313 inches 2 inches 5 cm 663 to 796 cm 275 inches 698 5 cm 287 to 345 inches 2 2 inches 6 cm 729 to 875 cm 16 10 Aspect Ratio Image or Screen Screen or image size Projection distance 1 Offset from lens center 2 Wide to Tele 29...

Страница 31: ...m 386 to 464 cm 200 inches 508 cm 203 to 244 inches 3 7 inches 9 cm 516 to 619 cm 250 inches 635 cm 254 to 305 inches 4 6 inches 12 cm 654 to 774 cm 280 inches 711 2 cm 284 to 341 inches 5 2 inches 13 cm 723 to 867 cm Parent topic Projector Placement Projector Connections You can connect the projector to a variety of computer video and audio sources to display presentations movies or other images ...

Страница 32: ...elated references Projector Setup Settings Extended Menu Product Box Contents Connecting to Computer Sources Follow the instructions in these sections to connect a computer to the projector Connecting to a Computer for USB Video and Audio Connecting to a Computer for VGA Video Connecting to a Computer for HDMI Video and Audio Connecting to a Computer for USB Mouse Control Connecting to a Computer ...

Страница 33: ...ort on your computer 1 USB TypeB port 5 Do one of the following Windows Wait as messages appear on your computer screen and the projector installs the Epson USB Display software on your computer Note For Windows 2000 select My Computer EPSON_PJ_UD and EMP_UDSE EXE to install the Epson USB Display software Macintosh The USB Display setup folder appears on your screen Select USB Display Installer an...

Страница 34: ...pter options 1 If necessary disconnect your computer s monitor cable 2 Connect the VGA computer cable to your computer s monitor port 3 Connect the other end to a Computer port on the projector 1 Computer port 4 Tighten the screws on the VGA connectors Parent topic Connecting to Computer Sources Connecting to a Computer for HDMI Video and Audio If your computer has an HDMI port you can connect it ...

Страница 35: ...his connect the projector to your computer using a USB cable Note You cannot use the remote control s wireless mouse function when you use your projector s USB Type B port to project from a computer 1 In the projector s Extended menu set the USB Type B setting to Link21L 2 Connect the USB cable to your projector s USB TypeB port 1 USB TypeB port 3 Connect the other end to any available USB port on...

Страница 36: ...ect the other end to the projector s Audio port 1 Audio port Parent topic Connecting to Computer Sources Connecting to Video Sources Follow the instructions in these sections to connect video devices to the projector Connecting to an HDMI Video Source Connecting to a Component to VGA Video Source Connecting to a Composite Video Source Connecting to a Video Source for Sound Parent topic Projector C...

Страница 37: ...g with a component video cable 1 Make sure the projector and your video source are turned off 2 Connect the component connectors to your video source s color coded component video output ports usually labelled Y Pb Pr or Y Cb Cr If you are using an adapter connect these connectors to your component video cable 3 Connect the VGA connector to the projector s Computer port 1 Computer port If your ima...

Страница 38: ... video output port 3 Connect the other end to the projector s Video port 1 Video port Parent topic Connecting to Video Sources Connecting to a Video Source for Sound You can play sound through the projector s speaker system if your video source has audio output ports Connect the projector to the video source using a stereo mini jack adapter cable with one 3 5 mm mini plug and two RCA plugs Note Yo...

Страница 39: ...rojector Parent topic Projector Connections USB Device Projection You can project images and other content without using a computer or video device by connecting any of these devices to your projector USB flash drive Digital camera or camera phone USB hard drive Multimedia storage viewer USB memory card reader Note Digital cameras or camera phones must be USB mounted devices not TWAIN compliant de...

Страница 40: ...USB cable or USB flash drive or USB memory card reader into the projector s USB TypeA port shown below 1 USB TypeA port Note Do not connect a USB hub or a USB cable longer than 10 feet 3 m or the device may not operate correctly 3 Connect the other end of the cable if applicable to your device Parent topic Connecting to External USB Devices Related topics Projecting a Slide Show Selecting the Conn...

Страница 41: ...e show or presentation from the device 2 Disconnect the USB device or camera from the projector 3 If the device has a power button be sure to turn off and unplug the device Parent topic Connecting to External USB Devices Connecting to a Document Camera You can connect an Epson document camera to your projector to project images viewed by the camera 1 Locate the USB cable that came with the documen...

Страница 42: ...alling Batteries in the Remote Control The remote control uses the two AA batteries that came with the projector 1 Open the battery cover as shown 2 Insert the batteries with the and ends facing as shown 42 ...

Страница 43: ...3 Close the battery cover and press it down until it clicks into place Parent topic Setting Up the Projector Opening the Lens Cover 1 To open the projector s lens cover slide the A V Mute slide lever 43 ...

Страница 44: ...2 To cover the lens or temporarily turn off the projected picture and sound slide the A V Mute slide cover closed Parent topic Setting Up the Projector 44 ...

Страница 45: ...r installing the module and setting up the projector install the network software from the Epson Projector Software for Meeting Presentation CD on your computer Use the following software and documentation to set up control and monitor wireless projection EasyMP Network Projection software sets up your computer for wireless network projection See the EasyMP Network Projection Operation Guide insta...

Страница 46: ...2 11g b n wireless module in the projector Do not install any other type of wireless module Caution Never remove the module while its indicator light is green or flashing or while you are projecting wirelessly You may damage the module or lose data 1 Turn off the projector and unplug the power cord 2 Turn the projector over and remove the screw securing the LAN module cover 46 ...

Страница 47: ...3 Remove the wireless LAN module cover 4 Insert the wireless LAN module into the port 47 ...

Страница 48: ...You can use the optional Epson Quick Wireless Connection USB key to quickly connect the projector to a Windows computer wirelessly Then you can project your presentation and remove the key when you are done 1 Turn on the projector 2 Connect the USB key to the projector s USB TypeA port You see a projected message that the network information update is complete 3 Remove the USB key 48 ...

Страница 49: ...by the projector If it does not appear press the LAN button on your projector remote control or restart your computer 6 Run your presentation as necessary 7 When you finish projecting wirelessly remove the USB key from your computer Note You may need to restart your computer to reactivate your wireless interface Parent topic Wireless Network Projection Selecting Wireless Network Settings Manually ...

Страница 50: ...t Network Configuration and press Enter 5 Select the Basic menu and press Enter 6 Select the following basic options as necessary Projector Name lets you enter a name up to 16 alphanumeric characters long to identify the projector over the network 50 ...

Страница 51: ...work Projection software to access the projector Note Use the displayed keyboard to enter the name passwords and keyword Press the arrow buttons on the remote control to highlight characters and press Enter to select them 7 Select the Wireless LAN menu and press Enter 8 Select the settings on the Wireless LAN menu as necessary for your network 9 When you finish selecting settings select Complete a...

Страница 52: ... USB key to connect Advanced lets you connect to multiple computers via a wireless network access point Channel 1ch In Quick connection mode selects the frequency band 6ch channel used by the wireless 11ch LAN Wireless LAN Sys 802 11b g Sets the type of wireless LAN system the projector is 802 11b g n connecting to SSID Auto Setting On Turns on automatic SSID searching in Quick connection Off mode...

Страница 53: ...computer 1 To access your wireless utility software double click the network icon on the Windows taskbar 2 Do one of the following If your projector is set up on an existing network Advanced mode select the network name SSID If your projector is configured for Quick mode select the SSID you assigned to the projector 3 Click Connect Parent topic Wireless Network Projection Selecting Wireless Networ...

Страница 54: ...eck with your network administrator for guidance on entering the correct information 1 Press the Menu button on the remote control 2 Select the Network menu and press Enter 3 Select Network Configuration and press Enter 4 Select the Security menu and press Enter 5 Select the security settings as necessary to match your network settings 6 When you finish selecting settings select Complete and follo...

Страница 55: ... HEX ASCII enables text input HEX enables hexadecimal input Key ID 1 to 4 For WEP security selects the WEP encryption key ID Encryption Key 1 to Various characters depending on For the selected WEP Key ID selected WEP Encryption and setting enter the key used for Encryption Key 4 Format settings WEP encryption 128 bit ASCII 13 alphanumeric characters 128 bit HEX 26 characters 0 to 9 and A to F 64 ...

Страница 56: ...tton on the remote control 2 Select the Network menu and press Enter 3 Select Network Configuration and press Enter 4 Select the Mail menu and press Enter 5 Turn on Mail Notification 6 Enter the IP address for the SMTP Server option Note Do not use these addresses 127 x x x or 224 0 0 0 through 255 255 255 255 where x is a number from 0 to 255 7 Select a number for the SMTP server Port Number from...

Страница 57: ...mail containing the following information EPSON Projector on the subject line The name of the projector experiencing a problem The IP address of the affected projector Detailed information about the problem If the problem information includes a a problem has occurred If the information includes a the problem has been solved Note If a critical problem causes a projector to shut down you may not rec...

Страница 58: ... screen instructions to save your settings and exit the menus Parent topic Using the Projector on a Network Controlling a Networked Projector Using a Web Browser Once you have connected your projector to your network you can select projector settings and control projection using a compatible web browser This lets you access the projector remotely Note The web setup and control features support Mic...

Страница 59: ...name of the menu and follow the on screen instructions to select settings 5 To control the projection remotely select the Web Remote option You see this screen 1 Power button control 2 Selects Computer port source 3 Selects Video and HDMI port sources 4 Freeze button control 5 A V Mute button control 6 Page Up and Page Down button controls 7 Searches for sources 8 Selects the network source 9 Sele...

Страница 60: ...10 Volume button controls 6 Select the icon corresponding to the projector function you want to control Parent topic Using the Projector on a Network Related concepts Wireless Network Projection 60 ...

Страница 61: ...justing the Image Height Image Shape Resizing the Image With the Zoom Ring Focusing the Image Remote Control Operation Selecting an Image Source Projection Modes Image Aspect Ratio Color Mode Controlling the Volume With the Volume Buttons Projecting a Slide Show Turning On the Projector Turn on the computer or video equipment you want to use before you turn on the projector so it can display the i...

Страница 62: ...1 Open the projector s lens cover 2 Connect the power cord to the projector s power inlet 62 ...

Страница 63: ...ous for children If you do not see a projected image right away try the following Turn on the connected computer or video device Insert a DVD or other video media and press the Play button if necessary Press the Source Search button on the projector or remote control to detect the video source Parent topic Using Basic Projector Features Related references Projector Setup Settings Extended Menu Tur...

Страница 64: ...he projector beeps twice the lamp turns off and the power light turns orange Note With Epson s Instant Off technology there is no cool down period so you can pack up the projector for transport right away 3 To transport or store the projector make sure the power light is orange but not flashing then unplug the power cord 64 ...

Страница 65: ...4 Close the projector s lens cover Parent topic Using Basic Projector Features Selecting the Language for the Projector Menus If you want to view the projector s menus and messages in another language you can change the Language setting The default language setting is English 1 Turn on the projector 2 Press the Menu button 65 ...

Страница 66: ...guage setting and press Enter 5 Select the language you want to use and press Enter 6 Press Menu to exit the menus Parent topic Using Basic Projector Features Adjusting the Image Height If you are projecting from a table or other flat surface and the image is too high or low you can adjust the image height using the projector s adjustable feet 1 Turn on the projector and display an image 66 ...

Страница 67: ...ector 3 Release the lever to lock the foot 4 If the image is tilted rotate the rear feet to adjust their height If the projected image is unevenly rectangular you need to adjust the image shape Parent topic Using Basic Projector Features Related concepts Image Shape Related references Projector Feature Settings Settings Menu 67 ...

Страница 68: ...orrecting Image Shape With Screen Fit Correcting Image Shape With Quick Corner Correcting Image Shape With the Keystone Buttons Parent topic Using Basic Projector Features Related references Projector Feature Settings Settings Menu Related tasks Adjusting the Image Height Automatically Correcting Image Shape With Screen Fit You can use the projector s Screen Fit feature to automatically correct th...

Страница 69: ...emote control You see a message on the screen 2 Move the projector as necessary to display the message in the middle of the screen 3 Zoom into the image until its white frame extends beyond the edges of the screen 4 Press the Screen Fit button again 69 ...

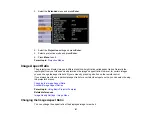
Страница 70: ...ally using Quick Corner by pressing the arrow buttons on the control panel Parent topic Image Shape Correcting Image Shape With Quick Corner You can use the projector s Quick Corner setting to correct the shape and size of an image that is unevenly rectangular on all sides 1 Turn on the projector and display an image 2 Press the Menu button 3 Select the Settings menu and press Enter 4 Select the K...

Страница 71: ...e you want to adjust Then press Enter 7 Press the arrow buttons to adjust the image shape as necessary 8 When you are finished press Esc Parent topic Image Shape Correcting Image Shape With the Keystone Buttons You can use the projector s keystone correction buttons to correct the shape of an image that is unevenly rectangular on the sides 1 Turn on the projector and display an image 71 ...

Страница 72: ... Note If the projector is installed out of reach you can also correct the image shape using the Keystone settings in the projector menus Parent topic Image Shape Related references Projector Feature Settings Settings Menu Resizing the Image With the Zoom Ring 1 Turn on the projector and display an image 72 ...

Страница 73: ...rLite 1750 1760W 1770W Parent topic Using Basic Projector Features Focusing the Image Before you sharpen the focus turn on the projector and display an image PowerLite 1775W Press the Focus buttons on the projector or remote control PowerLite 1750 1760W 1770W Rotate the projector s focus ring 73 ...

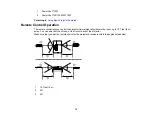
Страница 74: ...ion The remote control lets you control the projector from almost anywhere in the room up to 19 7 feet 6 m away You can point it at the screen or the front or back of the projector Make sure that you aim the remote control at the projector s receivers within the angles listed below 1 19 7 feet 6 m 2 30º 3 60º 74 ...

Страница 75: ...emote control as a wireless mouse so you can control your computer presentation from a distance Note You cannot use the remote control s wireless mouse function when you use your projector s USB Type B port to project video 1 Connect the projector to a computer using the projector s Computer or HDMI port 2 Using a USB cable connect the projector s USB TypeB port to a USB port on your computer for ...

Страница 76: ... release Enter at the destination Parent topic Remote Control Operation Related references Projector Setup Settings Extended Menu Using the Remote Control as a Presentation Pointer You can use the projector s remote control as a pointer to help you call out important information during a presentation The default pointer shape is an arrow but you can select an alternative shape using the Settings m...

Страница 77: ...rences Projector Feature Settings Settings Menu Selecting an Image Source If you connected multiple image sources to the projector such as a computer and DVD player you may want to switch from one image source to the other 1 Make sure the connected image source you want to use is turned on 2 For video image sources insert a DVD or other video media and press Play if necessary 77 ...

Страница 78: ...3 Do one of the following Press the Source Search button on the projector or remote control until you see the image from the source you want 78 ...

Страница 79: ...jector and the device Make sure the projector is turned on and its lens cover is open For laptop computers make sure you have set up your laptop to output its display properly Parent topic Using Basic Projector Features Projection Modes Depending on how you positioned the projector you may need to change the projection mode so your images project correctly Front default setting lets you project fr...

Страница 80: ...ge the projection mode to flip the image over top to bottom 1 Turn on the projector and display an image 2 Hold down the A V Mute button on the remote control for five seconds The image disappears briefly and reappears flipped top to bottom 3 To change projection back to the original mode hold down the A V Mute button for five seconds again Parent topic Projection Modes Changing the Projection Mod...

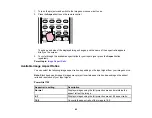
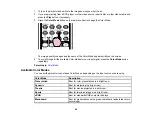
Страница 81: ...termines the image s aspect ratio However for certain images you can change the aspect ratio to fit your screen by pressing a button on the remote control If you always want to use a particular aspect ratio for a certain video input source you can select it using the projector s menus Changing the Image Aspect Ratio Available Image Aspect Ratios Parent topic Using Basic Projector Features Related ...

Страница 82: ... Aspect Ratio Available Image Aspect Ratios You can select the following image aspect ratios depending on the input signal from your image source Note Black bands and cropped images may project in certain aspect ratios depending on the aspect ratio and resolution of your input signal PowerLite 1750 Aspect ratio setting Description Normal Displays images using the full projection area and maintains...

Страница 83: ...t ratio setting is available only for HDMI image sources Parent topic Image Aspect Ratio Color Mode The projector offers different Color Modes to provide optimum brightness contrast and color for a variety of viewing environments and image types You can select a mode designed to match your image and environment or experiment with the available modes If you always want to use a particular color mod...

Страница 84: ...ll the available Color Modes for your input signal press the Color Mode button repeatedly Parent topic Color Mode Available Color Modes You can set the projector to use these Color Modes depending on the input source you are using Color Mode Description Presentation Best for color presentations in a bright room Dynamic Best for projecting in a bright room Theatre Best for movies projected in a dar...

Страница 85: ...ge menu Parent topic Color Mode Related references Image Quality Settings Image Menu Turning On Auto Iris In certain color modes you can turn on the Auto Iris setting to automatically optimize the image based on the brightness of the content you project 1 Turn on the projector and switch to the image source you want to use 2 Press the Menu button 3 Select the Image menu and press Enter 4 Select th...

Страница 86: ...can set the volume using a projector menu Parent topic Using Basic Projector Features Related references Projector Feature Settings Settings Menu Projecting a Slide Show You can use your projector s Slideshow feature whenever you connect a USB device that contains compatible image files This lets you quickly and easily display a slide show or presentation and control it using the projector s remot...

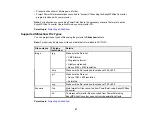
Страница 87: ...how feature Note For best results place your files on media that is formatted in FAT16 32 File contents File type Details extension Image jpg Make sure the file is not CMYK format Progressive format Highly compressed Above 8192 8192 resolution bmp Make sure the file resolution is not above 1280 800 gif Make sure the file is not Above 1280 800 resolution Animated png Make sure the file resolution i...

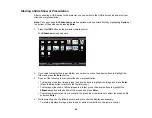
Страница 88: ... the folder and press the Enter button 3 Do one of the following to start your slide show or presentation To display an individual image press the arrow buttons to highlight the image and press Enter Press the Esc button to return to the file list screen To display a slide show of all the images in a folder press the arrow buttons to highlight the Slideshow option at the bottom of the screen and p...

Страница 89: ...screens in FSE file animations press the left or right arrow button and press Enter 5 To stop the display slide show or presentation follow the on screen instructions or press the Esc button Slideshow Display Options Parent topic Projecting a Slide Show Related tasks Disconnecting a USB Device or Camera From the Projector Slideshow Display Options You can select these display options when using th...

Страница 90: ...e time through Screen switching No Does not display the next file automatically time 1Sec to 60Sec Displays files for the selected time in seconds and switches to the next file automatically Effect Wipe Transitions between images with a wipe effect Dissolve Transitions between images with a dissolve effect Random Transitions between images using a random variety of effects Parent topic Starting a ...

Страница 91: ...f you want to redirect your audience s attention during a presentation Any sound or video action continues to run however so you cannot resume projection at the point that you stopped it If you want to display an image such as a company logo or picture when the presentation is stopped you can set up this feature using the projector s menus 1 Press the A V Mute button on the remote control to tempo...

Страница 92: ...action continues to run however so you cannot resume projection at the point that you stopped it 1 Press the Freeze button on the remote control to stop the video action 2 To restart the video action in progress press Freeze again Parent topic Adjusting Projector Features Zooming Into and Out of Images You can draw attention to parts of a presentation by zooming into a portion of the image and enl...

Страница 93: ...tons To zoom out of the image press the E Zoom button as necessary To return to the original image size press Esc Parent topic Adjusting Projector Features Projector Security Features You can secure your projector to prevent theft or unintended use by setting up the following security features Password security to prevent the projector from being turned on and prevent changes to the startup screen...

Страница 94: ...feature The presence of the custom screen discourages theft by identifying the projector s owner Network Protect password prevents anyone from changing the network settings in the projector menus Setting a Password Selecting Password Security Types Entering a Password to Use the Projector Saving a User s Logo Image to Display Parent topic Projector Security Features Setting a Password To use passw...

Страница 95: ...Then you see the confirmation prompt 5 Enter the password again You see the message Password accepted 6 Press Esc to return to the Password Protect menu 7 Make a note of the password and keep it in a safe place in case you forget it Parent topic Password Security Types Selecting Password Security Types After setting a password you see the Password Protect menu Select the password security types yo...

Страница 96: ...etwork settings select Network Protect press Enter select On and press Esc You can attach the Password Protect sticker to the projector as an additional theft deterrent Note Be sure to keep the remote control in a safe place if you lose it you will not be able to enter the password required to use the projector Parent topic Password Security Types Entering a Password to Use the Projector If a pass...

Страница 97: ...the projector remains locked You must contact Epson for service and provide the request code displayed with the locking message Parent topic Password Security Types Related references Where to Get Help Saving a User s Logo Image to Display You can transfer an image to the projector and then display it whenever the projector turns on You can also display the image when the projector is not receivin...

Страница 98: ...ng if you want to use the displayed image as a user s logo 4 Select Yes and press Enter You see a selection box overlaying your image 5 Use the arrow buttons on the remote control to surround the image area you want to use as the User s Logo and press Enter You see a prompt asking if you want to select this image area 6 Select Yes and press Enter If you want to change the selected area select No p...

Страница 99: ...message screen 10 Select the Extended menu and press Enter 11 Select Display and press Enter 12 Select when you want to display the User s Logo screen To display it whenever there is no input signal select Display Background and set it to Logo To display it whenever you turn the projector on select Startup Screen and set it to On To display it whenever you press the A V Mute button select A V Mute...

Страница 100: ...Enter 4 Select one of these lock types and press Enter To lock all of the projector s buttons select Full Lock To lock all buttons except the power button select Partial Lock You see a confirmation prompt 5 Select Yes and press Enter Unlocking the Projector s Buttons Parent topic Projector Security Features Unlocking the Projector s Buttons If the projector s buttons have been locked hold the Ente...

Страница 101: ...ach projector and to the remote control Then you can operate all the projectors at once or individually You can also match the colors displayed by any projectors you plan to use near each other Caution Leave at least two feet 60 cm of space between the projectors to prevent them from overheating Setting the Projector ID Setting the Remote Control ID Matching Multiple Projector Display Quality Pare...

Страница 102: ...ltiple Projector Control Setting the Remote Control ID The remote control s ID is set to zero by default so it can operate any compatible projector If you want to set the remote control to operate only a particular projector you need to set the remote control s ID to match the projector s ID 1 Turn on the projector you want the remote control to operate with exclusively 2 Make sure you know the pr...

Страница 103: ...ote control ID to match the projector ID each time you turn on the projector you have set it to control 6 To allow the remote control to operate any compatible projectors again ID number is zero repeat the steps above and set the remote control ID number to 0 Parent topic Projector Identification System for Multiple Projector Control Matching Multiple Projector Display Quality You can match the di...

Страница 104: ...splay and press Enter You may need to switch the remote control ID back and forth to make adjustments to each projector in all of these steps 11 Change the Adjustment Level setting to 5 on each projector but this time match the lighter display to the darker one 12 Adjust the Brightness Correct setting on Adjustment Level 2 3 and 4 in the same way 13 Adjust the green to red G R and blue to yellow B...

Страница 105: ...Image Quality Settings Image Menu Input Signal Settings Signal Menu Projector Feature Settings Settings Menu Projector Setup Settings Extended Menu Projector Network Settings Network Menu Projector Information Display Info Menu Projector Reset Options Reset Menu Using the Projector s Menus You can use the projector s menus to adjust the settings that control how your projector works The projector ...

Страница 106: ...1 Press the Menu button on the control panel or remote control You see the menu screen displaying the Image menu settings 106 ...

Страница 107: ...tings using the buttons listed on the bottom of the menu screens 6 To return all the menu settings to their default values select Reset 7 When you finish changing settings on a menu press Esc 8 Press Esc or Menu to exit the menu system Parent topic Adjusting the Menu Settings Image Quality Settings Image Menu Settings on the Image menu let you adjust the quality of your image for the input source ...

Страница 108: ... darkens the overall image Contrast Varying levels available Adjusts the difference between light and dark areas of the image Color Saturation Varying levels available Adjusts the intensity of the image colors Tint Varying levels available Adjusts the balance of green to magenta tones in the image Sharpness Varying levels available Adjusts the sharpness or softness of image details Abs Color Temp ...

Страница 109: ...rightness Off when certain Color Modes are selected Note The Brightness setting does not affect lamp brightness To change the lamp brightness mode use the Power Consumption setting Parent topic Adjusting the Menu Settings Related references Available Color Modes Input Signal Settings Signal Menu Normally the projector detects and optimizes the input signal settings automatically If you need to cus...

Страница 110: ...Component video input source Composite video input source HDMI input source PowerLite 1760W 1770W 1775W 110 ...

Страница 111: ...ions Description Auto Setup On Automatically optimizes computer image quality when Off On Resolution Auto Sets the input signal resolution if not detected automatically using Normal the Auto option Wide Customized 1 and 2 Various resolutions Tracking Varying levels available Adjusts signal to eliminate vertical stripes in computer images Sync Varying levels available Adjusts signal to eliminate fu...

Страница 112: ...mages in two levels NR1 NR2 HDMI Video Range Normal Sets the video range to match the setting of the device PowerLite Expanded connected to the HDMI input port 1760W 1770W 1775W Auto Input Signal Auto Specifies the signal type from input sources connected to RGB computer ports Component Auto detects signals automatically RGB corrects color for computer RGB video inputs Component corrects color for...

Страница 113: ... source Overscan Auto Changes the projected image ratio to make the edges visible by Off a selectable percentage or 4 automatically 8 Parent topic Adjusting the Menu Settings Related references Available Image Aspect Ratios Projector Feature Settings Settings Menu Options on the Settings menu let you customize various projector features 113 ...

Страница 114: ...ock locks all buttons Off Partial Lock locks all buttons except the power button Off no buttons locked Pointer Shape Three shapes available Changes the shape of the remote control pointer feature Power Consumption Normal Selects the brightness mode of the projector lamp ECO Normal sets maximum lamp brightness ECO reduces lamp brightness and fan noise and saves power and lamp life Volume Varying le...

Страница 115: ...olution Test Pattern On Displays a test pattern to assist in focusing and zooming the image Off and correcting image shape press Esc to cancel pattern display Parent topic Adjusting the Menu Settings Related tasks Correcting Image Shape With Quick Corner Projector Setup Settings Extended Menu Settings on the Extended menu let you customize various projector setup features that control its operatio...

Страница 116: ...reen controls whether a special screen appears when the projector starts up A V Mute selects the screen color or logo to display when A V Mute is turned on Closed Caption Off Controls use of closed captions and selects the closed caption CC1 channel CC2 User s Logo Creates a screen that the projector displays to identify itself and enhance security Projection Front Selects the way the projector fa...

Страница 117: ... is closed High Altitude Mode regulates the projector s operating temperature at altitudes above 4921 feet 1500 m Standby Mode Communication On Selects whether the projector can be monitored over a network Communication Off when it is in standby mode on or not off USB Type B USB Display Selects the use of the projector s USB Type B port Link21L USB Display select when you connect a computer to the...

Страница 118: ...uage Various languages available Selects the language for projector menu and message displays not changed by Reset option Parent topic Adjusting the Menu Settings Projector Network Settings Network Menu Settings on the Network menu let you view network information and set up the projector for monitoring and control over a network PowerLite 1760W 1770W 1775W 118 ...

Страница 119: ...ess Region Code Network Configuration Accesses additional network Configures your network settings menus Parent topic Adjusting the Menu Settings Related concepts Wireless Network Projection Projector Information Display Info Menu You can display information about the projector and input sources by viewing the Info menu However you cannot change any settings in the menu Computer input source 119 ...

Страница 120: ...Video input source USB or LAN input source 120 ...

Страница 121: ...rce Displays the name of the port to which the current input source is connected Input Signal Displays the input signal setting of the current input source Resolution Displays the resolution of the current input source Video Signal Displays the video signal format of the current input source Refresh Rate Displays the refresh rate of the current input source Sync Info Displays information that may ...

Страница 122: ...770W 1775W Event ID code Cause and solution 0432 The EasyMP Network Projection program did not start Turn the projector off and then on again 0435 0434 Unstable network communication Check the network communication status wait a few moments and try connecting to the network again 0482 0484 0485 0433 Cannot display the transferred images Restart the EasyMP Network Projection program 0481 Communicat...

Страница 123: ...istrator 0898 Failed to acquire DHCP Make sure the DHCP server is operating correctly If you are not using DHCP turn off the DHCP setting in the Network menus 0895 A communication error has occurred Try restarting the EasyMP Network Projection program and restarting your projector If that does not solve the problem contact 0899 Epson for help Parent topic Projector Information Display Info Menu Pr...

Страница 124: ...cannot reset the following settings using the Reset All option Input Signal User s Logo Language Network menu items Lamp Hours Password User Button Multi screen Parent topic Adjusting the Menu Settings 124 ...

Страница 125: ... authorized Epson servicer Warning Before cleaning any part of the projector turn it off and unplug the power cord Never open any cover on the projector except the lamp cover Dangerous electrical voltages in the projector can injure you severely Warning Do not try to service this product yourself except as specifically explained in this manual Refer all other servicing to qualified servicers Clean...

Страница 126: ...ld soap Caution Do not use wax alcohol benzene paint thinner or other chemicals to clean the projector case These can damage the case Parent topic Projector Maintenance Air Filter and Vent Maintenance The projector s air filter keeps the intake air clean and its vents expel the exhaust If dust collects on the air filter or vents clean them as described in this manual Dust clogs may cause the proje...

Страница 127: ...t is difficult to remove or the air filter is damaged replace the air filter Parent topic Air Filter and Vent Maintenance Replacing the Air Filter You need to replace the air filter in the following situations After cleaning the air filter you see a message telling you to clean or replace it The air filter is torn or damaged You can replace the air filter while the projector is mounted to the ceil...

Страница 128: ...p the tab at the center of the air filter and pull it out of the projector Note Air filters contain polycarbonate ABS resin and polyurethane foam Dispose of used air filters according to local regulations 128 ...

Страница 129: ...plays this information in the projector s menu system Replace the lamp as soon as possible when the following occurs The projected image gets darker or starts to deteriorate A message appears when you turn on the projector telling you to replace the lamp The projector s lamp light is flashing orange Replacing the Lamp Resetting the Lamp Timer Parent topic Projector Maintenance Related references P...

Страница 130: ... avoid injury You can replace the lamp while the projector is mounted to the ceiling if necessary 1 Turn off the projector and unplug the power cord 2 Allow the projector lamp to cool down for at least one hour 3 Use the screwdriver included with the replacement lamp to loosen the screw securing the lamp cover Warning If the lamp is broken glass fragments may be loose inside the lamp chamber Be ca...

Страница 131: ...4 Slide the lamp cover out and lift it off 5 Lift up the metal bar securing the lamp 131 ...

Страница 132: ...he projector Caution Lift the lamp handle carefully to avoid damaging the handle as you pull out the lamp Note The lamp s in this product contain mercury Please consult your state and local regulations regarding disposal or recycling Do not put in the trash 132 ...

Страница 133: ...asily make sure it is facing the right way Press down on the area shown to secure the lamp in place Caution Do not touch any glass on the lamp assembly to avoid premature lamp failure 8 Press the metal bar down over the lamp until it clicks into place on both sides 133 ...

Страница 134: ...rent topic Projector Lamp Maintenance Related tasks Resetting the Lamp Timer Resetting the Lamp Timer You must reset the lamp timer after replacing the projector s lamp to clear the lamp replacement message and to keep track of lamp usage correctly Note Do not reset the lamp timer if you have not replaced the lamp to avoid inaccurate lamp usage information 1 Turn on the projector 2 Press the Menu ...

Страница 135: ...ter Parent topic Projector Lamp Maintenance Related tasks Replacing the Lamp Replacing the Remote Control Batteries The remote control uses the two AA manganese or alkaline batteries Replace the batteries as soon as they run out Caution Use only the type of batteries specified in this manual Do not install batteries of different types or mix new and old batteries 135 ...

Страница 136: ...ld batteries Warning If the battery fluid has leaked wipe it away with a soft cloth and avoid getting the fluid on your hands If it gets on your hands wash them immediately to avoid injury 3 Insert the batteries with the and ends facing as shown 136 ...

Страница 137: ...s precision parts some of which are glass Follow these guidelines to transport or ship the projector safely Close the lens cover to protect the lens Remove any equipment connected to the projector Use a carrying case to hand carry the projector When transporting the projector a long distance or as checked luggage place it in a carrying case Then pack the case in a firm box with cushioning around i...

Страница 138: ...Note Epson shall not be liable for any damages incurred during transportation Parent topic Maintaining and Transporting the Projector 138 ...

Страница 139: ...it back in and turn it on If this does not solve the problem check the following The lights on the projector s control panel may indicate what the problem is The projector s Help system can display information about common problems if the projector is operating The solutions in this manual can help you solve many problems If none of these solutions help you can contact Epson for technical support ...

Страница 140: ...jector is too hot Make sure that the vents and air filter are not clogged with dust or obstructed by nearby objects Make sure the environmental temperature is not too hot If overheating continues replace the air filter Red Off Red Projector has overheated and turned off Leave it turned off to cool down for five minutes Make sure that the vents and air filter are not clogged with dust or obstructed...

Страница 141: ...shing Off Replace the lamp soon to avoid damage Do not orange continue using the projector Red Off Flashing red A fan or sensor has a problem Turn the projector off unplug it and contact Epson for help Red or flashing Flashing red Flashing red Internal projector error Turn the projector off red unplug it and contact Epson for help Note If the lights display a pattern not listed in the table above ...

Страница 142: ...these sections if you have any problems with projected images or sound Solutions When No Image Appears Solutions When Image is Incorrect Using the USB Display Function Solutions When No Signal Message Appears Solutions When Not Supported Message Appears Solutions When Only a Partial Image Appears Solutions When the Image is Not Rectangular Solutions When the Image Contains Noise or Static Solution...

Страница 143: ...jector does not respond when you press buttons on the remote control make sure the remote receivers are turned on Parent topic Solving Image or Sound Problems Related references Projector Setup Settings Extended Menu Image Quality Settings Image Menu Projector Feature Settings Settings Menu Input Signal Settings Signal Menu Related tasks Unlocking the Projector s Buttons Solutions When Image is In...

Страница 144: ...lay from a PC laptop you need to set up the laptop to display on an external monitor 1 Hold down the laptop s Fn key and press the key labelled with a monitor icon or CRT LCD See your laptop manual for details Wait a few seconds for an image to appear 2 To display on both the laptop s monitor and the projector try pressing the same keys again 3 If the same image is not displayed by the laptop and ...

Страница 145: ...ignal Settings Signal Menu Supported Video Display Formats Solutions When Only a Partial Image Appears If only a partial computer image appears try the following solutions Press the Auto button on the remote control to optimize the image signal Try adjusting the image position using the Position menu setting Press the Aspect button on the remote control to select a different image aspect ratio If ...

Страница 146: ... Image Shape With Quick Corner Solutions When the Image Contains Noise or Static If the projected image seems to contain electronic interference noise or static try the following solutions Check the cables connecting your computer or video source to the projector They should be Separated from the power cord to prevent interference Securely connected at both ends No longer than 9 8 feet 3 m Not con...

Страница 147: ...ronment let the projector warm up to room temperature before using it Position the projector close enough to the screen and directly in front of it Position the projector so the keystone adjustment angle is not so wide that it distorts the image When using the Screen Fit feature PowerLite 1775W position the projector at a compatible distance from the screen or adjust the image shape manually Turn ...

Страница 148: ...the correct input source on the Signal menu Make sure all the cables are securely connected to the projector and your video device If you connected long cables try connecting shorter cables For computers check the color balance of your computer s display See your computer manual for details If the colors are incorrect from a video source make sure you selected the correct Video Signal setting If y...

Страница 149: ...isplay Settings program on your computer Parent topic Solving Image or Sound Problems Solving Projector or Remote Control Operation Problems Check the solutions in these sections if you have problems operating the projector or remote control Solutions to Projector Power or Shut Off Problems Solutions to Problems With the Remote Control Solutions to Password Problems Parent topic Solving Problems S...

Страница 150: ...g the remote control within the reception angle and range of the projector Check to see if a button on the remote control is stuck down causing it to enter sleep mode Release the button to wake the remote control up Strong fluorescent lighting direct sunlight or infrared device signals may be interfering with the projector s remote receivers Dim the lights or move the projector away from the sun o...

Страница 151: ...o not receive an e mail alerting you to problems with a projector over the network PowerLite 1760W 1770W 1775W try the following solutions Make sure the projector is turned on and connected to the network correctly If an error shut down the projector it cannot send an e mail Make sure you set up the projector e mail alert settings correctly on the projector s network Mail menu or in the network so...

Страница 152: ...94 6 AM to 6 PM Pacific Time Monday through Friday Canada 905 709 3839 6 AM to 6 PM Pacific Time Monday through Friday Days and hours of support are subject to change without notice Toll or long distance charges may apply Before you call have the following information ready Product name Product serial number located on the bottom or rear of the projector or in menu system Proof of purchase such as...

Страница 153: ...Formats General Projector Specifications Type of display Poly silicon TFT active matrix Resolution PowerLite 1750 1024 x 768 pixels XGA PowerLite 1760W 1770W 1775W 1280 x 800 pixels WXGA Lens F 1 58 to 1 7 Focal length 13 52 to 16 22 mm Color reproduction Full color 16 77 million colors Brightness PowerLite 1750 1760W Normal Power Consumption mode White light output 2600 lumens ISO 21118 standard ...

Страница 154: ...4 3 PowerLite 1760W 1770W 1775W 16 10 Focus adjustment PowerLite 1750 1760W 1770W Manual PowerLite 1775W Powered Zoom adjustment Manual Zoom ratio 1 1 2 Tele to Wide Internal sound system 1 W monaural Noise level 40 dB Normal Power Consumption mode 30 dB ECO Power Consumption mode Keystone correction angle PowerLite 1750 1760W 1770W Vertical 45º manual 30º using Auto Keystone Horizontal 30º manual...

Страница 155: ...W 1775W 230 W PowerLite 1760W 205 W Lamp life Up to about 4000 hours Note Turn off this product when not in use to prolong the life of the projector Lamp life will vary depending upon mode selected environmental conditions and usage Brightness decreases over time Parent topic Technical Specifications Remote Control Specifications Reception range 19 7 feet 6 m Batteries Two alkaline or manganese AA...

Страница 156: ...ctor Electrical Specifications Rated frequency 50 60 Hz Power supply 100 to 240 VAC 10 PowerLite 1760W 3 to 1 4 A PowerLite 1750 1770W 1775W 3 3 to 1 5 A Power consumption PowerLite 1760W 100 to 120 V Operating 293 W Standby 0 38 W Communication Off 7 4 W Communication On PowerLite 1750 1770W 1775W Operating 322 W Standby 0 38 W Communication Off 7 4 W Communication On 156 ...

Страница 157: ...l Specifications Temperature Operating 41 to 95 ºF 5 to 35 ºC Storage 14 to 140 ºF 10 to 60 ºC Humidity relative Operating 20 to 80 non condensing Storage 10 to 90 Operating altitude Up to 4921 feet 1500 m Up to 7500 feet 2286 m with High Altitude Mode enabled Parent topic Technical Specifications Projector Safety and Approvals Specifications United States FCC Part 15 Class B DoC UL60950 1 Canada ...

Страница 158: ...our computer or video card manual for details The table below lists the compatible refresh rate and resolution for each compatible video display format Display format Refresh rate in Hz Resolution in pixels Computer signals analog RGB VGA 60 72 75 85 640 480 SVGA 56 60 72 75 85 800 600 XGA 60 70 75 85 1024 768 WXGA 60 1280 768 WXGA 60 1360 768 WXGA 60 75 85 1280 800 SXGA 70 75 85 1152 864 SXGA 60 ...

Страница 159: ... 60 1280 720 HDTV 1080i 50 60 1920 1080 HDTV 1080p 24 30 50 60 1920 1080 HDMI input signals PowerLite 1760W 1770W 1775W VGA 60 640 480 SVGA 60 800 600 XGA 60 1024 768 WXGA 60 1280 800 SXGA 60 1280 960 SXGA 60 1280 1024 SXGA 60 1400 1050 UXGA 60 1600 1200 SDTV 480i 480p 60 720 480 SDTV 576i 576p 50 720 576 HDTV 720p 50 60 1280 720 HDTV 1080i 50 60 1920 1080 HDTV 1080p 24 30 50 60 1920 1080 PowerLit...

Страница 160: ... Wide resolution only Parent topic Technical Specifications 160 ...

Страница 161: ...is product yourself Refer all servicing to qualified service personnel Warning The projector and its accessories come packaged in plastic bags Keep plastic bags away from small children to avoid any risk of suffocation Caution When you replace the lamp never touch the new lamp with your bare hands the invisible residue left by the oil on your hands may shorten the lamp life Use a cloth or glove to...

Страница 162: ... not overload wall outlets extension cords or power strips Do not insert the plug into a dusty outlet This can cause fire or electric shock Do not place the projector where the cord can be walked on This may result in fraying or damage to the plug Unplug the projector from the wall outlet before cleaning Use a dry cloth or for stubborn dirt or stains a moist cloth that has been wrung dry for clean...

Страница 163: ...t or smoke Do not use or store the projector or remote control in a hot location such as near a heater in direct sunlight or in a closed vehicle If you use the projector in a country other than where you purchased it use the correct power cord for that country Do not stand on the projector or place heavy objects on it Do not use the projector outside of the required temperature range of 41 to 95 º...

Страница 164: ...y and if not installed and used in accordance with the instructions may cause harmful interference to radio or television reception However there is no guarantee that interference will not occur in a particular installation If this equipment does cause interference to radio and television reception which can be determined by turning the equipment off and on the user is encouraged to try to correct...

Страница 165: ...ATM and WPA2TM are trademarks of the Wi Fi Alliance HDMI and High Definition Multimedia Interface are the trademarks or registered trademarks of HDMI Licensing LLC General Notice Other product names used herein are for identification purposes only and may be trademarks of their respective owners Epson disclaims any and all rights in those marks Parent topic Notices Software Copyright This product ...

Страница 166: ...the GNU General Public License Version 2 at http www gnu org licenses GNU GENERAL PUBLIC LICENSE LICENSE Version 2 June 1991 Copyright 1989 1991 Free Software Foundation Inc 51 Franklin Street Fifth Floor Boston MA 02110 1301 USA Everyone is permitted to copy and distribute verbatim copies of this license document but changing it is not allowed Preamble The licenses for most software are designed ...

Страница 167: ...are patents We wish to avoid the danger that redistributors of a free program will individually obtain patent licenses in effect making the program proprietary To prevent this we have made it clear that any patent must be licensed for everyone s free use or not licensed at all The precise terms and conditions for copying distribution and modification follow GNU GENERAL PUBLIC LICENSE TERMS AND CON...

Страница 168: ...w to view a copy of this License Exception if the Program itself is interactive but does not normally print such an announcement your work based on the Program is not required to print an announcement These requirements apply to the modified work as a whole If identifiable sections of that work are not derived from the Program and can be reasonably considered independent and separate works in them...

Страница 169: ...ies the executable If distribution of executable or object code is made by offering access to copy from a designated place then offering equivalent access to copy the source code from the same place counts as distribution of the source code even though third parties are not compelled to copy the source along with the object code 4 You may not copy modify sublicense or distribute the Program except...

Страница 170: ... a licensee cannot impose that choice This section is intended to make thoroughly clear what is believed to be a consequence of the rest of this License 8 If the distribution and or use of the Program is restricted in certain countries either by patents or by copyrighted interfaces the original copyright holder who places the Program under this License may add an explicit geographical distribution...

Страница 171: ...RE OF THE PROGRAM TO OPERATE WITH ANY OTHER PROGRAMS EVEN IF SUCH HOLDER OR OTHER PARTY HAS BEEN ADVISED OF THE POSSIBILITY OF SUCH DAMAGES END OF TERMS AND CONDITIONS How to Apply These Terms to Your New Programs If you develop a new program and you want it to be of the greatest possible use to the public the best way to achieve this is to make it free software which everyone can redistribute and...

Страница 172: ...aims all copyright interest in the program Gnomovision which makes passes at compilers written by James Hacker signature of Ty Coon 1 April 1989 Ty Coon President of Vice This General Public License does not permit incorporating your program into proprietary programs If your program is a subroutine library you may consider it more useful to permit linking proprietary applications with the library ...

Страница 173: ...ware Foundation and other authors who decide to use it You can use it too but we suggest you first think carefully about whether this license or the ordinary General Public License is the better strategy to use in any particular case based on the explanations below When we speak of free software we are referring to freedom of use not price Our General Public Licenses are designed to make sure that...

Страница 174: ... is legally speaking a combined work a derivative of the original library The ordinary General Public License therefore permits such linking only if the entire combination fits its criteria of freedom The Lesser General Public License permits more lax criteria for linking other code with the library We call this license the Lesser General Public License because it does Less to protect the user s f...

Страница 175: ...e preferred form of the work for making modifications to it For a library complete source code means all the source code for all modules it contains plus any associated interface definition files plus the scripts used to control compilation and installation of the library Activities other than copying distribution and modification are not covered by this License they are outside its scope The act ...

Страница 176: ...e whole must be on the terms of this License whose permissions for other licensees extend to the entire whole and thus to each and every part regardless of who wrote it Thus it is not the intent of this section to claim rights or contest your rights to work written entirely by you rather the intent is to exercise the right to control the distribution of derivative or collective works based on the ...

Страница 177: ...eters data structure layouts and accessors and small macros and small inline functions ten lines or less in length then the use of the object file is unrestricted regardless of whether it is legally a derivative work Executables containing this object code plus portions of the Library will still fall under Section 6 Otherwise if the work is a derivative of the Library you may distribute the object...

Страница 178: ...d in either source or binary form with the major components compiler kernel and so on of the operating system on which the executable runs unless that component itself accompanies the executable It may happen that this requirement contradicts the license restrictions of other proprietary libraries that do not normally accompany the operating system Such a contradiction means you cannot use both th...

Страница 179: ...n the only way you could satisfy both it and this License would be to refrain entirely from distribution of the Library If any portion of this section is held invalid or unenforceable under any particular circumstance the balance of the section is intended to apply and the section as a whole is intended to apply in other circumstances It is not the purpose of this section to induce you to infringe...

Страница 180: ...NTABILITY AND FITNESS FOR A PARTICULAR PURPOSE THE ENTIRE RISK AS TO THE QUALITY AND PERFORMANCE OF THE LIBRARY IS WITH YOU SHOULD THE LIBRARY PROVE DEFECTIVE YOU ASSUME THE COST OF ALL NECESSARY SERVICING REPAIR OR CORRECTION 16 IN NO EVENT UNLESS REQUIRED BY APPLICABLE LAW OR AGREED TO IN WRITING WILL ANY COPYRIGHT HOLDER OR ANY OTHER PARTY WHO MAY MODIFY AND OR REDISTRIBUTE THE LIBRARY AS PERMI...

Страница 181: ...rk as a programmer or your school if any to sign a copyright disclaimer for the library if necessary Here is a sample alter the names Yoyodyne Inc hereby disclaims all copyright interest in the library Frob a library for tweaking knobs written by James Random Hacker signature of Ty Coon 1 April 1990 Ty Coon President of Vice That s all there is to it BSD License Berkeley Software Distribution Lice...

Страница 182: ...CLUDING BUT NOT LIMITED TO PROCUREMENT OF SUBSTITUTE GOODS OR SERVICES LOSS OF USE DATA OR PROFITS OR BUSINESS INTERRUPTION HOWEVER CAUSED AND ON ANY THEORY OF LIABILITY WHETHER IN CONTRACT STRICT LIABILITY OR TORT INCLUDING NEGLIGENCE OR OTHERWISE ARISING IN ANY WAY OUT OF THE USE OF THIS SOFTWARE EVEN IF ADVISED OF THE POSSIBILITY OF SUCH DAMAGE libjpeg This projector product includes the open s...

Страница 183: ...ocumentation must state that this software is based in part on the work of the Independent JPEG Group 3 Permission for use of this software is granted only if the user accepts full responsibility for any undesirable consequences the authors accept NO LIABILITY for damages of any kind These conditions apply to any software derived from or based on the IJG code not just to the unmodified library If ...

Страница 184: ...e the LZW algorithm the resulting GIF files are larger than usual but are readable by all standard GIF decoders We are required to state that The Graphics Interchange Format is the Copyright property of CompuServe Incorporated GIF sm is a Service Mark property of CompuServe Incorporated libpng This projector product includes the open source software program libpng which applies the terms and condi...

Страница 185: ...orts or the library will fulfill any of your particular purposes or needs This library is provided with all faults and the entire risk of satisfactory quality performance accuracy and effort is with the user libpng versions 0 97 January 1998 through 1 0 6 March 20 2000 are Copyright 1998 1999 Glenn Randers Pehrson and are distributed according to the same disclaimer and license as libpng 0 96 with...

Страница 186: ...g restrictions 1 The origin of this source code must not be misrepresented 2 Altered versions must be plainly marked as such and must not be misrepresented as being the original source 3 This Copyright notice may not be removed or altered from any source or altered source distribution The Contributing Authors and Group 42 Inc specifically permit without fee and encourage the use of this source cod...

Страница 187: ...edistribute it freely subject to the following restrictions 1 The origin of this software must not be misrepresented you must not claim that you wrote the original software If you use this software in a product an acknowledgment in the product documentation would be appreciated but is not required 2 Altered source versions must be plainly marked as such and must not be misrepresented as being the ...

Страница 188: ... the original software If you use this software in a product an acknowledgment in the product documentation would be appreciated but is not required 2 Altered source versions must be plainly marked as such and must not be misrepresented as being the original software 3 This notice may not be removed or altered from any source distribution L Peter Deutsch ghost aladdin com Independent implementatio...

Страница 189: ...e union of the acting entity and all other entities that control are controlled by or are under common control with that entity For the purposes of this definition control means I the power direct or indirect to cause the direction or management of such entity whether by contract or otherwise or ii ownership of fifty percent 50 or more of the outstanding shares or iii beneficial ownership of such ...

Страница 190: ...as been received by Licensor and subsequently incorporated within the Work 2 Grant of Copyright License Subject to the terms and conditions of this License each Contributor hereby grants to You a perpetual worldwide non exclusive no charge royalty free irrevocable copyright license to reproduce prepare Derivative Works of publicly display publicly perform sublicense and distribute the Work and suc...

Страница 191: ...utions Unless You explicitly state otherwise any Contribution intentionally submitted for inclusion in the Work by You to the Licensor shall be under the terms and conditions of this License without any additional terms or conditions Notwithstanding the above nothing herein shall supersede or modify the terms of any separate license agreement you may have executed with Licensor regarding such Cont...

Страница 192: ...t should be enclosed in the appropriate comment syntax for the file format We also recommend that a file or class name and description of purpose be included on the same printed page as the copyright notice for easier identification within third party archives Copyright yyyy name of copyright owner Licensed under the Apache License Version 2 0 the License you may not use this file except in compli...

Страница 193: ...r excluding the U S failure to strictly comply with Seiko Epson Corporation s operating and maintenance instructions Seiko Epson Corporation shall not be liable for any damages or problems arising from the use of any options or any consumable products other than those designated as Original Epson Products or Epson Approved Products by Seiko Epson Corporation Copyright Attribution Parent topic Noti...

Отзывы: