


• The ink cartridges may be old or low on ink, and you may need to replace them.
• Make sure the paper type setting matches the type of paper you loaded.
• Make sure your paper is not damp, curled, old, or loaded facedown in the sheet feeder (the printable
side should be faceup).
• Clean the paper path.
Parent topic:
Solving Print Quality Problems
Related concepts
Related tasks
Selecting Basic Print Settings - Windows
Selecting Basic Print Settings - Mac OS X 10.5/10.6/10.7
Selecting Basic Print Settings - Mac OS X 10.4
Cleaning the Paper Path
Related topics
Replacing Ink Cartridges
Loading Paper
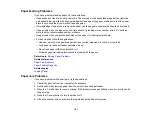
Grainy Printout
If your printouts are grainy, try these solutions:
• Make sure you loaded the printable side of the paper faceup in the sheet feeder.
• Select a higher print quality setting and turn off any high speed settings in your product software.
• Align the print head.
• You may need to increase the image resolution or print a smaller size; see your software
documentation.
Parent topic:
Solving Print Quality Problems
Related concepts
Related tasks
Selecting Advanced Print Settings - Windows
Selecting Basic Print Settings - Mac OS X 10.5/10.6/10.7
Selecting Basic Print Settings - Mac OS X 10.4
193
Содержание Epson Stylus NX330
Страница 1: ...Epson Stylus NX330 User s Guide ...
Страница 2: ......
Страница 10: ...Default Delay Times for Power Management for Epson Products 221 Copyright Attribution 221 10 ...
Страница 11: ...Epson Stylus NX330 User s Guide Welcome to the Epson Stylus NX330 User s Guide 11 ...
Страница 17: ...Product Parts Top 1 Sheet feeder 2 Paper support 3 Output tray 4 Paper stopper 5 Feeder guard 6 Edge guide 17 ...
Страница 20: ...Product Parts Back 1 AC inlet 2 USB port Parent topic Product Parts Locations 20 ...
Страница 25: ...3 Pull out the output tray and open the paper stopper on the end 4 Slide the edge guide left 25 ...
Страница 28: ...3 Pull out the output tray and open the paper stopper on the end 4 Slide the edge guide left 28 ...
Страница 87: ...87 ...
Страница 93: ... Normal preview Click the Auto Locate icon to create a marquee dotted line on the preview image 93 ...
Страница 97: ...3 Adjust the scan area as necessary 97 ...
Страница 104: ...104 ...
Страница 112: ...3 Adjust the scan area as necessary 112 ...
Страница 144: ...144 ...
Страница 157: ...157 ...
Страница 163: ...163 ...


