6.
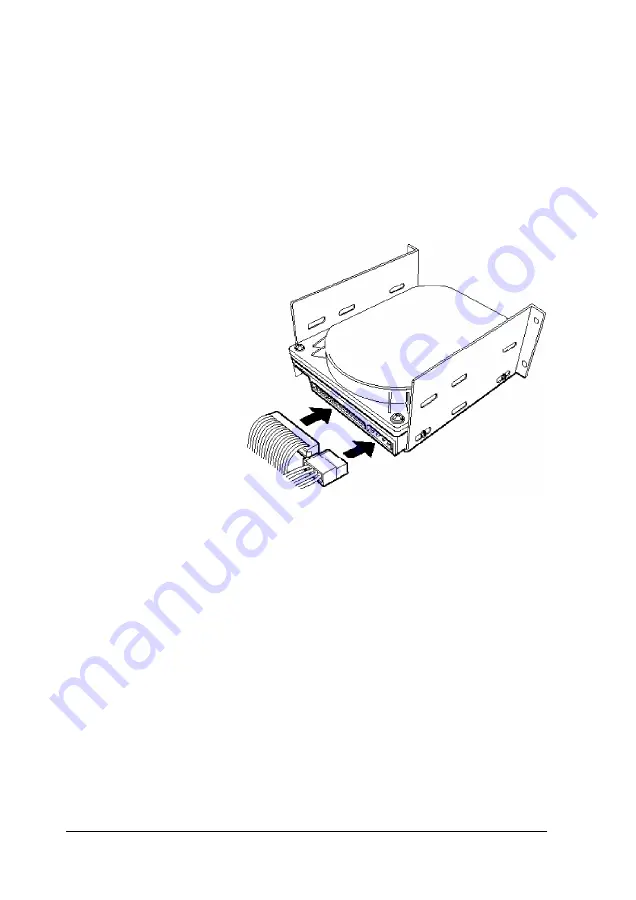
To connect the drive cables to the drives in the rear internal
bracket, first locate pin 1 on each drive’s connector. The
number I or 2 may be printed on the drive’s connector or
circuit board to identify the side containing pin 1.
7.
Hold the connector on the IDE device cable so the red wire
aligns with pin 1 on the drive. Make sure the holes in the
connector fit over all the pins; then push in the connector.
8.
Locate a power supply cable for each drive installed in the
rear internal bracket. These cables lead from the power
supply and have multi-colored wires with a plastic
connector on the end. Align the notched corners of the
power supply connector with the drive’s power connector;
then push in the connector.
6-18
Installing and Removing Drives in the Tower Computer
Содержание Endeavor Pro
Страница 28: ...2 2 0 Setting Up Your System ...
Страница 38: ...The Integrated Peripherals options are described in the table below Running SETUP and lnstalling Drivers 2 9 ...
Страница 47: ...Green PC options continued 2 18 Running SETUP and lnstalling Drivers ...
Страница 57: ...Using Your Computer 3 5 ...
Страница 71: ...Installing and Removing Options 4 7 ...
Страница 163: ...Environmental Requirements System Memory Map A S Specifications ...
Страница 164: ...Video Resolutions and Colors Specifications A 9 ...
Страница 167: ...Hardware Interrupts System l O Address Map A 12 Specifications ...


