


Aspect Mode
Explanation
Full
Projects at the full size of the projected screen.
H-Zoom
Projects by enlarging the input image to the full width of
the projected screen while retaining the aspect ratio. Areas
that exceed the edges of the projected screen are not
projected.
V-Zoom
Projects by enlarging the input image to the full height of
the projected screen while retaining the aspect ratio. Areas
that exceed the edges of the projected screen are not
projected.
Native
Projects to the center of the projected screen at the
resolution of the input image. Areas that exceed the edges
of the projected screen are not projected.
a
•
The available aspect ratios differ depending on the input signal from
the connected device.
•
You can also set the aspect ratio from the Configuration menu.
s
Signal
-
Aspect
•
If parts of the computer image are missing, set the
Resolution
setting to
Wide
or
Normal
from the Configuration menu, according
to the resolution of the computer.
s
Signal
-
Resolution
Adjusting the Image
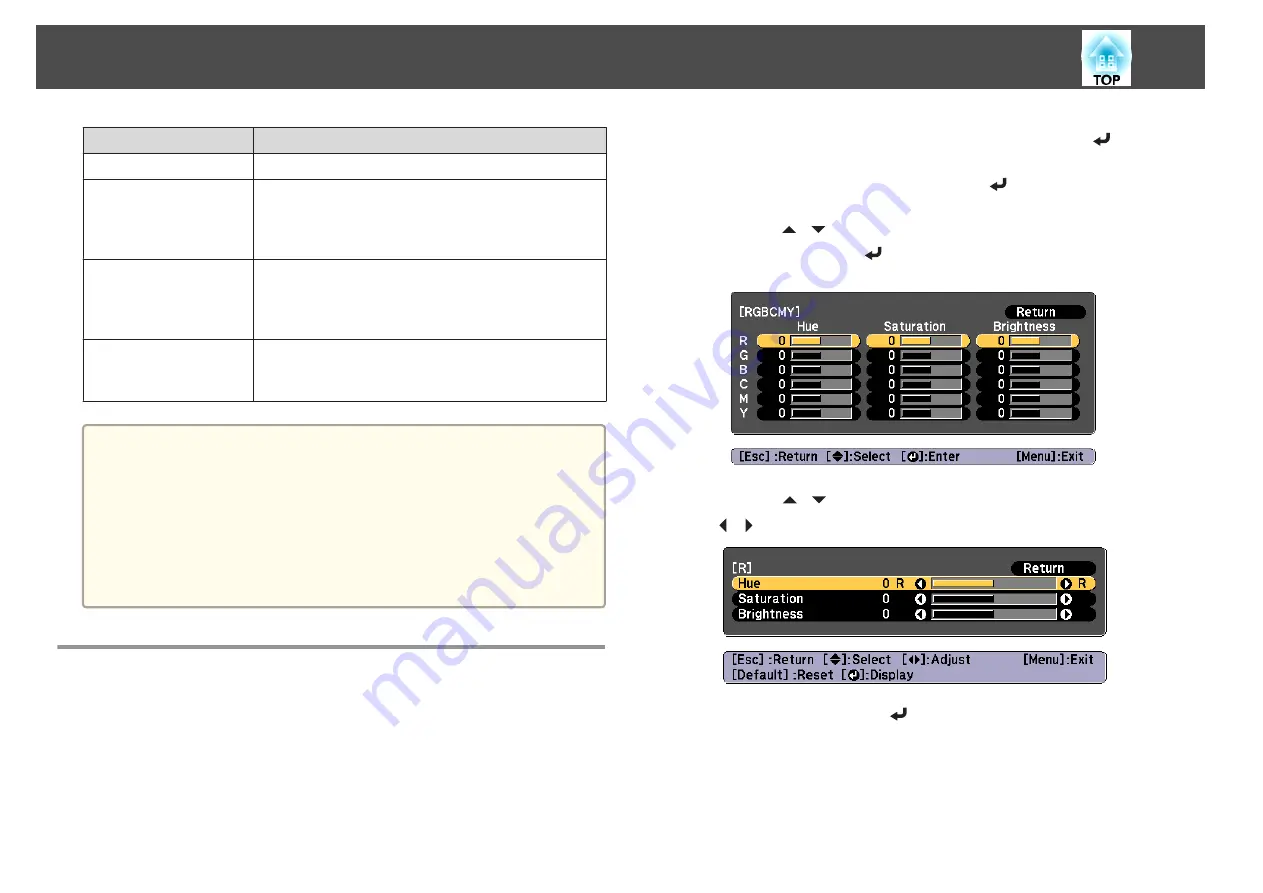
Hue, Saturation, and Brightness adjustment
You can adjust the
Hue
(tint),
Saturation
(vividness), and
Brightness
of
the six axes R (red), G (green), B (blue), C (cyan), M (magenta), and Y
(yellow) according to your preferences.
a
Press the [Menu] button while projecting.
b
Select
Advanced
from
Image
, and then press the [
] button.
c
Select
RGBCMY
, and then press the [
] button.
d
Use the [
][
] buttons to select the color you want to adjust,
and then press the [
] button.
e
Use the [
][
] buttons to select the item, and then use the
[
][
] buttons to make the adjustments.
Each time you press the [
] button, the adjustment screen changes.
f
To complete the corrections, press the [Menu] button.
Adjusting the Projected Images
81
Содержание EB-L1050U
Страница 1: ...User s Guide ...
Страница 14: ...Introduction This chapter explains the names for each part ...
Страница 26: ...Preparing the Projector This chapter explains how to install the projector and connect projection sources ...
Страница 57: ...Basic Usage This chapter explains how to project and adjust images ...
Страница 135: ...Configuration Menu This chapter explains how to use the Configuration menu and its functions ...
Страница 172: ...Troubleshooting This chapter explains how to identify problems and what to do if a problem is found ...
Страница 207: ...Cleaning the Parts 207 ...
Страница 214: ...Appendix ...
Страница 282: ...This product is also designed for IT power distribution system with phase to phase voltage 230V Specifications 282 ...