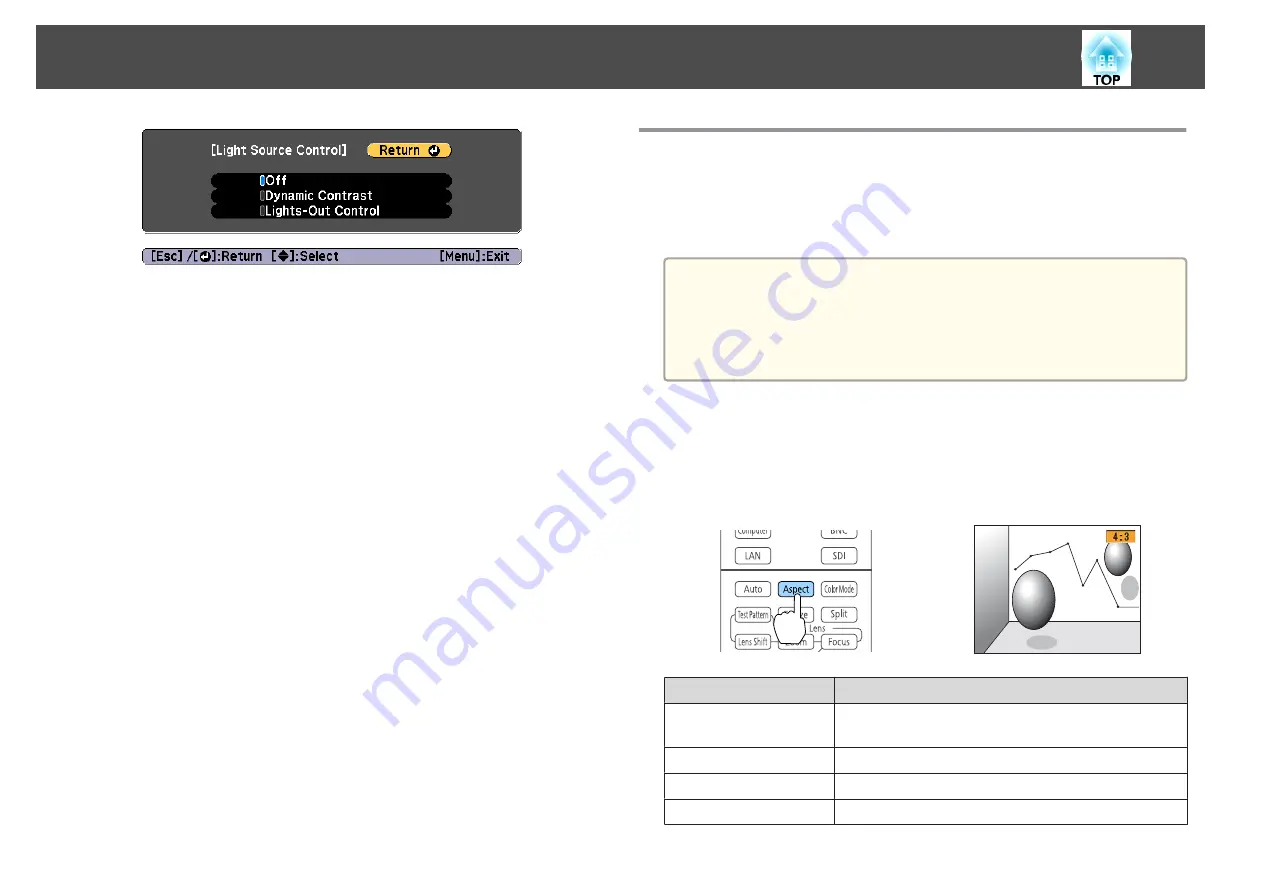
•
Off
: Select if you do not want to control the light source.
•
Dynamic Contrast
: Automatically adjust the amount of light when
projecting according to the brightness of the image.
•
Lights-Out Control
: Automatically turns off the light after the set
time has elapsed at the specified video level.
e
Press the [Esc] button to return to the previous screen.
f
If you selected
Dynamic Contrast
in step 4, make the following
settings in
Dynamic Contrast
.
•
Response Speed
: Select
High Speed
to adjust the amount of light
as soon as the scene changes.
•
Black Level
: Set the black level when the brightness level of the
image signal is zero. When you select
0%
, the light source turns
off.
g
If you selected
Lights-Out Control
in step 4, make the following
settings in
Lights-Out Control
.
•
Lights-Out Signal Level
: Set the brightness level for the video
signal being controlled. After turning off automatically when
exceeding the specified image level, it turns on immediately.
•
Lights-Out Timer
: Set the amount of time before automatically
turning off the light source.
h
Press the [Menu] button to finish making settings.
Changing the Aspect Ratio of the Projected Image
You can change the aspect ratio of the projected image to suit the type, the
ratio of height and width, and the resolution of the input signals.
Available aspect modes vary depending on the Screen Type currently set.
a
•
Set the
Screen Type
before changing the aspect ratio.
s
•
This cannot be changed when
Scale Mode
is set to
Zoom
Display
.
s
Signal
-
Scale
-
Scale Mode
Changing methods
Each time you press the [Aspect] button on the remote control, the aspect
mode name is displayed on the screen and the aspect ratio changes.
Remote control
Aspect Mode
Explanation
Auto
Projects in an appropriate aspect ratio based on
information from the signal being input.
Normal
Projects while retaining the aspect ratio of the input image.
4:3
Projects at an aspect ratio of 4:3.
16:9
Projects at an aspect ratio of 16:9.
Adjusting the Projected Images
80
Содержание EB-L1050U
Страница 1: ...User s Guide ...
Страница 14: ...Introduction This chapter explains the names for each part ...
Страница 26: ...Preparing the Projector This chapter explains how to install the projector and connect projection sources ...
Страница 57: ...Basic Usage This chapter explains how to project and adjust images ...
Страница 135: ...Configuration Menu This chapter explains how to use the Configuration menu and its functions ...
Страница 172: ...Troubleshooting This chapter explains how to identify problems and what to do if a problem is found ...
Страница 207: ...Cleaning the Parts 207 ...
Страница 214: ...Appendix ...
Страница 282: ...This product is also designed for IT power distribution system with phase to phase voltage 230V Specifications 282 ...


