


3.
Open the
Get Images From
pop-up menu and select your product.
4.
Select the language used in the document you are going to scan as the
Document Language
setting.
5.
Select the type of document you are going to scan.
Epson Scan starts in the last scan mode you used.
6.
Select your scan settings and click
Scan
.
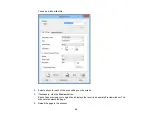
Your document is scanned and you see the Epson Scan window while your document is converted
to editable text.
7.
Click
Close
to close the Epson Scan window and Preview window, if necessary.
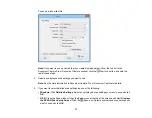
You see the Save Converted File As window:
8.
Click the
Save
button.
The file is saved and then opened in an application associated with the file type you selected, if
available on your system.
Parent topic:
Convert Scanned Documents to Editable Text (OCR)
Scanning to a SharePoint Server or Cloud Service
You can use Document Capture Pro (Windows) or Document Capture (OS X) to upload scanned images
to a SharePoint server or a cloud service.
1.
Do one of the following to start Document Capture Pro (Windows) or Document Capture (OS X):
•
Windows 8.x
: Navigate to the
Apps
screen and select
Document Capture Pro
.
49
Содержание DS-510
Страница 1: ...DS 510 User s Guide ...
Страница 2: ......
Страница 6: ......
Страница 11: ...Lights 1 The error light 2 The Ready light Parent topic Scanner Parts Locations 11 ...
Страница 14: ...Parent topic Scanner Basics 14 ...
Страница 22: ...Note Do not load a plastic card vertically 5 Slide the edge guides against the edges of the plastic card 22 ...
Страница 36: ...You see a window like this 2 Click the Scan icon 36 ...
Страница 78: ...Parent topic Solving Problems 78 ...


