24
Preparation for Using Cinema Color Editor
Installing Cinema Color Editor
If any other applications are open, close them before installing Cinema Color Editor.
If you use a Macintosh computer that the previous version of Cinema Color Editor has been
installed, uninstall it before installing the newer version.
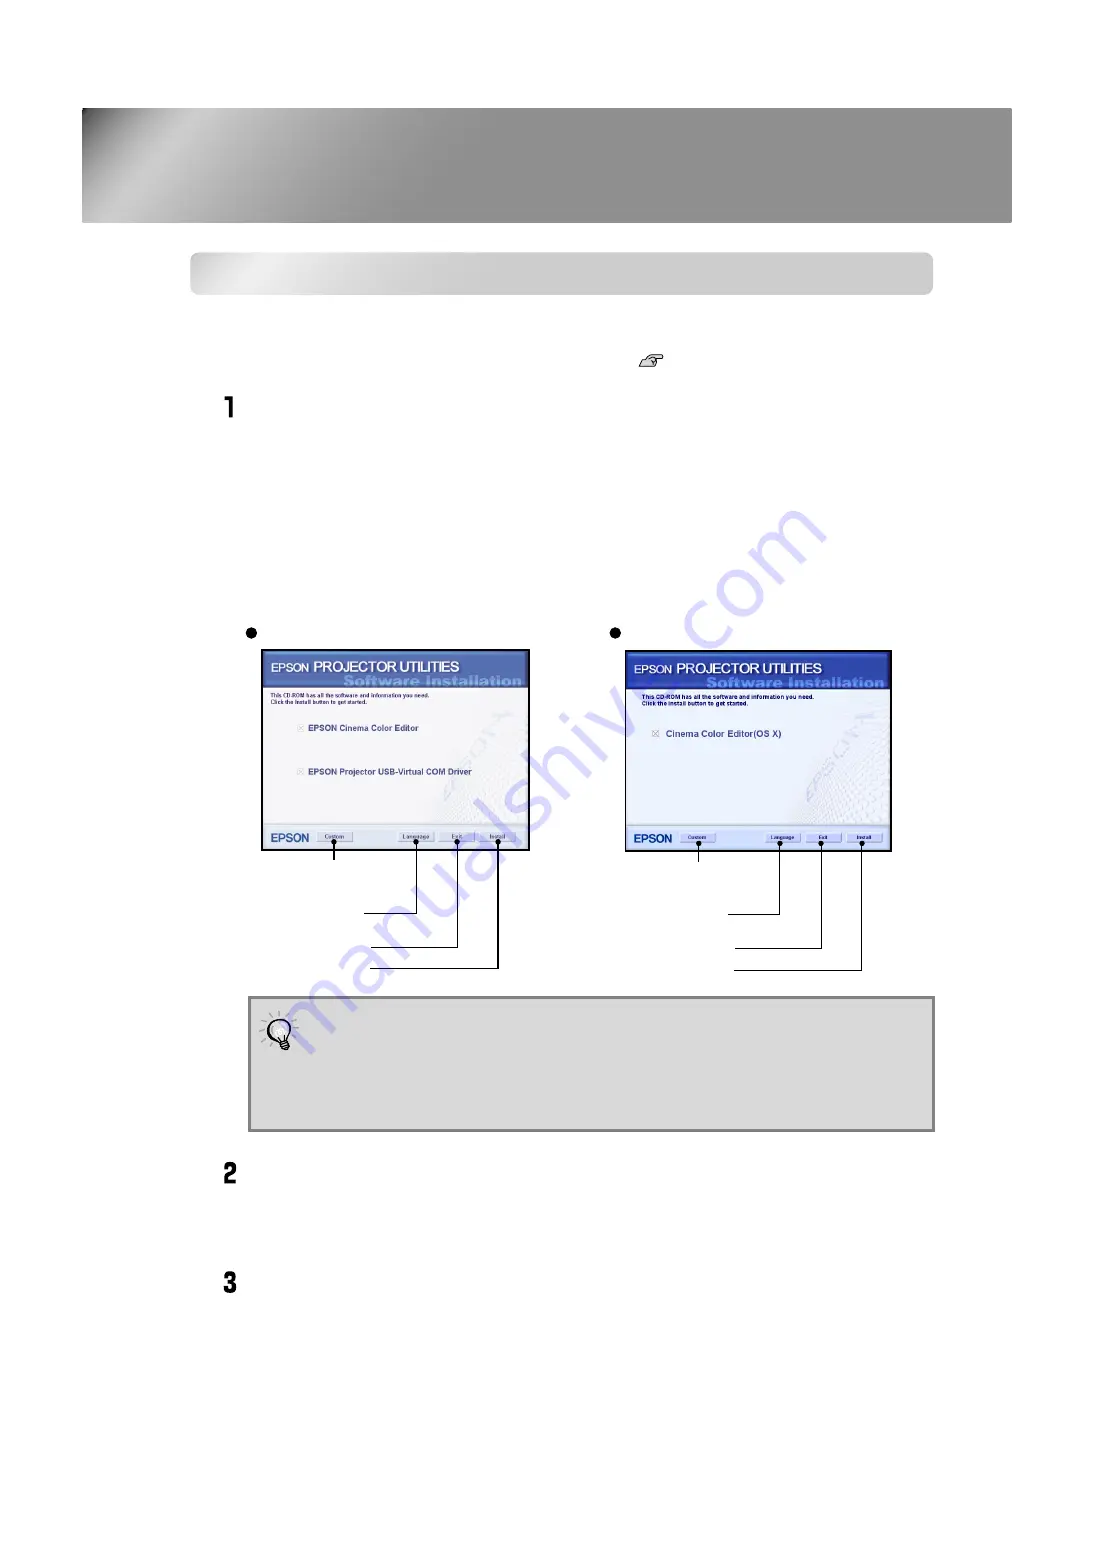
Insert the accessory Cinema Color Editor CD-ROM into your CD-ROM drive.
A virus check program window will be displayed, so check the contents of this window and
then click [Continue].
The software verification window will be displayed.
Check the settings and then click [Install].
Installation will start. Follow the instructions which appear on the screen to complete the
installation.
Click [Exit] to finish the installation.
If using a Macintosh and a message may be displayed prompting you to restart the computer. If
this happens, follow the instructions in the message and restart your computer.
Windows:
The installer will start
automatically.
Macintosh:
Click the "Installer for Mac OS
Classic" icon or the "Installer for
Mac OS X" icon in the "EPSON"
window, depending on the
operating system you are using.
If using Windows:
•
If connecting to a computer using a USB cable, be sure to install the USB driver
(EPSON Projector USB-Virtual COM Driver).
•
If the setup program does not start automatically, click [Start] - [Run] and then
open the "Browse" dialogue box and select "[CD-ROM drive]:\Epsetup.exe" and
then click [OK].
Windows
Start installation
Close the installer
Change the
display language
Select the software
to be installed
Macintosh
Start installation
Close the installer
Change the
display language
Select the software
to be installed


