


42
Registering an administrator
Register an administrator who will administer and manage the product. After registering the administrator, other
users who will use the product can be registered. (See “Registering users” on page 79 in this guide for the procedure
to register the user.)
1
Start Internet Explorer on the computer, and enter the IP address
(http
s
://xxx. xxx. xxx. xxx)
that was set for the product into the address bar.
In this example, we enter https://192.168.192.168.
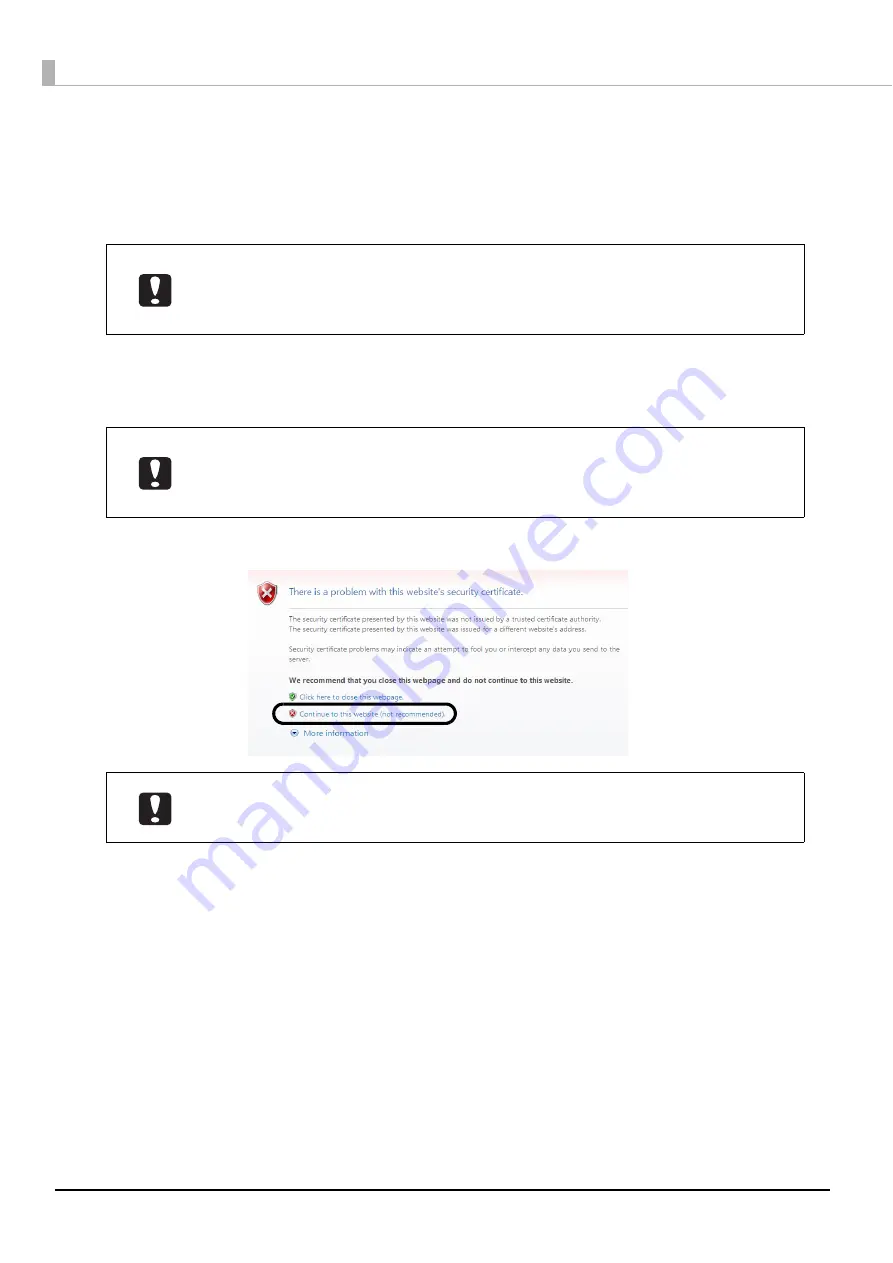
2
Click [Continue to this website (not recommended).] if a security warning screen appears.
•
Two or more administrators must be assigned to monitor the product’s status constantly
and to be able to respond quickly when a warning or error occurs.
•
In Security Mode, the administrator who is registered first is also registered as the
approver.
•
In the PIN Controlled Mode or Security Mode, enter “https” instead of “http” in order to
perform encrypted communication.
•
The IP address setting can be checked with the product’s control panel (“Top menu” –
“Network” – “Check settings”).
After the CA certificate is imported, the security warning screen is not displayed. See
“Installing digital certificates” on page 56 in this guide for the procedure to import the CA
certificate.
Содержание Disc producer PP-100N Security
Страница 1: ...Administrator s Guide M00012700 ...
Страница 22: ...22 3 Grasp the fixture on the top plate and slide the top plate backwards slightly 4 Remove the top plate ...
Страница 33: ...33 Preparation 4 Close the disc cover ...
Страница 49: ...49 Preparation 4 Click OK ...
Страница 88: ...88 4 Click OK The user list of the User management screen appears Check that the user was deleted ...
Страница 91: ...91 Administration and Management 6 Click OK ...
Страница 112: ...112 The usage statuses of drivers 1 and 2 and the number of published discs appear in the Device screen ...
Страница 140: ...140 5 Grasp the fixture inside the product top and slide it backwards slightly 6 Remove the top plate ...
Страница 144: ...144 5 Grasp the fixture on the top plate and slide it backwards slightly 6 Remove the top plate ...


