


133
Troubleshooting
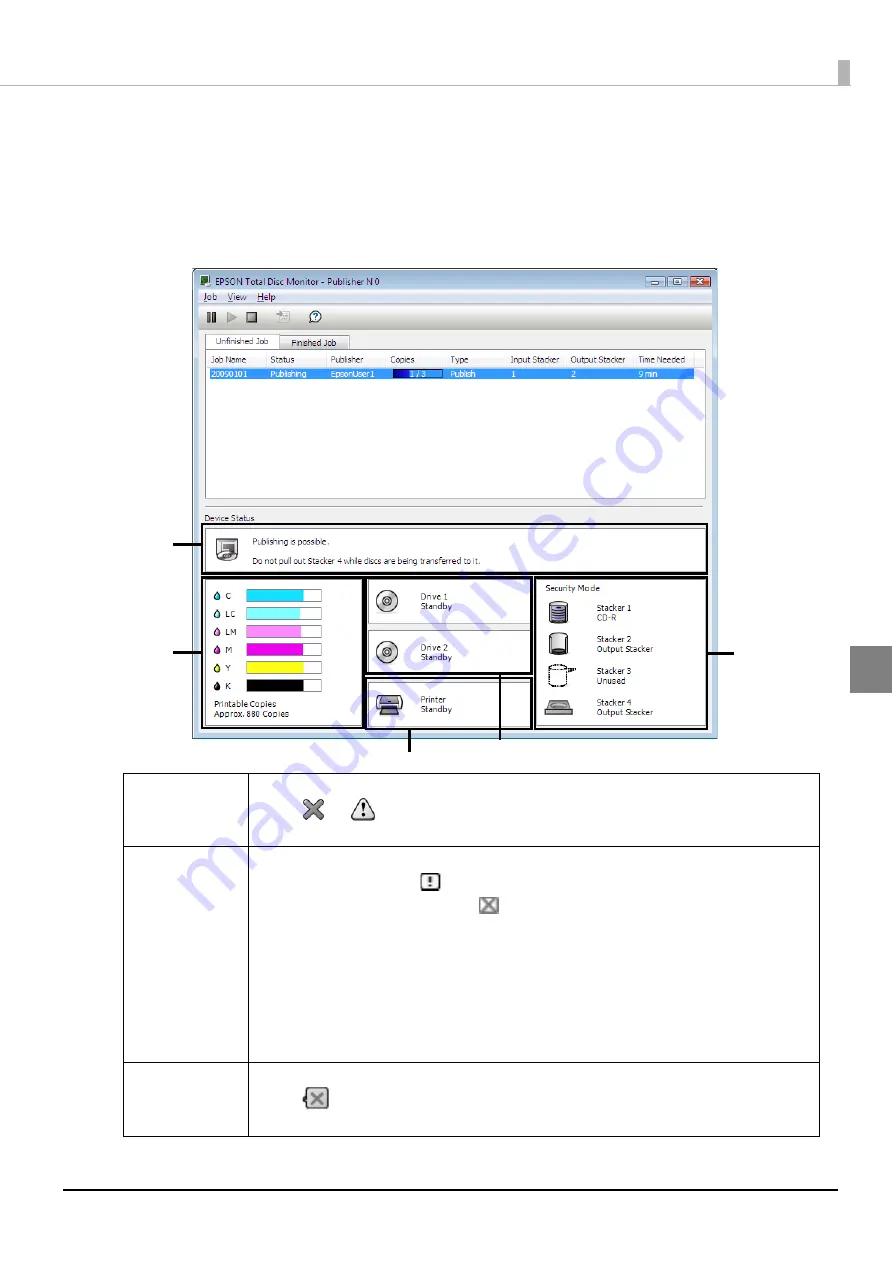
Checking with EPSON Total Disc Monitor
EPSON Total Disc Monitor is a utility that enables checking of the status of this product (PP-100N) and the remedy
procedures for errors.
See “Starting EPSON Total Disc Monitor” in the
PP-100N Security User’s Guide
for details on the EPSON Total Disc
Monitor startup procedure.
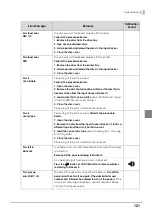
Device Status
This displays the status of this product (PP-100N), error descriptions and messages.
When
or
is displayed, check the product (PP-100N) by referring to the
displayed remedy procedure.
Ink Status
This displays the remaining ink level.
The ink level is low when
is displayed. Obtain a replacement ink cartridge.
The ink should be replaced when
is displayed. Replace with a new ink cartridge.
See “Changing the ink cartridge” in the
PP-100N Security User’s Guide
for the ink
cartridge changing procedure.
The number of printable labels is an estimate of how many more of the same type of
labels as last time can be printed. This value may differ slightly from the actual value
due to factors such as the printing data and printing environment. Values of 1000 or
more are displayed as “1000 or more,” and quantities fewer than 1000 discs are
displayed in 10-disc units.
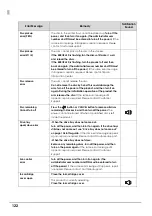
CD/DVD Drive
Status
This displays the CD/DVD drive status.
When
is displayed on the drive icon, check the product drive by referring to the
displayed message.
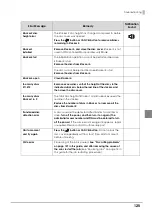
Ink Status
Printer Status
Stacker Status
Device Status
CD/DVD Drive Status
Содержание Disc producer PP-100N Security
Страница 1: ...Administrator s Guide M00012700 ...
Страница 22: ...22 3 Grasp the fixture on the top plate and slide the top plate backwards slightly 4 Remove the top plate ...
Страница 33: ...33 Preparation 4 Close the disc cover ...
Страница 49: ...49 Preparation 4 Click OK ...
Страница 88: ...88 4 Click OK The user list of the User management screen appears Check that the user was deleted ...
Страница 91: ...91 Administration and Management 6 Click OK ...
Страница 112: ...112 The usage statuses of drivers 1 and 2 and the number of published discs appear in the Device screen ...
Страница 140: ...140 5 Grasp the fixture inside the product top and slide it backwards slightly 6 Remove the top plate ...
Страница 144: ...144 5 Grasp the fixture on the top plate and slide it backwards slightly 6 Remove the top plate ...


