218
Caution:
Never turn off the product during a cleaning cycle or you may damage it.
6.
When the cleaning cycle is finished, you can check to see if the nozzles are clean; click
Print Nozzle
Check Pattern
and click
.
7.
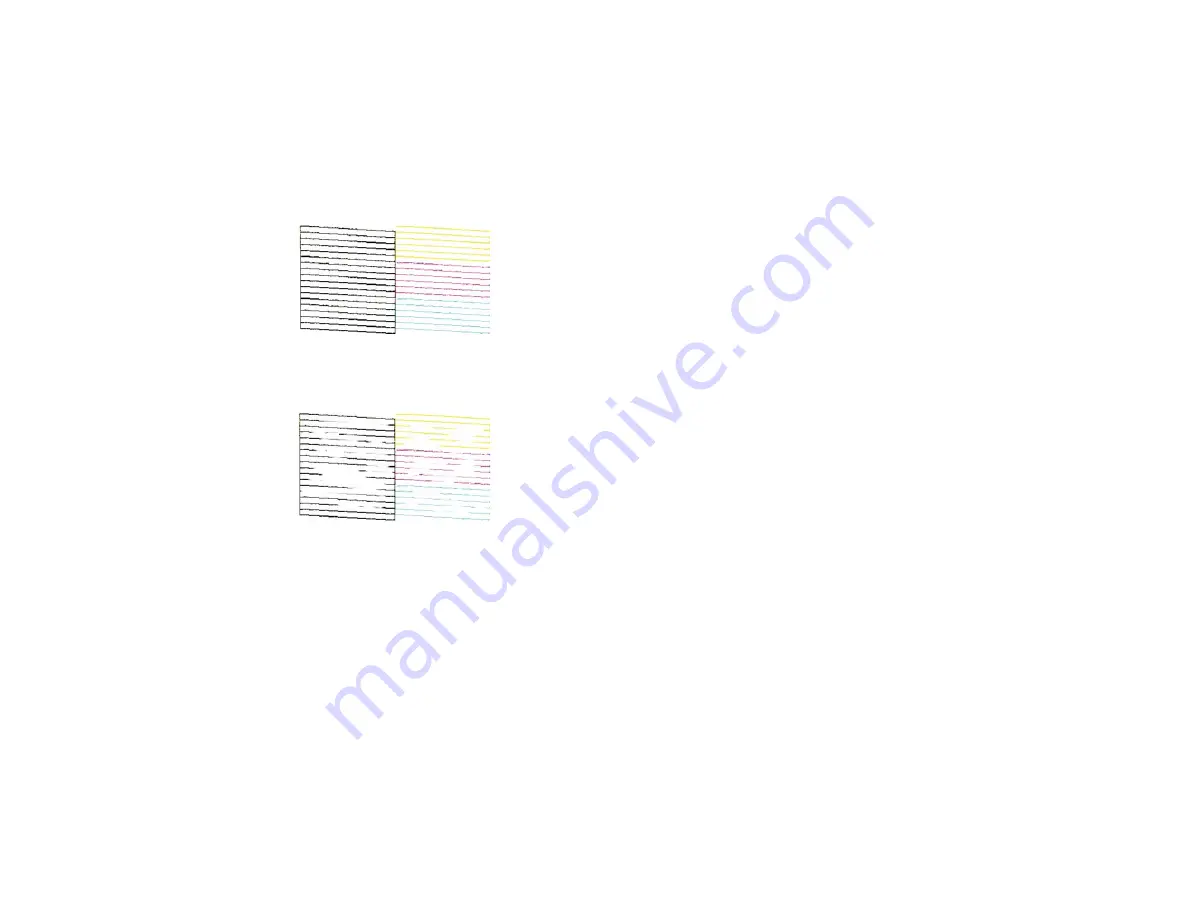
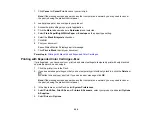
Check the printed pattern to see if there are gaps in the lines.
Print head is clean
Print head needs cleaning
• If there are no gaps, click
Finish
.
• If there are gaps or the pattern is faint, click
Clean
to clean the print head again.
If you don’t see any improvement after cleaning the print head up to 4 times, wait at least 6 hours without
printing. Then try cleaning the print head again. If quality still does not improve, contact Epson.
Parent topic:
Related tasks
Cleaning the Print Head Using the Product Control Panel
Checking the Nozzles Using a Computer Utility
Aligning the Print Head Using the Product Control Panel
You can align the print head using the control panel on your product.
Содержание C11CG31201
Страница 1: ...WF 2850 User s Guide ...
Страница 2: ......
Страница 13: ...13 WF 2850 User s Guide Welcome to the WF 2850 User s Guide For a printable PDF copy of this guide click here ...
Страница 111: ...111 10 Select the Layout tab 11 Select the orientation of your document as the Orientation setting ...
Страница 137: ...137 You see an Epson Scan 2 window like this ...
Страница 139: ...139 You see an Epson Scan 2 window like this ...
Страница 141: ...141 You see this window ...
Страница 226: ...226 4 Lift up the scanner unit 5 Using the flashlight check the translucent film shown here for ink smears ...
Страница 230: ...230 Print Head Cleaning ...
Страница 249: ...249 3 Open the scanner unit 4 Carefully remove any paper jammed inside the product ...
Страница 253: ...253 3 Open the ADF cover 4 Carefully remove any jammed pages from beneath the ADF 5 Raise the ADF input tray ...


