Touch Unit and Control Pad
Installation GuideGuide d’installation de l’unité tactile
et du boîtier de commande
CPD-50949R1
Printed in XXXXXX
Pays d’impression : XXXXXX
Страница 1: ...Touch Unit and Control Pad Installation Guide Guide d installation de l unité tactile et du boîtier de commande ...
Страница 2: ...Touch Unit and Control Pad Installation Guide ...
Страница 3: ...o prevent personal injury or property damage Make sure you understand these warnings when reading this installation guide Safety Precautions for Installation This symbol indicates information that if ignored could possibly result in personal injury or even death due to incorrect handling This symbol indicates information that if ignored could possibly result in personal injury or physical damage d...
Страница 4: ... from the Touch Unit If such optical devices are applied it could cause personal injury or fire Do not look into the Touch Unit s laser diffusion ports This could cause injury to eyesight Extra care should be taken when children are present Do not view the laser light using optical devices such as a magnifying glass within a range of 2 75 inches 70 mm Viewing at close range could cause injury to e...
Страница 5: ...ot operate correctly if anything is obstructing the infrared signal When installing the touch unit above the frame of a whiteboard use the included Touch Unit Bracket If the distance from the wall to the surface of the whiteboard is greater than 2 inches 51 mm you must install the Touch Unit on the whiteboard If the frame of the whiteboard extends more than 0 1 inch 3 mm away from the board surfac...
Страница 6: ...he installation pattern Remove the dial cover Determine the installation position for the Touch Unit Install the Touch Unit Connect the cable Adjust the angle Attach labels Attach cover 10 11 11 11 12 13 14 17 17 26 27 27 27 28 29 30 31 31 39 39 4 Installing the Control Pad BrightLink 697Ui and BrightLink Pro 1450Ui 1460Ui 1470Ui Check the installation location Remove the front cover Attach the Co...
Страница 7: ...y when attaching the Touch Unit above the frame of a whiteboard When installing the installation plate you will also need three 3 M4 wood screws or M4 anchor bolts not included Tape approx 2 4 inches 6 cm for securing the markers 12 Label 4 Touch Unit Touch Unit connection cable Infrared deflector approx 11 2 inches 28 5 cm 8 Spacer for screw hole 3 Marker x2 Installation plate M4 12 mm hexagon so...
Страница 8: ...ons and weight The Touch Unit weighs approximately 16 ounces 450 g Attached labels The Touch Unit is a Class 1 laser product that conforms to the JIS C 6802 2011 standard There are warning labels affixed to the Touch Unit to indicate that it is a Class 1 laser product The labels contain the following information Invisible laser radiation Do not view the beam directly with optical instruments Class...
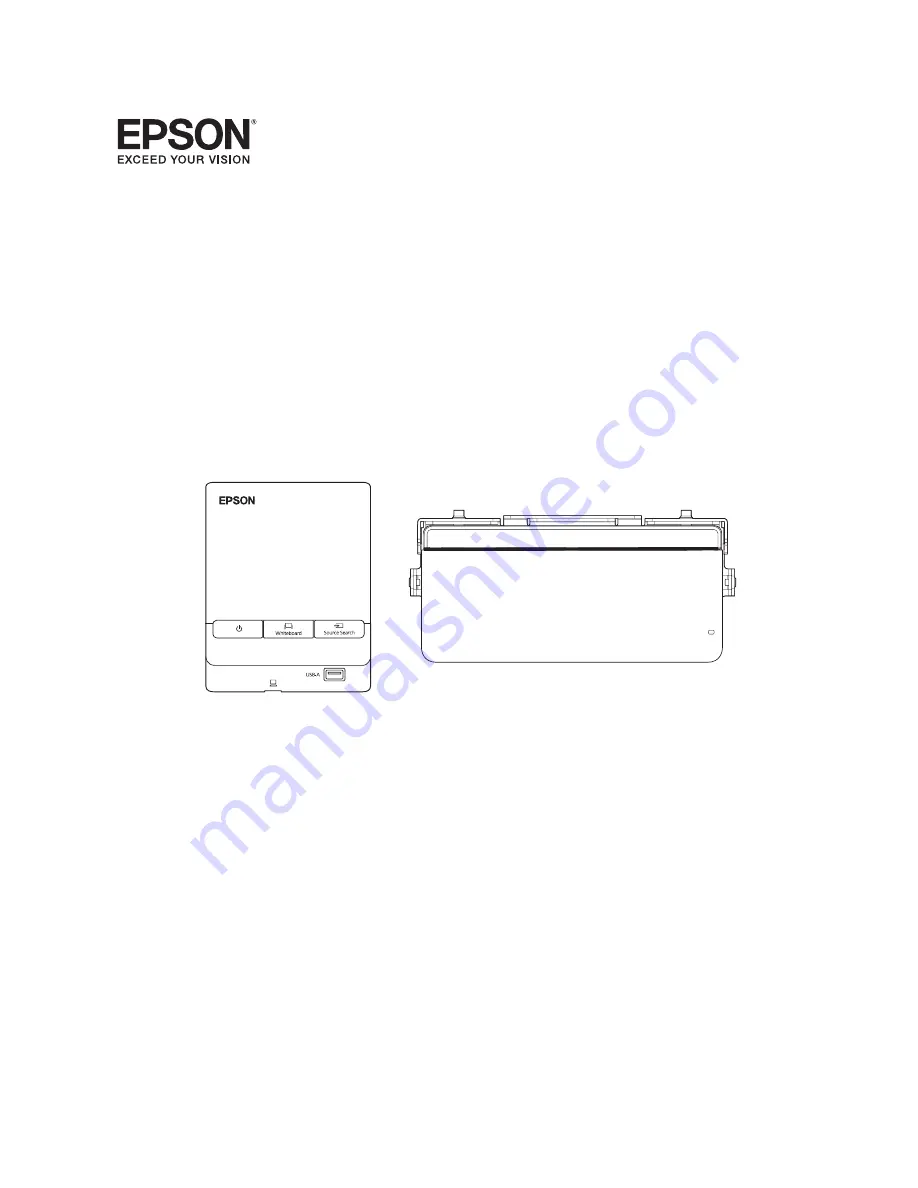
Страница 9: ...e Touch Unit Control Pad External dimensions and weight The Control Pad weighs approximately 8 2 ounces 262 g 5 4 in 135 9 mm 0 6 in 15 47 mm 0 1 in 3 5 mm 1 1 in 29 mm 4 2 in 107 mm 1 9 in 47 mm 1 2 in 30 9 mm 6 0 in 153 5 mm 0 4 in 11 5 mm 4 3 in 109 mm 4 4 in 111 mm 2 5 in 63 3 mm 2 0 in 51 5 mm ...
Страница 10: ...remove the cable cover and route the cables through the opening Route the printer cable along the groove on the back of the Control Pad Pen stand external dimensions and weight The pen stand weighs approximately 3 3 ounces 93 g 4 0 in 101 9 mm 1 7 in 44 4 mm 1 4 in 35 5 mm 2 8 in 70 mm 1 4 in 36 mm 3 9 in 99 9 mm 1 1 in 28 8 mm 1 1 in 28 8 mm ...
Страница 11: ...e Touch Unit above the frame of a whiteboard see Installing the Touch Unit above a whiteboard on page 11 If you are installing the Touch Unit on a whiteboard see Installing the Touch Unit on a whiteboard on page 27 If the distance from the wall to the surface of the whiteboard is greater than 2 inches 51 mm you must install the Touch Unit on the whiteboard If the frame of the whiteboard extends mo...
Страница 12: ...isplay the installation pattern 1 Press the Menu button on the remote control or the projector control panel 2 Select Easy Interactive Function from the Extended menu 3 Select Touch Unit Setup Install the Touch Unit Bracket on a flat smooth unwarped surface If there is unevenness on the screen surface of more than 0 2 inch 5 mm in any direction your fingers may not be detected and finger touch ope...
Страница 13: ... Select Installation Pattern The Installation pattern is displayed on the projected image C Remove the dial cover 1 Loosen the screw at the bottom of the dial cover 2 Slide the dial cover down to remove it ...
Страница 14: ...ositions The center line of the installation pattern align it with the center line of the installation plate 1 to 4 inches 25 to 100 mm from the top edge of the projected image align with the bottom edge of the installation plate The Touch Unit must be installed above the image area 1 0 to 4 0 in 25 to 100 mm ...
Страница 15: ...ith the M4 25 mm hexagon socket head cap bolts 2 supplied Adjust the position of the Touch Unit so that the two screw holes align with the holes on the securing plate Tighten the bolts with the supplied hexagon wrench When attaching the Touch Unit to the securing plate be careful not to trap your fingers or any other part of your body between the magnets and the securing plate Caution ...
Страница 16: ... the supplied hexagon wrench 4 Measure the distance from the wall to the surface of the whiteboard f If the distance from the wall to the surface of the whiteboard is greater than 2 inches 51 mm you must install the Touch Unit on the whiteboard If the frame of the whiteboard extends more than 0 1 inch 3 mm away from the board surface you must install the Touch Unit on the whiteboard ...
Страница 17: ...on wrench when you have finished aligning the Touch Unit 6 Insert the M4 55 mm or M4 70 mm hexagon socket head cap bolt into Touch Unit and tighten the bolt until the Touch Unit is parallel to the installation plate The bolt used varies based on the distance from the wall to the surface of the whiteboard f that you measured in step 4 If f is 0 8 to 1 4 inches 20 to 35 mm use the M4 55 mm bolt If f...
Страница 18: ... position of your fingers 1 Select Easy Interactive Function from the Extended menu Make sure you use the supplied Touch Unit connection cable Operations are not possible with a commercially available cable Make sure to calibrate the interactive pen s before adjusting the angle Press the User button on the remote control and select Yes to perform an auto calibration Refer to the projector s User s...
Страница 19: ...urns blue 4 Select Angle Adjustment When Power is set to On the Touch Unit automatically powers up the next time the projector is turned on Do not look into the projector s projection window or the Touch Unit s laser diffusion ports located on the back of the Touch Unit this could cause injury to eyesight Warning ...
Страница 20: ...ayed 6 Tighten the adjustment screw on the Touch Unit one turn with the supplied hexagon wrench 7 Turn both adjustment dials on the Touch Unit counterclockwise until you hear a click Then press the button on the remote control When adjusting the dials make sure to stop turning when you hear the click ...
Страница 21: ...left and right of the projection screen attach the markers to the projection screen as follows For magnetic screens Place the bottom of the markers onto the screen For non magnetic screens Use the supplied tape to secure the markers Make sure that both ends of the markers are flush with the screen Do not place anything other than the markers near the projected image during angle adjustment If othe...
Страница 22: ...side of the target of the same color blue and green on either side Loosening the adjustment screw moves the pointers diagonally up towards the center of the projected image Tightening the adjustment screw moves the pointers diagonally down away from the center of the projected image When the pointers are inside the target the circles become solid ...
Страница 23: ...The following screen is displayed 11 Turn the adjustment dials on the Touch Unit to move the circles so that they move inside of the target of the same color blue and green on either side Turning an adjustment dial clockwise moves the pointer diagonally up towards the center of the projected image ...
Страница 24: ...pointers are inside the target the circles become solid 12 When the circles on the left and right become solid press the button on the remote control The following screen is displayed If a dial makes a clicking sound the pointer will not move any further When turning the dials make sure shadows from your arm and body do not cover the markers ...
Страница 25: ...again from step 4 14 Place the markers at the bottom marker positions 2 When angle adjustment is performed correctly the bottom circles become solid If the bottom circles do not become solid start again from step 4 15 When you have finished checking the marker positions remove the markers and press the button on the remote control The following confirmation screen is displayed ...
Страница 26: ...from around the projected screen When you are finished press the or button on the remote control and repeat step 12 If the dots still remain after removing obstacles select Additional Adjustments and follow the instructions If the dots still remain or there are obstacles that cannot be removed such as whiteboard trays or frames go to step 17 Finger touch operations may not function correctly if yo...
Страница 27: ...t disappear even after attaching the infrared deflectors select Additional Adjustments and follow the instructions If the dots do not disappear even after performing the above procedures contact Epson 18 Perform touch calibration by pressing Menu on the remote control On the Extended menu select Easy Interactive Function then Touch Unit Setup Select Touch Calibration and follow the instructions H ...
Страница 28: ...ive Function from the Extended menu There are magnets built in to the back of the Touch Unit Typically the Touch Unit should be installed by attaching the magnets to the screen or whiteboard If the Touch Unit cannot be attached with the magnets use commercially available M4 screws 3 Install the Touch Unit on a flat smooth unwarped surface If there is unevenness on the screen surface of more than 0...
Страница 29: ...28 3 Select Touch Unit Setup 4 Select Installation Pattern The Installation pattern is displayed on the projected image C Remove the dial cover 1 Loosen the screw at the bottom of the dial cover ...
Страница 30: ... following installation positions The center line of the installation pattern align it with the center line of the Touch Unit 1 to 4 inches 25 to 100 mm from the top edge of the projected image align with the bottom edge of the Touch Unit The Touch Unit must be installed above the image area 1 0 to 4 0 in 25 to 100 mm ...
Страница 31: ... or screens attach the spacers to the screw holes on the back of the Touch Unit Secure the Touch Unit with three 3 M4 screws not included When installing the Touch Unit on a magnetic surface be careful not to trap your fingers or any other part of your body between the magnets and the installation surface Caution 1 7 in 43 mm 0 8 in 20 mm ...
Страница 32: ...ing from the Touch Unit so that the Touch Unit can detect the position of your fingers 1 Select Easy Interactive Function from the Extended menu Make sure to calibrate the interactive pen s before adjusting the angle Press the User button on the remote control and select Yes to perform an auto calibration Refer to the projector s User s Guide for detailed instructions on calibrating the pen s ...
Страница 33: ...urns blue 4 Select Angle Adjustment When Power is set to On the Touch Unit automatically powers up the next time the projector is turned on Do not look into the projector s projection window or the Touch Unit s laser diffusion ports located on the back of the Touch Unit this could cause injury to eyesight Warning ...
Страница 34: ...he bracket The Angle Adjustment screen is displayed 6 Turn the adjustment dials on the Touch Unit counterclockwise until you hear a click Then press the button on the remote control When adjusting the dials make sure to stop turning when you hear the click ...
Страница 35: ...left and right of the projection screen attach the markers to the projection screen as follows For magnetic screens Place the bottom of the markers onto the screen For non magnetic screens Use the supplied tape to secure the markers Make sure that both ends of the markers are flush with the screen Do not place anything other than the markers near the projected image during angle adjustment If othe...
Страница 36: ... pointer diagonally up towards the center of the projected image Turning an adjustment dial counterclockwise moves the pointer diagonally down away from the center of the projected image When the pointers are inside the target the circles become solid If a dial makes a clicking sound the pointer will not move any further When turning the dials make sure shadows from your arm and body do not cover ...
Страница 37: ...top marker positions 1 When angle adjustment is performed correctly the upper circles become solid If the upper circles do not become solid start again from step 4 11 Place the markers at the bottom marker positions 2 When angle adjustment is performed correctly the bottom circles become solid If the bottom circles do not become solid start again from step 4 ...
Страница 38: ...ontrol The following confirmation screen is displayed 13 Trace the dots with your finger as shown When angle adjustment is performed correctly the traced dots disappear Finger touch operations may not function correctly if you are wearing bandages artificial nails nail polish or anything else that may obstruct your fingers ...
Страница 39: ...at the laser is not reflected by the obstacle Make sure to stick the deflectors between the dots and the obstacle and use as many deflectors as necessary to match the width of the dots After placing the infrared deflectors press the or button on the remote control and then repeat step 12 If the dots do not disappear even after attaching the infrared deflectors select Additional Adjustments and fol...
Страница 40: ...h Unit Match the centers of the labels with the tabs on the Touch Unit I Attach cover Attach the dial cover Make sure to tighten the screw at the bottom of the cover If the Touch Unit moves out of position use the position of the labels to determine where to reposition the Touch Unit ...
Страница 41: ...k the installation location Make sure there is enough space surrounding the Control Pad to easily connect or disconnect cables When installing the Pen Stand do not block the groove in the front cover of the Control Pad The Control Pad should only be connected to the BrightLink 697Ui and BrightLink Pro 1450Ui 1460Ui 1470Ui Do not connect the Control Pad to any other projectors Caution 2 in 50 mm 3 ...
Страница 42: ...operate correctly if anything is obstructing the infrared signal A Remove the front cover B Attach the Control Pad Attach the Control Pad with commercially available M4 20 mm screws 4 0 8 in 20 mm 4 0 in 100 mm 4 0 in 100 mm Make sure the screws are not angled Make sure the Control Pad is firmly attached Do not attach the Control Pad with double side tape or magnets Warning ...
Страница 43: ...Control Pad Projector function Required cables Supplying power from the projector Stereo mini connection cable included Projecting images from a USB flash drive USB cable 1 Saving data to a USB flash drive Projecting computer images with USB Display or performing mouse functions using the Easy Interactive Function USB cable 2 USB cable 3 Controlling the computer with a USB keyboard and the remote ...
Страница 44: ...43 English E Attach the front cover ...
Страница 45: ...on the computer OS X users also need to install a driver that enables pen or finger touch interactivity to work Both software programs are included with the BrightLink or BrightLink Pro projector For details see the online User s Guide or visit U S epson com support brightlinkdownloads Canada epson ca support brightlinkdownloads Latin America www epson com jm support Attaching a Security Cable Use...
Страница 46: ...Guide d installation de l unité tactile et du boîtier de commande ...
Страница 47: ...lation à portée de main pour pouvoir vous y reporter ultérieurement Lisez les consignes de sécurité dans le Guide de l utilisateur en ligne de votre projecteur et suivez les instructions figurant dans ce document Explication des symboles Les symboles d avertissement ci dessous sont utilisés dans ce guide d installation afin d éviter les blessures corporelles ou les dommages matériels Assurez vous ...
Страница 48: ... des câbles peut provoquer un incendie ou un choc électrique N appliquez pas d appareils optiques tels qu une loupe ou un télescope à la lumière laser diffusée depuis l unité tactile L utilisation d appareils optiques dans ces conditions pourrait entraîner des blessures ou un incendie Ne regardez pas dans les ports de diffusion laser de l unité tactile Cela pourrait entraîner des problèmes oculair...
Страница 49: ... un tableau blanc fixez la à l aide d aimants ou de vis Assurez vous qu il n y a pas d obstacles par exemple des câbles ou des objets protubérants comme des plateaux pour tableau blanc ou des cadres épais dans les zones ombrées de l illustration ci dessous L unité tactile ne fonctionnera pas correctement si le signal infrarouge est bloqué 5 mm 0 2 po 20 mm 0 8 po 100 mm 4 0 po 100 mm 4 0 po ...
Страница 50: ...e l unité tactile inclus Si la distance entre le mur et la surface du tableau blanc est supérieure à 51 mm 2 po vous devez installer l unité tactile sur le tableau blanc Si le cadre du tableau blanc est de plus de 3 mm 0 1 po d épaisseur vous devez installer l unité tactile sur le tableau blanc ou l écran ...
Страница 51: ... installation Retirez le couvercle des cadrans Déterminez la position d installation de l unité tactile Installez l unité tactile Branchez le câble Réglez l angle Collage des étiquettes Fixez le couvercle 55 55 55 56 57 58 58 61 62 71 72 72 72 73 74 75 76 76 84 84 4 Installation du boîtier de commande BrightLink 697Ui et BrightLink Pro 1450Ui 1460Ui 1470Ui Vérifiez l emplacement pour l installatio...
Страница 52: ...tion de l unité tactile au dessus du cadre d un tableau blanc Lorsque vous fixez la plaque d installation vous aurez aussi besoin de trois 3 vis à bois ou boulons d ancrage M4 non inclus Rubans adhésifs approx 6 cm 2 4 po pour fixer les marqueurs 12 Étiquettes 4 Unité tactile Câble de connexion de l unité tactile Déflecteurs infrarouges environ 28 5 cm 11 2 po 8 Rondelles d espacement pour trou de...
Страница 53: ...oids L unité tactile pèse environ 450 g 16 oz Étiquettes d avertissement L unité tactile est un produit laser de classe 1 qui est conforme à la norme JIS C 6802 2011 Des étiquettes d avertissement sont apposées à l unité tactile afin d indiquer qu il s agit d un produit laser de classe 1 Les étiquettes contiennent les informations suivantes Radiations laser invisibles Évitez de regarder le faiscea...
Страница 54: ...aser à l arrière de l unité tactile Boîtier de commande Dimensions externes et poids Le boîtier de commande pèse environ 262 g 9 2 oz 135 9 mm 5 4 po 15 47 mm 0 6 po 3 5 mm 0 1 po 29 mm 1 1 po 107 mm 4 2 po 47 mm 1 9 po 30 9 mm 1 2 po 153 5 mm 6 0 po 11 5 mm 0 4 po 109 mm 4 3 po 111 mm 4 4 po 63 3 mm 2 5 po 51 5 mm 2 0 po ...
Страница 55: ... Sinon retirez le cache câbles et faites passer les câbles à travers l ouverture Faites passer le câble de l imprimante le long de la rainure à l arrière du boîtier de commande Dimensions externes et poids du porte crayon Le porte crayon pèse environ 93 g 3 3 oz 101 9 mm 4 0 po 44 4 mm 1 7 po 35 5 mm 1 4 po 70 mm 2 8 po 36 mm 1 4 po 99 9 mm 3 9 po 28 8 mm 1 1 po 28 8 mm 1 1 po ...
Страница 56: ...nc Suivez les étapes ci dessous pour installer l unité tactile au dessus d un tableau blanc à l aide du support de l unité tactile Il est possible que l apparence de certains menus soit différente des illustrations mais les instructions d installation demeurent les mêmes A Mettez le projecteur sous tension Si la distance entre le mur et la surface du tableau blanc est supérieure à 51 mm 2 po vous ...
Страница 57: ... sur le bouton Menu de la télécommande ou du panneau de commande du projecteur 2 Sélectionnez Easy Interactive Function depuis le menu Avancé 3 Sélectionnez Config uni tactile 4 Sélectionnez Motif d installation Télécommande Panneau de configuration ...
Страница 58: ...motif d installation s affiche sur l image projetée C Retirez le couvercle des cadrans 1 Desserrez la vis dans la partie inférieure du couvercle des cadrans 2 Faites glisser le couvercle des cadrans afin de le retirer ...
Страница 59: ...centrale de la plaque d installation 25 à 100 mm 1 à 4 po depuis le bord supérieur de l image projetée Alignez avec le bord inférieur de la plaque d installation E Installez le support de l unité tactile 1 Fixez la plaque d installation au mur à l aide de trois 3 vis à bois ou boulons d ancrage M4 non inclus L unité tactile doit être installée au dessus de la zone d image 25 à 100 mm 1 à 4 po ...
Страница 60: ...Serrez les boulons avec la clé à six pans fournie 3 Fixez l unité tactile et la plaque de fixation à la plaque d installation à l aide des boulons à tête cylindrique à six pans M4 12 mm 2 fournis Serrez les boulons sur la plaque de fixation avec la clé à six pans fournie Lors de l installation de l unité tactile sur la plaque de fixation veillez à ne pas coincer vos doigts ou toute autre partie de...
Страница 61: ...port de l unité tactile selon la distance f mesurée à l étape 4 Lorsque vous avez terminé d aligner l unité tactile serrez les boulons avec la clé à six pans fournie Si la distance entre le mur et la surface du tableau blanc est supérieure à 51 mm 2 po vous devez installer l unité tactile sur le tableau blanc Si le cadre du tableau blanc est de plus de 3 mm 0 1 po d épaisseur vous devez installer ...
Страница 62: ...blanc f mesurée à l étape 4 Si f mesure entre 20 et 35 mm 0 8 et 1 4 po utilisez le boulon M4 55 mm Si f mesure entre 35 et 50 mm 1 4 et 2 0 po utilisez le boulon M4 70 mm F Branchez le câble Branchez le câble de connexion de l unité tactile au port de l unité tactile L autre extrémité devrait déjà être branchée au projecteur Assurez vous d utiliser le câble de connexion de l unité tactile fourni ...
Страница 63: ...ion depuis le menu Avancé 2 Sélectionnez Config uni tactile Avant d ajuster l angle assurez vous d effectuer le calibrage du ou des crayons interactifs Appuyez sur le bouton User de la télécommande et sélectionnez Oui afin d effectuer un calibrage automatique Veuillez consulter le Guide de l utilisateur en ligne pour obtenir des instructions détaillées sur le calibrage des crayons ...
Страница 64: ...eu 4 Sélectionnez Réglage de l angle Lorsque le paramètre Alimentation est réglé à On l unité tactile s allumera automatiquement au prochain démarrage du projecteur Ne regardez pas la fenêtre de projection du projecteur ou les ports de diffusion laser de l unité tactile Ceci pourrait entraîner des problèmes oculaires Avertissement ...
Страница 65: ...unité tactile un seul tour avec la clé à six pans fournie 7 Tournez les deux cadrans de réglage de l unité tactile dans le sens inverse des aiguilles d une montre jusqu à ce que vous entendiez un clic Puis appuyez sur le bouton de la télécommande Lorsque vous ajustez les cadrans assurez vous de cesser de tourner dès que vous entendez un clic ...
Страница 66: ...droite de l écran de projection fixez les marqueurs sur l écran de projection comme suit Pour les écrans magnétiques Placez la partie inférieure des marqueurs sur l écran Pour les écrans non magnétiques Utilisez le ruban fourni pour fixer les marqueurs Assurez vous que les deux bouts des marqueurs soient en contact avec la surface de l écran Ne placez rien d autre que les marqueurs à proximité de ...
Страница 67: ...e de même couleur bleu et vert sur chaque côté Lorsque vous desserrez la vis d ajustement le pointeur se déplace à la diagonale vers le haut en direction du centre de l image projetée Lorsque vous serrez la vis d ajustement le pointeur se déplace à la diagonale vers le bas en direction opposée du centre de l image projetée Lorsque les pointeurs sont dans la cible les cercles deviennent unis ...
Страница 68: ...Tournez les cadrans d ajustement de l unité tactile pour déplacer les cercles de sorte qu ils se retrouvent dans la cible de même couleur bleu et vert de chaque côté Lorsque vous tournez un cadran d ajustement dans le sens des aiguilles d une montre le pointeur se déplace à la diagonale vers le haut en direction du centre de l image projetée ...
Страница 69: ...Lorsque les pointeurs sont dans la cible les cercles deviennent unis 12 Lorsque les cercles à gauche et à droite deviennent unis appuyez sur le bouton de la télécommande L écran suivant s affiche Si vous entendez un clic provenant du cadran le pointeur ne peut plus aller plus loin Lorsque vous tournez les cadrans assurez vous que l ombre de votre bras ou de votre corps ne couvre pas les marqueurs ...
Страница 70: ...rnez à l étape 4 14 Placez les marqueurs sur les positions de marqueur inférieures 2 Si le réglage de l angle a été effectué correctement les cercles inférieurs deviennent unis Si les cercles inférieurs ne deviennent pas unis retournez à l étape 4 15 Lorsque vous avez terminé la vérification des positions des marqueurs retirez les marqueurs et appuyez sur le bouton de la télécommande L écran de co...
Страница 71: ... de projection Lorsque vous avez terminé appuyez sur le bouton ou de la télécommande et répétez l étape 12 Si les points sont toujours là après avoir retiré tous les obstacles sélectionnez Réglages suppl et suivez les instructions qui s affichent Si les points ne disparaissent pas ou si certains obstacles ne peuvent être enlevés tels que des plateaux pour tableau blanc ou des cadres passez à l éta...
Страница 72: ...déflecteurs infrarouges sélectionnez Réglages suppl et suivez les instructions qui s affichent Si les points ne disparaissent toujours pas après avoir effectué les procédures ci dessus communiquez avec Epson 18 Effectuez le calibrage tactile en appuyant sur la touche Menu de la télécommande Dans le menu Avancé sélectionnez Easy Interactive Function puis Config uni tactile Sélectionnez Calibrage ta...
Страница 73: ...Function depuis le menu Avancé Des aimants sont intégrés à l arrière de l unité tactile Normalement l unité tactile doit être installée en fixant les aimants à l écran ou au tableau blanc Si l unité tactile ne peut pas être fixée à l aide des aimants utilisez des vis M4 3 disponibles dans le commerce Installez l unité tactile sur une surface plate lisse et régulière Si des irrégularités de plus de...
Страница 74: ...ionnez Config uni tactile 4 Sélectionnez Motif d installation Le motif d installation s affiche sur l image projetée C Retirez le couvercle des cadrans 1 Desserrez la vis dans la partie inférieure du couvercle des cadrans ...
Страница 75: ...quer les positions d installation suivantes Ligne centrale du motif d installation Alignez la avec la ligne centrale de l unité tactile 25 à 100 mm 1 à 4 po depuis le bord supérieur de l image projetée Alignez avec le bord inférieur de l unité tactile L unité tactile doit être installée au dessus de la zone d image 25 à 100 mm 1 à 4 po ...
Страница 76: ...nétiques fixez les séparateurs sur les trous de vis à l arrière de l unité tactile Puis fixez l unité tactile à l aide de trois 3 vis M4 non incluses Lors de l installation de l unité tactile sur une surface magnétique veillez à ne pas coincer vos doigts ou toute autre partie de votre corps entre les aimants et la surface d installation Miseengarde 43 mm 1 7 po 20 mm 0 8 po ...
Страница 77: ...l unité tactile puisse détecter la position de vos doigts 1 Sélectionnez Easy Interactive Function depuis le menu Avancé Avant d ajuster l angle assurez vous d effectuer le calibrage du ou des crayons interactifs Appuyez sur le bouton User de la télécommande et sélectionnez Oui afin d effectuer un calibrage automatique Veuillez consulter le Guide de l utilisateur en ligne pour obtenir des instruct...
Страница 78: ... 4 Sélectionnez Réglage de l angle Lorsque le paramètre Alimentation est réglé à On l unité tactile s allumera automatiquement au prochain démarrage du projecteur Ne regardez pas la fenêtre de projection du projecteur ou les ports de diffusion laser de l unité tactile situés à l arrière de l unité tactile Ceci pourrait entraîner des problèmes oculaires Avertissement ...
Страница 79: ...gle s affiche 6 Tournez les cadrans de réglage de l unité tactile dans le sens inverse des aiguilles d une montre jusqu à ce que vous entendiez un clic Puis appuyez sur le bouton de la télécommande Lorsque vous ajustez les cadrans assurez vous de cesser de tourner dès que vous entendez un clic ...
Страница 80: ... droite de l écran de projection fixez les marqueurs à l écran de projection comme suit Pour les écrans magnétiques Placez la partie inférieure des marqueurs sur l écran Pour les écrans non magnétiques Utilisez le ruban fourni pour fixer les marqueurs Assurez vous que les deux bouts des marqueurs soient en contact avec la surface de l écran Ne placez rien d autre que les marqueurs à proximité de l...
Страница 81: ...n direction du centre de l image projetée Lorsque vous tournez un cadran d ajustement dans le sens contraire des aiguilles d une montre le pointeur se déplace à la diagonale vers le bas en direction opposée du centre de l image projetée Lorsque les pointeurs sont dans la cible les cercles deviennent unis Si vous entendez un clic provenant du cadran le pointeur ne peut plus aller plus loin Lorsque ...
Страница 82: ...ures 1 Si le réglage de l angle a été effectué correctement les cercles supérieurs deviennent unis Si les cercles supérieurs ne deviennent pas unis retournez à l étape 4 11 Placez les marqueurs sur les positions de marqueur inférieures 2 Si le réglage de l angle a été effectué correctement les cercles inférieurs deviennent unis Si les cercles inférieurs ne deviennent pas unis retournez à l étape 4...
Страница 83: ...ion suivant s affiche 13 Tracez les points avec votre doigt tel qu illustré Si le réglage de l angle est effectué correctement les points que vous avez tracés disparaissent Les opérations tactiles peuvent ne pas fonctionner correctement si vous portez des ongles artificiels ou du vernis à ongles si vos doigts sont entourés de bandages ou toute autre obstruction ...
Страница 84: ...lanc ou un cadre retirez la pellicule à l endos des déflecteurs infrarouges fournis et collez les à l écran afin que le laser ne soit pas réfléchi par l obstacle Assurez vous de coller les déflecteurs entre les points et l obstacle et d utiliser autant de déflecteurs que nécessaire pour couvrir toute la largeur des points Après avoir placé les déflecteurs infrarouges appuyez sur le bouton ou de la...
Страница 85: ...tions qui s affichent H Collage des étiquettes Apposez les étiquettes sur les onglets de chaque côté de l unité tactile Alignez le centre des étiquettes avec les onglets de l unité tactile I Fixez le couvercle Fixez le couvercle des cadrans Assurez vous de serrer la vis dans la partie inférieure du couvercle Si l unité tactile se déplace hors position utilisez les étiquettes pour déterminer où réi...
Страница 86: ... installation Assurez vous qu il y a assez d espace autour du boîtier de commande pour brancher et débrancher aisément les câbles Lorsque vous installez le porte crayon assurez vous de ne pas bloquer la rainure sur le couvercle avant du boîtier de commande Le boîtier de commande ne doit être connecté qu aux modèles BrightLink 697Ui et BrightLink Pro 1450Ui 1460Ui 1470Ui Ne connectez pas le boîtier...
Страница 87: ... le signal infrarouge est bloqué A Retirez le couvercle avant B Fixez le boîtier de commande Fixez le boîtier de commande avec des vis M4 20 mm 4 disponibles dans le commerce 20 mm 0 8 po 100 mm 4 0 po 100 mm 4 0 po Assurez vous que les vis ne sont pas en angle Assurez vous que le boîtier de commande est solidement fixé Ne fixez pas le boîtier de commande avec des aimants ou du ruban à deux côtés ...
Страница 88: ...liser le boîtier de commande Fonction du projecteur Câbles requis Alimenter depuis le projecteur Mini câble de connexion stéréo inclus Projeter des images depuis une clé USB Câble USB 1 Enregistrer des données sur une clé USB Projeter des images de l ordinateur avec USB Display ou effectuer les fonctions de souris en utilisant Easy Interactive Function Câble USB 2 Câble USB 3 Contrôler l ordinateu...
Страница 89: ...le logiciel sur l ordinateur Les utilisateurs d OS X doivent installer un pilote qui active le crayon ou l interactivité par commande tactile Les deux programmes sont inclus avec les projecteurs BrightLink ou BrightLink Pro Pour obtenir plus de détails consultez le Guide de l utilisateur en ligne ou le site Web à l adresse suivante www epson ca brightlinklogiciels Fixation d un câble de sécurité U...
Страница 90: ...CPD 50949R1 Printed in XXXXXX Pays d impression XXXXXX ...