


224
8.
If the cursor location and your finger position do not match, repeat these steps to calibrate again.
Parent topic:
Using Finger Touch Interactivity
Related concepts
Related references
Pen and Touch Setup Settings - Pen/Touch Menu
Installation Settings - Installation Menu
Using Finger Touch Operations
You can use your finger to interact with the projected screen, just as you would use an interactive pen.
You can use either a pen or your finger, or use both at the same time.
When performing touch operations with your finger, you can use up to six fingers (depending on the
interactive mode, operating system, and connection type).
Note:
A Touch Unit is optional for the BrightLink 1480Fi and must be installed for finger touch operation.
1.
Install the Touch Unit as described in the online
Installation Guide
.
Note:
If you are using an older Touch Unit, refer to the installation guide for that model.
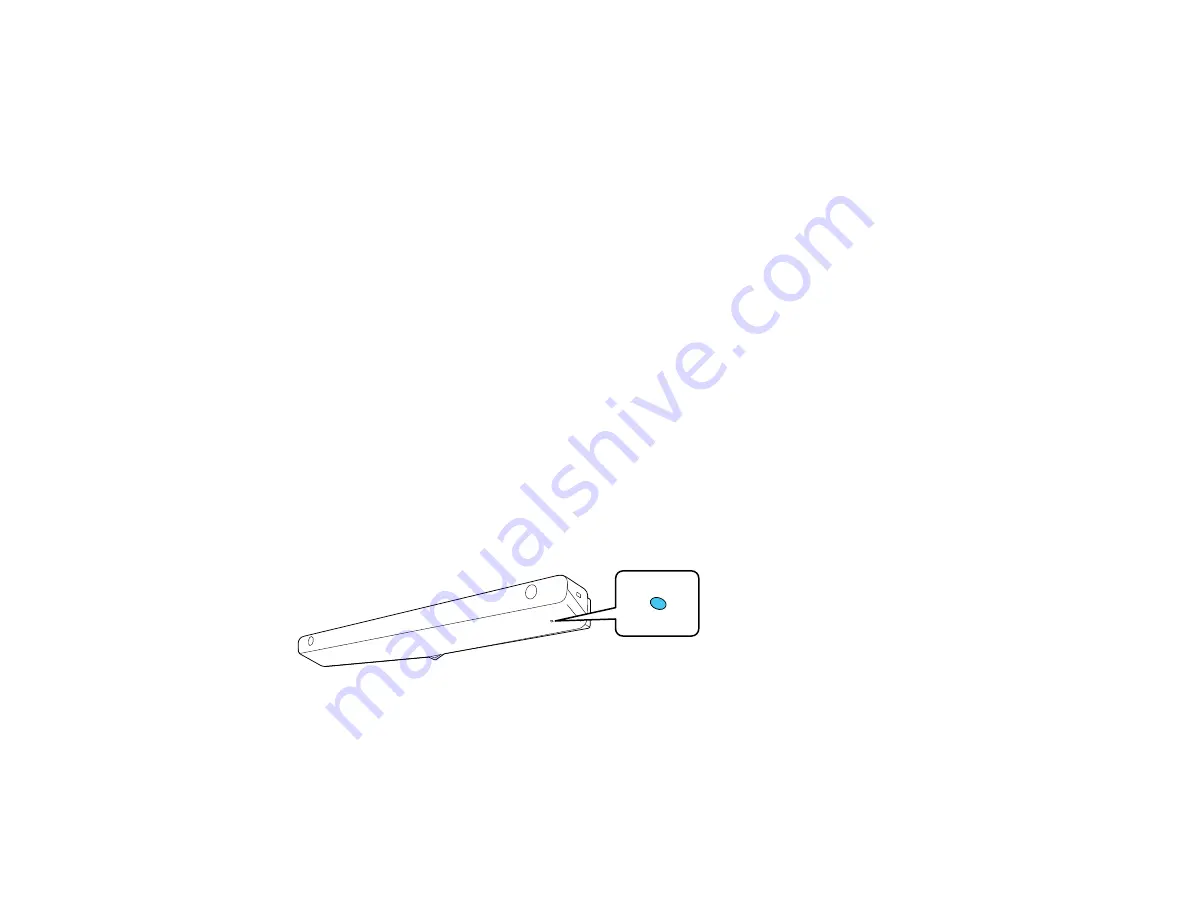
2.
Turn on your projector. This automatically turns on the Touch Unit also.
The blue light on the Touch Unit turns on.
Note:
If the blue light does not turn on, press the
Menu
button on the remote control and make sure
the
Installation > Touch Unit > Power
setting is set to
On
.
3.
Calibrate the pens.
Содержание BrightLink 1480Fi
Страница 1: ...BrightLink 1480Fi 1485Fi User s Guide ...
Страница 2: ......
Страница 28: ...28 Projector Parts Remote Control 1 Power button 2 HDMI button cycles through connected HDMI sources ...
Страница 98: ...98 You see the Epson Web Control screen 3 Select Crestron Connected ...
Страница 129: ...129 6 Move the focus lever and adjust the focus using the center reference point of the projected screen ...
Страница 144: ...144 3 Select the Operation menu and press Enter ...
Страница 165: ...165 1 Press the Menu button on the remote or control panel select the Multi Projection menu and press Enter ...
Страница 200: ...200 5 Select the Schedule menu and press Enter 6 Select Add New and press Enter You see a screen like this ...
Страница 204: ...204 Parent topic Scheduling Projector Events ...
Страница 316: ...316 3 Open the air filter cover 4 Pull the air filter out of the projector ...
Страница 325: ...325 1 Twist off the tip of the pen to remove it 2 Remove the soft tip ...
Страница 326: ...326 3 Insert the new tip 4 Twist on the pen tip Parent topic Maintaining and Transporting the Projector ...
Страница 370: ...370 Top Side ...
Страница 386: ...386 Copyright Attribution 2019 Epson America Inc 10 19 CPD 57752 Parent topic Copyright Notice ...


