


Connecting the Printer to Your Computer
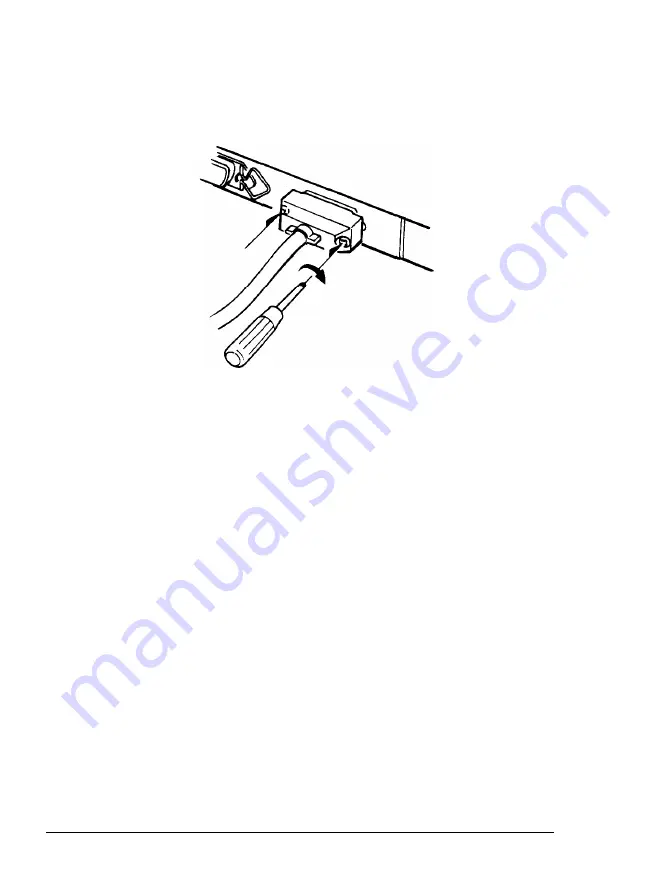
3. Use a screwdriver to fasten the screws of the connector, if
required.
4. Plug the other end of the cable into your computer. (Fasten the
screws of the connector to the interface, if required.)
This completes the connection of the serial interface cable. Now you
need to set the DIP switches for the type of serial interface you are
using.
Setting the DIP switches for the serial interface
The DIP switches are factory set for the RS-232C interface. If you are
using the RS-422A interface, you need to change the DIP switches
according to the table on the next page.
2-14
Testing and Connecting Your Printer
Содержание ActionLaser Plus
Страница 1: ......
Страница 3: ......
Страница 168: ...Transporting Your Printer 16 Repack all accessories in the accessory pack 6 38 Maintenance and Transportation ...
Страница 198: ...7 28 Troubleshooting ...
Страница 202: ...Symbol Set Tables Roman 8 Symbol Set ID 8U A 4 Character Samples and Symbol Sets ...
Страница 203: ...Symbol Set Tables ECMA 94 Latin 1 Symbol Set ID ON Character Samples and Symbol Sets A 5 ...
Страница 204: ...Symbol Set Tables IBM US PC 8 Symbol Set ID 10U A 6 Character Samples and Symbol Sets ...
Страница 205: ...Symbol Set Tables IBM Denmark Norway PC 8 D N Symbol Set ID 11U Character Samples and Symbol Sets A 7 ...
Страница 208: ...FX Character Tables Italic character set A 10 Character Samples and Symbol Sets ...
Страница 218: ...Interface Specifications B 8 Technical Specifications ...
Страница 234: ...FX Emulation Submenu ...
Страница 235: ...HP Emulation Submenu ...
Страница 236: ...Interface Submenu ...
Страница 237: ...Slots for face up output tray hooks ...
Страница 238: ...Drum replacement cartridge Transfer charger wire ...


