


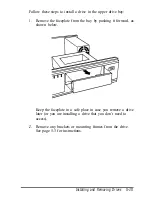

Installing a Hard Disk Drive in the Internal Drive Bay
Your computer may have a hard disk drive already installed in
the internal drive bay. If not, you can install a 1-inch high by
3½-inch wide drive in this bay.
This section includes steps for the following procedures:
Removing the mounting frames from the hard disk drive
(if necessary)
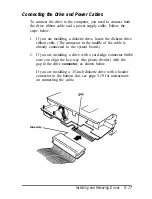
Connecting the hard disk drive cables
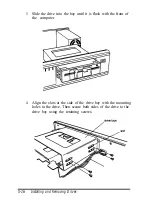
Installing the hard disk drive under the mounting bracket
installing the hard disk drive above the mounting bracket.
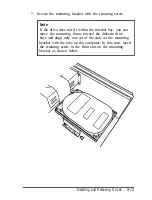
Note
Be sure to check the jumper settings on the hard disk drive
before you install it. Also, you may need to know the drive
parameters if the hard disk drive autosensing feature in
SETUP is unable to correctly identify your drive. See the
documentation that came with your drive for this
information.
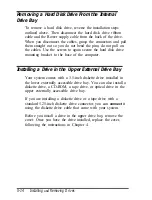
Before you can install a hard disk drive, you need to remove
any option cards that may be blocking your access to the hard
disk drive area. Once you have installed the drive, replace any
option cards you removed. See Chapter 4 for instructions.
5-2
Installing and Removing Drives
Содержание ActionDesk 4000
Страница 1: ......
Страница 128: ...Hard disk drive types continued Specifications A 9 ...
Страница 130: ...DMA Assignments Specifications A 11 ...
Страница 131: ...A 12 Specifications ...
Страница 132: ...System I O Address Map Specifications A 13 ...
Страница 133: ...A 14 Specification ...
Страница 134: ...Specifications A 15 ...
Страница 135: ...A 16 Specifications ...
Страница 136: ...Speaker connector pin assignments J21 Specifications A 17 ...
Страница 137: ...A 18 Specification ...
Страница 138: ...Specifications A 19 ...