EPSON Stylus COLOR 900/900N
Chapter 4 Disassembly and Assembly
115
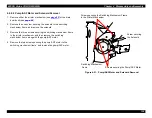
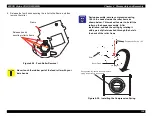
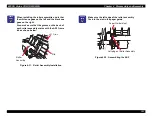
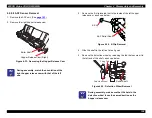
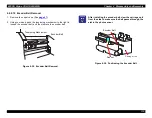
4.2.8.16 Top Frame Removal
1. Remove the ASF unit. (See
2. Remove the platen. (See
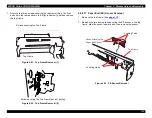
3. Remove the screw securing the paper support lever to the printer
mechanism, and then remove the paper support mechanism.
Figure 4-48. Paper Support Mechanism Removal
4. From the back of the printer mechanism, release the torsion springs
securing the paper pinch rollers.
Figure 4-49. Releasing the Pinch Rollers
5. Remove all the pinch rollers by sliding them out toward the front of
the printer.
6. Remove the spring used for tensioning the encoder belt.
Figure 4-50. Tension Spring Removal
Screw securing the Paper Support Lever
Torsion Springs
(six springs in all)
Pinch Rollers
C A U T I O N
When installing the rightmost pinch roller, you must
insert it from the rear of the printer mechanism. If you
try to insert it from the front, you will break the actuator
of the PE sensor.
Tension Spring
Содержание 900N
Страница 1: ...EPSONStylusCOLOR900 900N Color ink jet printer TM SC900 N 6 59 0 18 ...
Страница 8: ... 37 5 PRODUCTDESCRIPTION ...
Страница 37: ... 37 5 OPERATINGPRINCIPLES ...
Страница 67: ... 37 5 TROUBLESHOOTING ...
Страница 89: ... 37 5 DISASSEMBLYANDASSEMBLY ...
Страница 121: ... 37 5 ADJUSTMENTS ...
Страница 156: ... 37 5 MAINTENANCE ...
Страница 169: ... 37 5 APPENDIX ...
Страница 178: ...EPSON Stylus COLOR 900 900N Chapter 7 Appendix 175 7 3 Component Layout Figure 7 2 C265 Main Board Component side ...
Страница 179: ...EPSON Stylus COLOR 900 900N Chapter 7 Appendix 176 Figure 7 3 C265 Main Board Soldering side ...
Страница 180: ...EPSON Stylus COLOR 900 900N Chapter 7 Appendix 177 Figure 7 4 C265 PSB Board Figure 7 5 C265 PSE Board ...
Страница 181: ...EPSON Stylus COLOR 900 900N Chapter 7 Appendix 178 Figure 7 6 C265 PNL Board ...
Страница 195: ...06 03 01 02 for S E ASIA 03 03 05 03 04 EPSON STYLUS COLOR 900 No 7 10056 Rev 01 ...
Страница 197: ......
Страница 198: ......
Страница 199: ......
Страница 200: ......
Страница 201: ......


