EPSON Stylus COLOR 900/900N
Chapter 4 Disassembly and Assembly
98
4.2.8 Printer Mechanism Disassembly
4.2.8.1 Printhead Removal
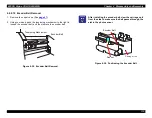
1. Remove the upper case. (See
2. Remove any installed ink cartridges.
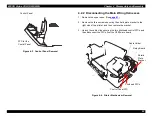
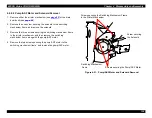
3. Release the carriage lock at the back of the printer mechanism, and
then move the carriage unit to the left end of the printer mechanism.
Figure 4-14. Releasing the Carriage Lock
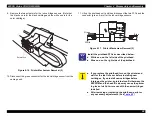
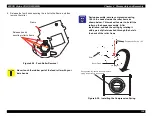
4. Open the ink cartridge clamps all the way and flex their hinges (the
blue part) inward to separate the ink cartridge clamps from the
carriage unit. Then remove the ink cartridge clamps.
Figure 4-15. Printer Mechanism Removal (1)
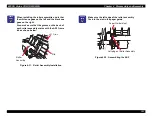
5. Remove the compression spring on the left side of the carriage unit.
6. Release the three hooks securing the cover that protects the ink
cartridge sensors in the carriage unit, and then remove the cover.
7. Remove the FFC holder on the right edge of the carriage unit. Pull
outward (to the right) on the part that hangs outside the carriage unit
to free the locking tabs. Then lift it up to remove it.
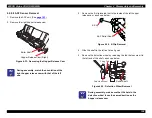
8. Remove the two screws securing the head fixing lever, and then pull
out the head fixing lever to the left.
C A U T I O N
Before removing the printhead, move the carriage unit
all the way to the left end of the printer mechanism. If
you try to remove the printhead from any other
position, you will damage the printhead.
CR Motor
CR Lock (rotate top of lever out and down)
PE Sensor Connector
Pump/ASF Motor
Cartridge Clamp
Hinges
Screws securing the
Compression Spring
FFC Holder
Ink Cartridge
Head Fixing Lever
Sensor Cover
Head Fixing Lever
Содержание 900N
Страница 1: ...EPSONStylusCOLOR900 900N Color ink jet printer TM SC900 N 6 59 0 18 ...
Страница 8: ... 37 5 PRODUCTDESCRIPTION ...
Страница 37: ... 37 5 OPERATINGPRINCIPLES ...
Страница 67: ... 37 5 TROUBLESHOOTING ...
Страница 89: ... 37 5 DISASSEMBLYANDASSEMBLY ...
Страница 121: ... 37 5 ADJUSTMENTS ...
Страница 156: ... 37 5 MAINTENANCE ...
Страница 169: ... 37 5 APPENDIX ...
Страница 178: ...EPSON Stylus COLOR 900 900N Chapter 7 Appendix 175 7 3 Component Layout Figure 7 2 C265 Main Board Component side ...
Страница 179: ...EPSON Stylus COLOR 900 900N Chapter 7 Appendix 176 Figure 7 3 C265 Main Board Soldering side ...
Страница 180: ...EPSON Stylus COLOR 900 900N Chapter 7 Appendix 177 Figure 7 4 C265 PSB Board Figure 7 5 C265 PSE Board ...
Страница 181: ...EPSON Stylus COLOR 900 900N Chapter 7 Appendix 178 Figure 7 6 C265 PNL Board ...
Страница 195: ...06 03 01 02 for S E ASIA 03 03 05 03 04 EPSON STYLUS COLOR 900 No 7 10056 Rev 01 ...
Страница 197: ......
Страница 198: ......
Страница 199: ......
Страница 200: ......
Страница 201: ......


