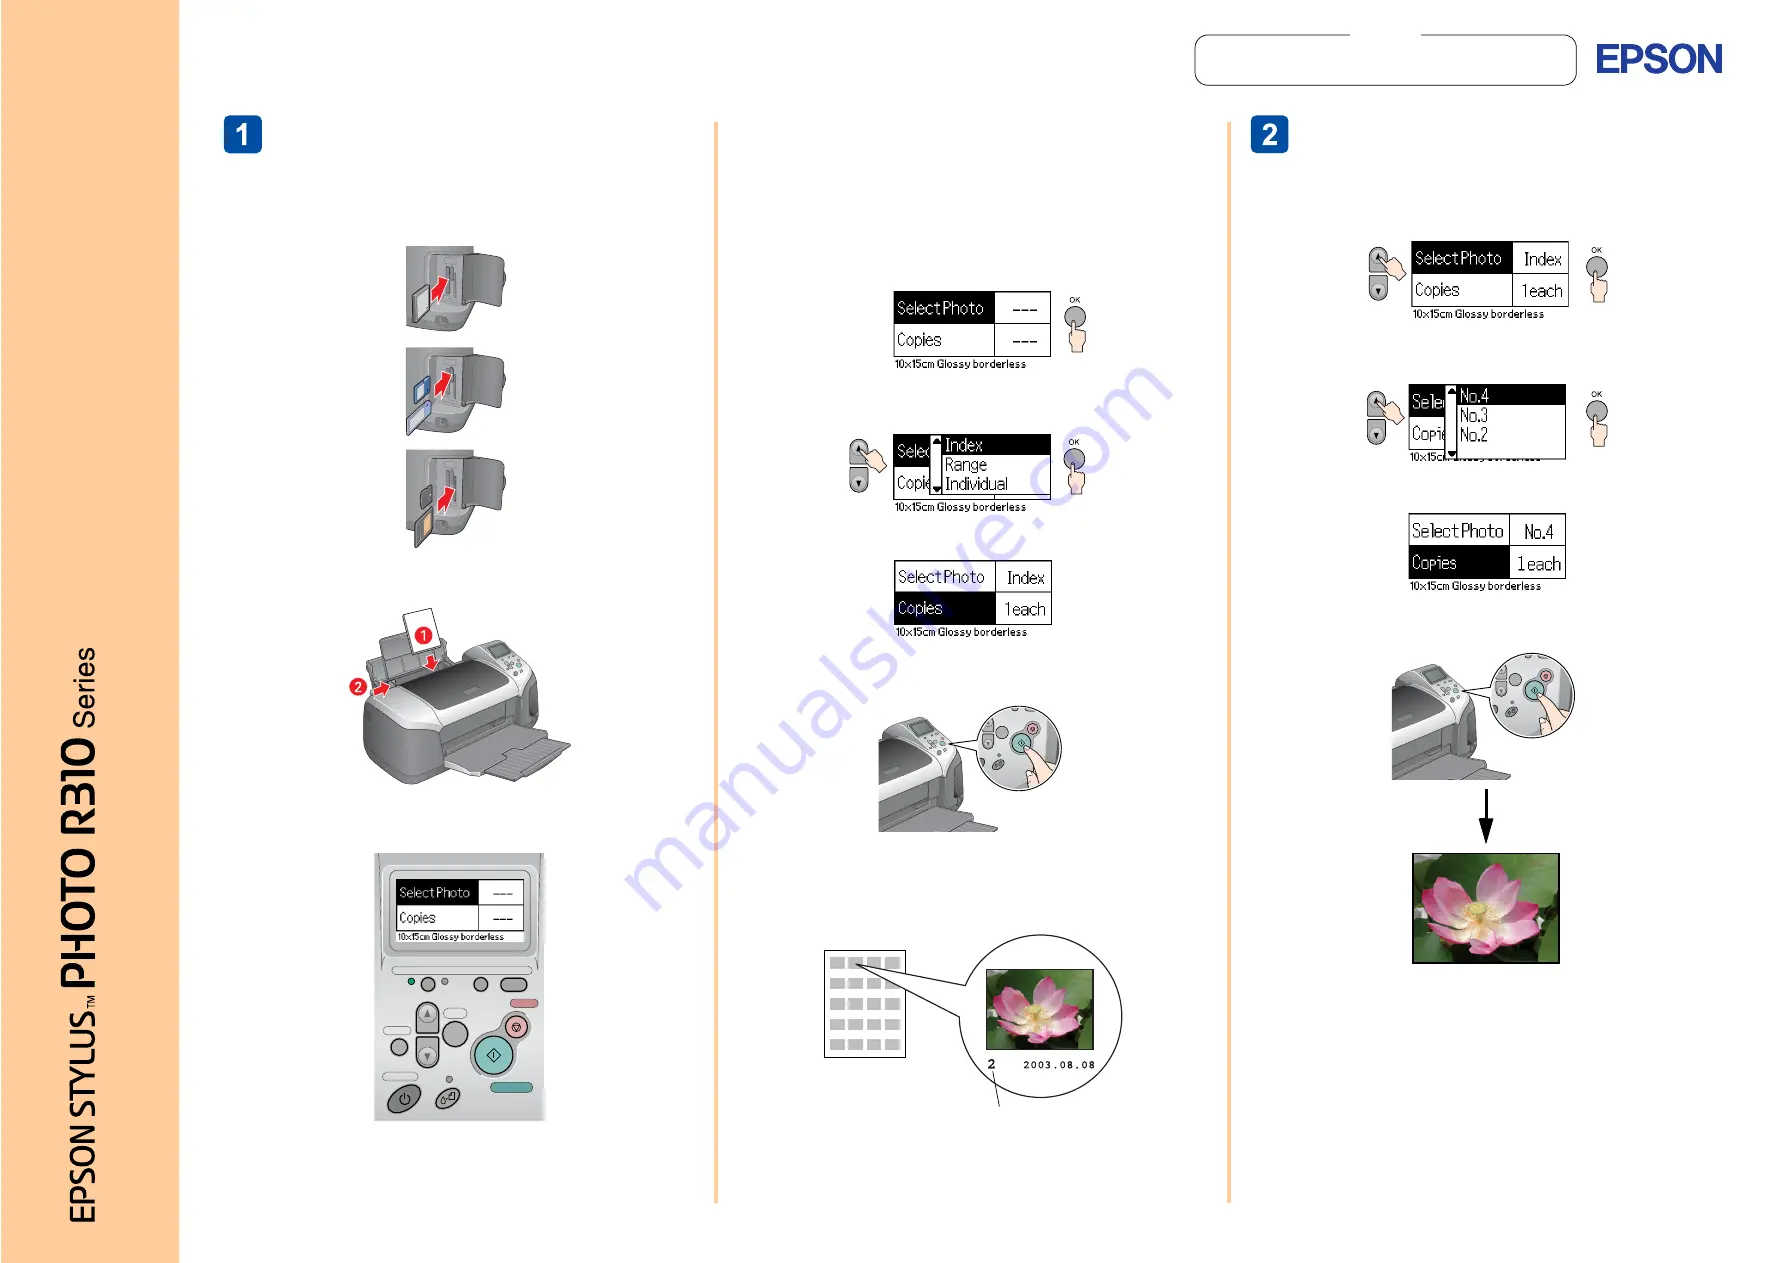
Printing an Index
Print an index of photos.
1.
Insert the memory card containing your photos into the
appropriate memory card slot.
2.
Load 10
×
15 cm size Premium Glossy Photo Paper into
the sheet feeder.
3.
Make sure that
Basic Mode
is selected (the Basic Mode
light is flashing).
If Advanced Mode is selected, press the
Basic/Advanced
mode switch
button, then press the
OK
button to select
Basic Mode
.
Note:
When
Basic Mode
is selected, the
Paper Type
,
Paper Size
and
Layout
settings are automatically set to
Premium
Glossy Photo Paper
,
10
×
15 cm
and
Borderless
.
When Index is selected, Layout is automatically set to
index.
4.
Make sure Select Photo is highlighted, then press the
OK
button to open the menu.
Press the
u
button to highlight Index, then press the
OK
button.
5.
Make sure that 1 each is indicated as the Copies setting.
6.
Press the
x
button to print the Index.
7.
Look at the index and choose the photo you want to
print.
The photo number will be entered as the Select Photo
setting in the following procedure.
Printing a Photo
Print a photo selected from the index.
1.
Press the
u
button to highlight Select Photo, then press
the
OK
button.
2.
Press the
u
button to specify the photo number that you
have selected from the index, then press the
OK
button.
3.
Make sure that 1 each is indicated as the Copies setting.
4.
Press the
x
button to print the photo.
Basic
Advanced
Custom
Direct Save
Back
OK
Stop
Power
photo number
The example below demonstrates how to print an index of photos and then a Borderless photo on 10
×
15 cm EPSON Premium Glossy Photo
Paper.
For more detailed information, refer to the
Standalone Operation Guide
.
Copyright© 2003 by Seiko Epson Corporation, Nagano, Japan.
Printed in XXXX
Notes
contain important information and useful tips
on the operation of your printer.
Notes
Quic
k R
ef
er
ence
English
Color Ink Jet Printer
404463
2-00
xx
x


