Pearl-2 User Guide
Configure AFU to SCP client parameters
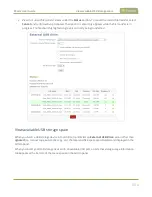
2. Specify the target
Server address
. If your system is configured with DHCP or has a valid DNS
), you can use the server’s fully qualified domain name instead of
the IP address.
3. Enter the target
Server port
, if you have configured the server to use something non-standard. Leave
this value blank to use the default port.
4. Specify the
Server share
. This is the CIFS share name or the name of the shared folder on the server.
If needed, request this value from the network administrator.
5. If the system is in a different domain than the server or if it is part of Active Directory, enter the
Domain name
of the CIFS server.
6. Specify a username for the CIFS Server in the
Login
field. The user must have write permissions for the
share folder.
7. Specify the password for the user in the
Password
field; the value is masked by dots.
8. Select
Use temp file
to name files with a temporary filename extension (.part) on the server until
upload is complete.
9. Click
Apply
Configure AFU to SCP client parameters
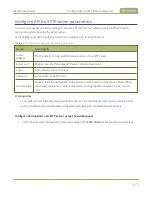
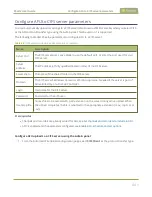
You can automatically upload recordings to an SCP (secure copy) client when you select SCP as the AFU
protocol transfer type using the Admin panel.
The following table describes the parameters to configure AFU to an SCP client.
442
Содержание Pearl-2
Страница 137: ...Pearl 2 User Guide Disable the network discovery port 123 ...
Страница 157: ...Pearl 2 User Guide Mute audio 143 ...
Страница 178: ...Pearl 2 User Guide 4K feature add on 164 ...
Страница 434: ...Pearl 2 User Guide Delete a recorder 3 Click Delete this recorder and click OK when prompted 420 ...
Страница 545: ...Pearl 2 User Guide Register your device 531 ...
Страница 583: ... and 2021 Epiphan Systems Inc ...


