


3 of 5 14/11/10
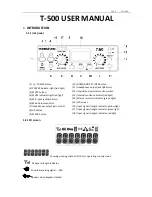
2.2 CHANNEL SETTING
Fig 1
Press the [UP] or [Down] button to choose the operating channel from channel 1 to 17.
The TX power would be off during the switching interval.
2.3 Frequency SETTING
Fig 2
In “frequency display” mode, the transmitter will show the frequencies instead of channel numbers
(see Fig 2). Press [UP] or [Down] button to choose the operating frequency with default setting.
Please note that if going in steps of 0.1Mhz there are only 17 frequencies available because some
frequencies are restricted:
Allowed frequencies are: 72.1, 72.2, 72.3, 72.4, 72.5, 72.6, 72.7, 72.8, 72.9, 74.7, 75.3, 75.4, 75.5, 75.6,
75.7, 75.8, 75.9 Mhz.
2.4 Channel / Frequency Lock
Fig 3 Fig 4
By pressing and holding the UP or DOWN button for 5 seconds,
the display will show “
“ icon (see Fig 3 & 4), the transmitter will be locked and the channel or frequency cannot be
changed until the unit is unlocked by pressing and holding the [UP] or [DOWN] button for 5
seconds again. The lock option will remain even if the unit is turned off and on again or is
unplugged from the power source.
3.
Menu Options:
Pressed and held the [MENU] button for 5 seconds, then the transmitter will enter into program
mode, there are five items Test Tone, Tx Power, Display, Modulation, Exit in setting menu.
After 10 seconds of inactivity the transmitter automatically will exit the program mode.
3.1
Test Tone
Enter into program mode first option will blink “TONE”.