Express Cam II
5. An installation bar would appear showing
installation status, wait to finish copying files
6.
Wait few seconds for the Found
New Hardware Wizard screen to pop
up, and then click
“NEXT”
Congratulations
and thank you for your purchase of Encore
Electronics® Express Cam II
“ENUCM-012”
.
This User’s Manual will guide you through the successful installation
of your new Encore Electronics®
“ENUCM-012”
Express Cam II into
your computer.
NOTE:
Before you start, please make sure that there is no other web camera
software and drivers installed on your computer. If you are replacing
an old web camera please uninstall the software driver and the
application software from the old device before proceeding to the
next step.
NOTE:
Do not insert the Express Web Cam II at this moment yet.
Software driver installation procedure:
1. Turn on your computer
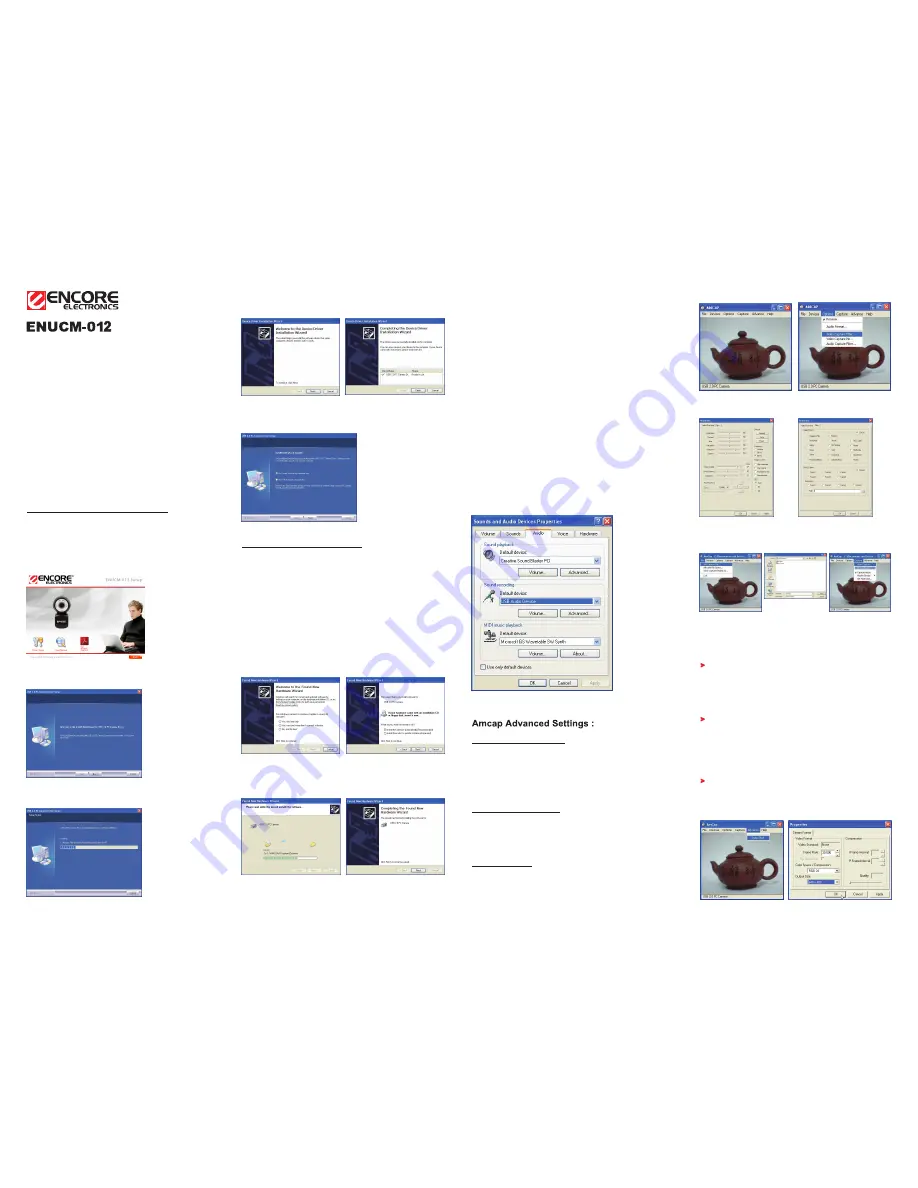
2. Put the Driver Disc to the CDROM drive and wait for the on-screen
menu to appear (image below)
3. Click on the
“Driver Setup”
,
as seen on the picture below to start
the installation wizard
4. Click
“NEXT”
7. Check Status is
“Ready to use”
,
and then Click
“Finish”
to complete
Device Driver Installation Wizard
8. Click
“Finish”
to complete the installation wizard and restart computer
Hardware Installation Procedure:
1.Right after the Software and software driver installation, you may now
insert or plug-in the Express Cam USB to the computer’s available USB
Port. Wait a few seconds and your computer will automatically detects the
Express Cam and a message box appears on the lower right hand of the
task bar next to the computers clock. Ignore this message and wait another
few seconds for the Found New Hardware Wizard screen to pop up
NOTE:
In Windows® XP or Windows Vista™ you need not do anything, the
computer will automatically install the necessary software driver from the
previous install. For Windows 2000 and below the computer will ask for the
driver disc while the hardware installation is in progress.
2.Make sure that the “Install the software automatically (Recommended)” is
selected as shown on the picture below, and then click
“NEXT”
3.The computer will start copying files
4.Click “Finish” to complete the
“Found New Hardware Wizard”
Final Step in Hardware installation:
After the Found New Hardware Wizard is completed, you may want to
check if the installation is successful by doing the following:
Step 1:
Check your Express Cam II in the
“Device Manager”
.
Go to the Device Manager Utility Window and then go to “Imaging
Devices –
USB 2.0 PC Camera
”. Make sure no exclamation mark
appears before it.
To open the Device Manager Windows, do the following:
A. Go to the
Control Panel
(click
START
, move your mouse and click
Control Panel
)
B. Open or double click the
System
icon
C. Click on the
Hardware
tab
D. Click on the
Device Manager
button
Step 2:
Check the Express Cam II microphone settings
Note: The following procedure is for the Express Cam II with
microphone built-in only.
Go to the
“Control Panel”
(Click “Start”, move your mouse to “Control
Panel” and click to select
Open the
“Sounds Audio Devices”
Click on the
“Audio”
tab
Under “Sound recording” section, select
“USB Camera”
from the drop
Open
『
AMCAP
』
Select
『
Options
』
->
『
Video Capture Filter…
』
Select
『
File
』
->
『
Set Capture File...
』
, assign folder and file name
then click on open, Select
『
Capture
』
to
『
Start Capture
』
and
『
Stop Capture
』
.
Frequently Asked Questions:
>
What should l do when videos drop or lag frames?
WebCam supports “Auto White Balance” and “Auto Exposure”. Your
Express Cam will activate this function automatically when light is not
sufficient. You can disable “Auto Exposure” if it causes slight delay
problems.
>Why my friend cannot hear my voice when using MSN?
>How to take snapshots?
From the AMcap screen, Click
Advance
– and click on
Snap Shots
.
You can select the desired
“Output Size”
first
.
Do not forget to save your image as file.
1. Check
“Sounds and Audio Devices Properties”
in Device
Manager and make sure
“Sound recording”
default value is in
USB Audio Device.
2. Check your software’s
“Sound recording”
, the value should be
“USB Audio Device”
.
Setting up Video Capture Filter:
1. From the Windows Desktop, Click on
“START”
go to
« All Programs
»
– go to
“USB 2.0 PC Camera”
– click on
“AMcap”
.
2. If the video is not stable while in preview, from the menu bar click on
“Options”
. Select
“Video Capture Filter.
From the Settings tab and
under the
“Flicker”
section, set the frequency to either
60Hz or 50Hz
whichever gives out better video screen.
Setting up Video Capture Pin:
1. From the
“AMcap”
Window screen menu bar, select
“Options”
, click
to select
“Video Capture Pin”
a new Window
“Stream Format”
will
appear, select the desired
“Output Size”
How to use Capture:
1. From the AMcap screen click on “Capture” – select “
『
Start Capture”.
Captured video will be saved on an AVI video file
2. Please refer to the pictures below to complete Advanced settings
Set video frequency at 60Hz or 50Hz and select
『
Image Effects
』
or
『
Photo Frames
』
which you like
User’s Manual
®

