


47 / 81
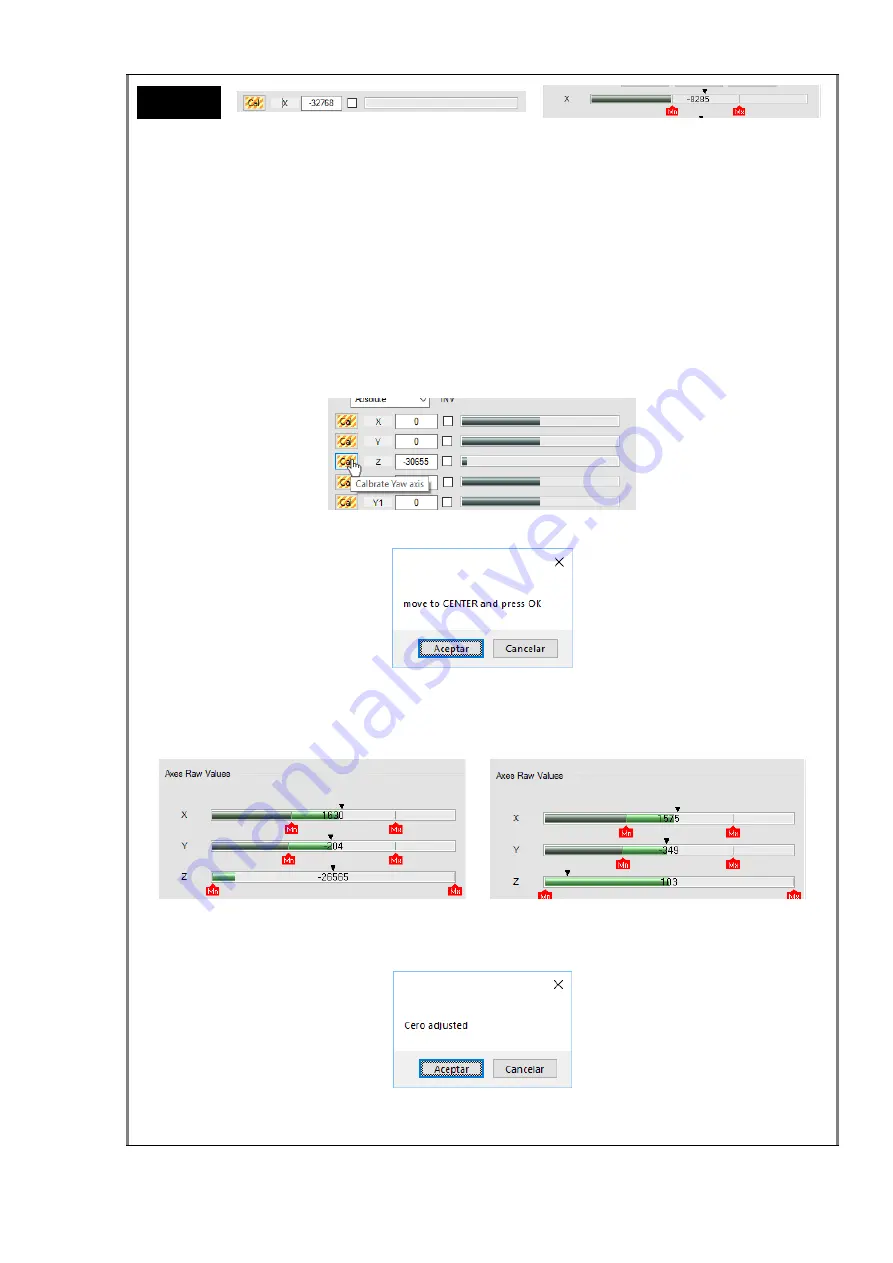
Z axis calibration
As we mentioned before, to calibrate an axis for windows, we need to set the
maximum, central and minimum positions of that axis. This is all the information
Windows needs. For that, we will move the stick in those positions over the selected
axis, following the sequence the system indicates. In this case, the calibration is made
in two phases, first the system will request the center position and after the extreme
positions.
To start the calibration, click the
Cal
button associated to the axis in the
Axis Measure
group box.
A new small window appears with instructions for the axis calibration.
Following the instructions, move the stick to the center position and then click
OK
to
continue. The system will do an auto-zero action over the axis measures, as you can
see in the pictures below.
Before auto-zero After auto-zero
And a new window is shown to describe the action. Click
OK
to continue.
And finally, a new window asks you to move the stick over the
Z axis
to the maximum
and minimum desired positions. When done, please click
OK
to finish.
Minimum


