


46 / 81
The axes calibration is grouped in two paragraphs:
- Calibration of X and Y axes.
- Calibration of Z axis.
X and Y axes calibration
The procedures to calibrate X and Y axes are similar, so here we will only show you
how to do it with the X axis.
As we explained before, to calibrate an axis in Windows, we need set the maximum,
central and minimum positions of that axis. For that, we will move the stick in those
positions over the selected axis, following the sequence the system indicates.
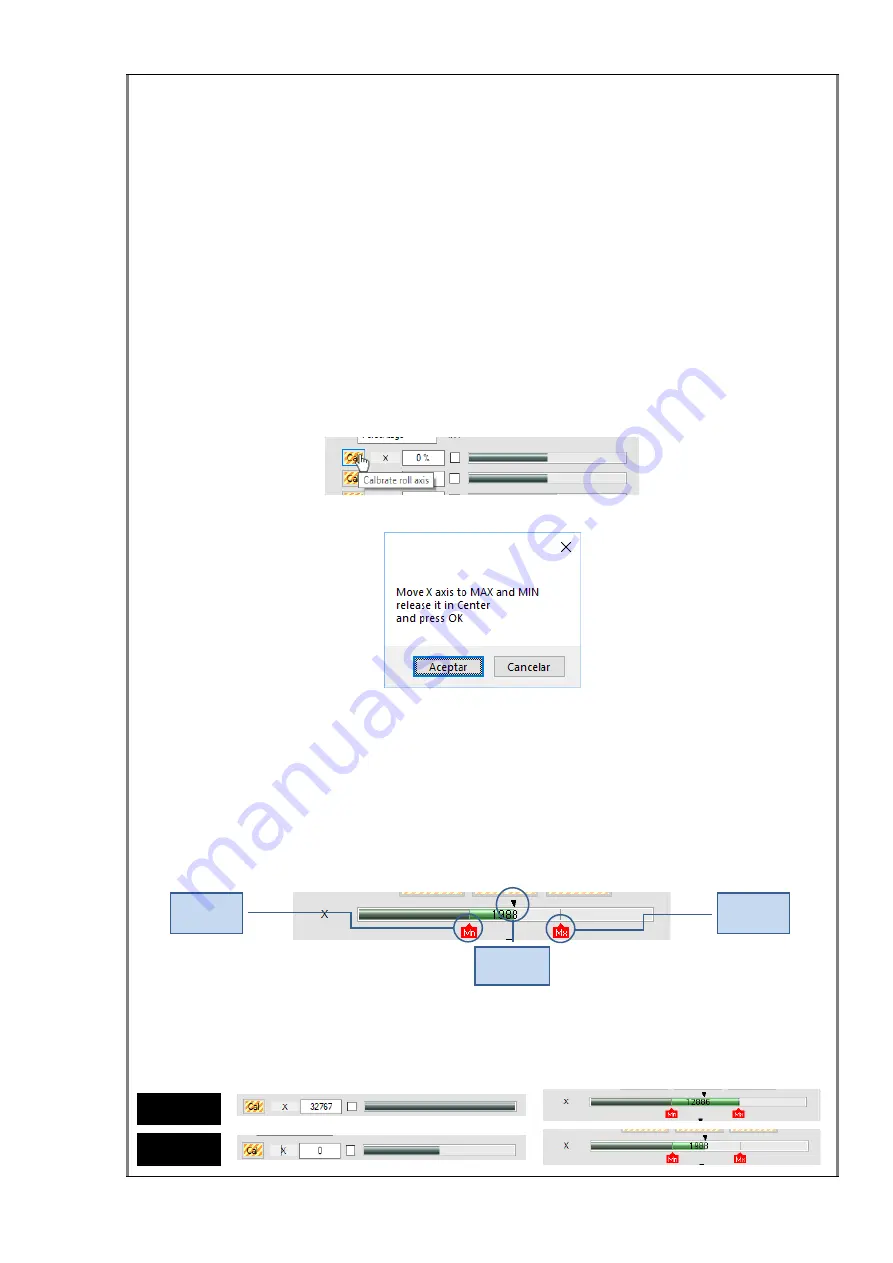
To start the calibration, click the
Cal
button associated to the axis in the
Axis Measure
group box.
A new small window will appear with instructions for the axis calibration.
Following the instructions, move the stick to the left and right to achieve the minimum
and maximum positions and release it in the center position. Then click
OK
to
continue.
After closing the window, RS_HID_DEV_TOOL saves the new calibration values in
Windows. It will also relocate the associated icons of minimum, centre and maximum,
as you can see here.
Now, with the calibration finished you can check that there is a direct correlation
between the maximum, centre and minimum positions of our hardware shown with the
red and black icons and the maximum, centre and minimum DX values.
Icon of
Minimum
Icon of
Maximum
Icon of
Centre
Maximum
Centre


