EMTRON EIC USER MANUAL
WWW.EMTRON.WORLD
© EMTRON AUSTRALIA PTY LTD APRIL 2018
6
3.0 Installation
Each device has a M4 x 1.5 thread tapped into the base of the enclosure and can be used for
mounting. In high vibration applications rubber mounting is recommended.
CAUTION:
When mounting the device inside the engine compartment, it should be
positioned in cooler areas and away from heat sources such as exhaust manifolds. Any
unnecessary radiated heat may affect device performance.
3.1 EIC10 Pinout
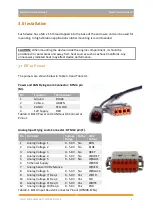
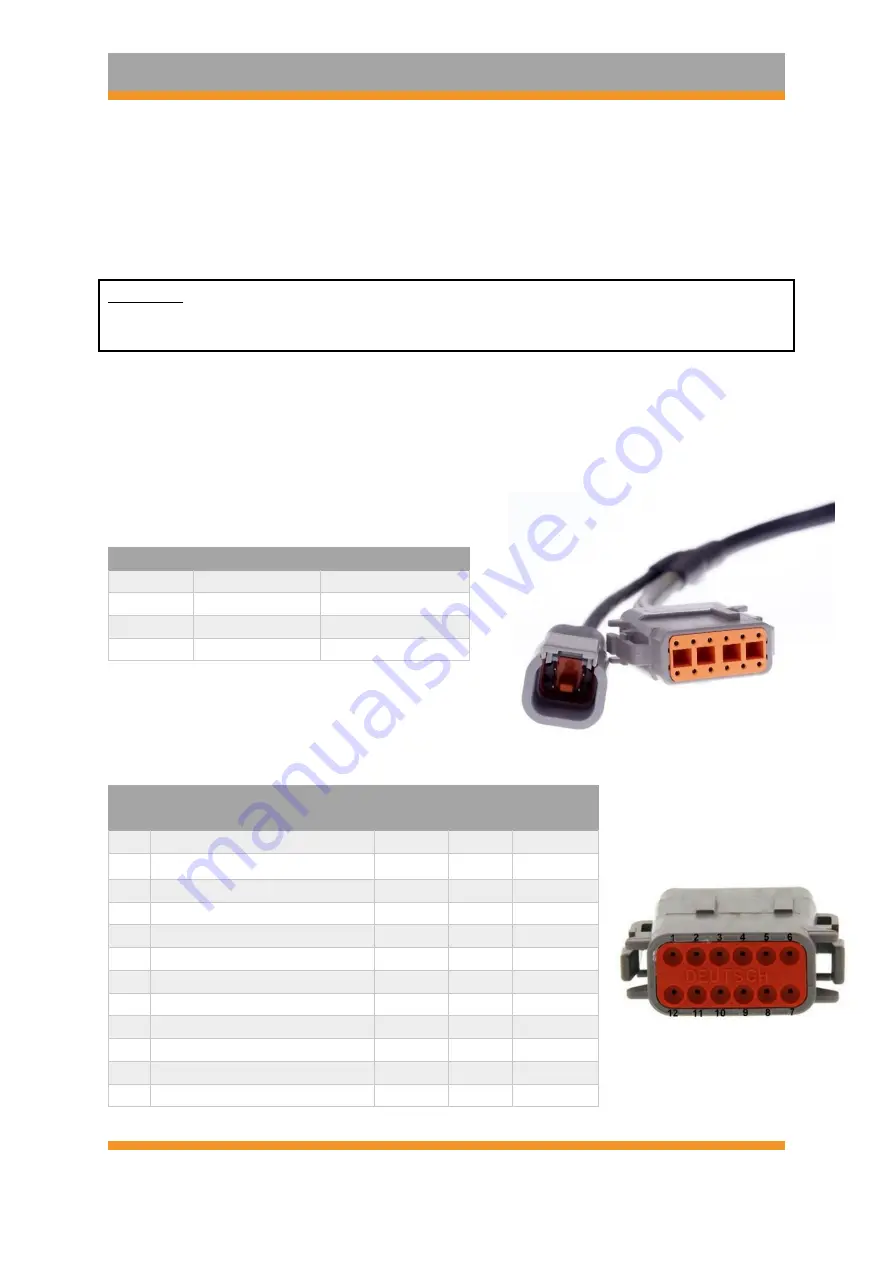
The pinouts are shown below in Table 3.0 and Table 3.1.
Power and CAN Flying Loom Connector: DTM 4 pin
(M).
Pin
Function
Wire Colour
1
Ground
BLACK
2
CAN Lo
GREEN
3
CAN Hi
YELLOW
4
12V Supply
RED
Table3.0. EIC10 Power and CAN Deustch Connector
Pinout
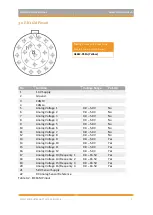
Analog Input Flying Loom Connector: DTM 12 pin (F).
Pin Function
Voltage
Range
Pullup Wire
Colour
1
Analog Voltage 1
0 - 5.0V No
BRN
2
Analog Voltage 2
0 - 5.0V No
BLUE
3
Analog Voltage 3
0 - 5.0V No
GREY
4
Analog Voltage 4
0 - 5.0V No
W/GREY
5
Analog Voltage 5
0 - 5.0V No
W/BLUE
6
5V Sensor Supply
W/BRN
7
Analog Sensor 0V Reference
W/RED
8
Analog Voltage 6
0 - 5.0V No
W/BLACK
9
Analog Voltage 7/ Freq 1
0 - 5.0V Yes
W/OR
10
Analog Voltage 8/ Freq 2
0 - 5.0V Yes
OR
11
Analog Voltage 9/ Freq 3
0 - 5.0V Yes
WHITE
12
Analog Voltage 10/Freq 4
0 - 5.0V Yes
PUR
Table3.1. EIC10 Input Deustch Connector Pinout (DTM06-12SA)

