Air Conditioners
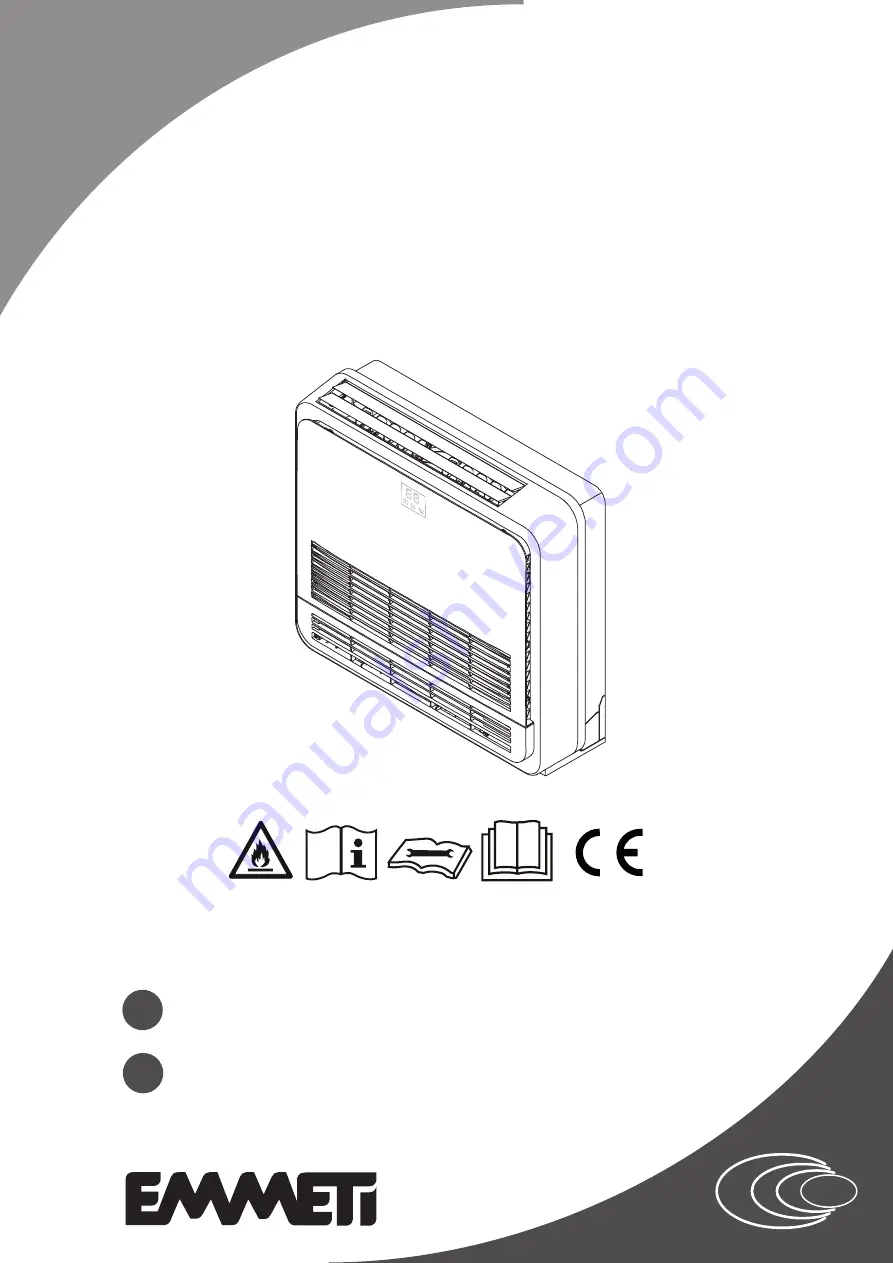
Serie: X-REVO - XX19K
CONSOLE
MANUALE INSTALLAZIONE ED ISTRUZIONI PER L’USO
IT
USE AND INSTALLATION MANUAL
GB
Страница 1: ...r Conditioners Serie X REVO XX19K CONSOLE MANUALE INSTALLAZIONE ED ISTRUZIONI PER L USO MANUALE INSTALLAZIONE ED ISTRUZIONI PER L USO IT IT USE AND INSTALLATION MANUAL USE AND INSTALLATION MANUAL GB G...
Страница 2: ...re differenze col prodotto acquistato Attenzione Conservare i manuali in luogo asciutto per evitare il deterioramento per even tuali riferimenti futuri GB GB page 49 Thanks you for the trust you have...
Страница 3: ...amento HEAT 8 4 Funzionamento in deumidificazione DRY 8 5 Funzionamento in automatico SMART AUTO 8 6 Regolazione della direzione del flusso dell aria 8 7 Come impostare l ora corrente 8 8 Programmazio...
Страница 4: ...temperatura condensa cedendo calore dall aria che quindi viene riscaldata 4 Espansione Il refrigerante sotto forma di liquido passa attraverso un organo di strozzamento detto valvola di espansione La...
Страница 5: ...ezionata 1 7 Tabella identificazione prodotti La seguente tabella serve ad identificare il climatizzatore completo o la singola unit acquistata Tipo Potenzialit in kBtu h Modello Set UI UE Unit estern...
Страница 6: ...otenziali pericoli Non lasciare giocare i bambini con l apparecchio pulizia e manutenzione utente non devono essere eseguite da bambini senza supervisione Non sostare a lungo sotto il getto d aria fre...
Страница 7: ...utilizzo di apparecchi di riscaldamento in prossimit del clima tizzatore Scegliere la temperatura ambiente pi adatta Attenzione a locali occupati da bambini ammalati e o anziani Non installare il cli...
Страница 8: ...di fabbrica del prodotto la quantit di refrigerante aggiuntiva per le tubazioni la carica di refrigerante totale L etichetta compilata deve essere appplicata in posizione visibile sull unit esterna A...
Страница 9: ...ZIONE DEGLI INCENDI Speciali procedure antincendio In caso di incendio bloccare la perdita se non c pericolo Non estinguere le fiamme sulla perdita perch esiste la possibilit di una riaccensione esplo...
Страница 10: ...rali Non scaricare dove l accumulo pu essere pericoloso Consultare il fornitore per le raccomandazioni specifiche Non scaricare in zone con rischio di formazione di atmosfere esplosive con l aria Il g...
Страница 11: ...tempestivo del danno e delle responsabilit Prima di eliminare gli imballi assicurarsi che tutti gli accessori in dotazione siano stati tolti dagli stessi Movimentazione Per la movimentazione delle un...
Страница 12: ...orgive ad alto contenuto di gas solforici d In aree con alta fluttuazione della tensione es fabbriche eccetera 5 1 Posizionamento dell unit interna Evitare sorgenti di calore o di vapore sottostanti o...
Страница 13: ...pe di calore contenenti taluni gas fluorurati ad effetto serra L installazione deve essere eseguita da personale qualificato e autoriz zato Non tentare di installare l apparecchio da soli Per eventual...
Страница 14: ...ebbano uscire lateral mente rimuovere i pretranci necessari per il passaggio delle tubazioni nella parte bassa della cornice utilizzando delle pinze Ganci Pannello anteriore Griglia anteriore Rimuover...
Страница 15: ...re l unit utilizzando viti tasselli due sul lato destro e due sul lato sinistro come indicato in figura 6 2 2 Installazione a pavimento Per l installazione a pavimento utilizzare i 6 fori Fori 1 e 2 c...
Страница 16: ...rata nell illustrazione non fornita non fornita Installazione della piastra supplementare per il fissaggio dell unit principale La parte posteriore dell unit pu essere fissata con viti nei punti mostr...
Страница 17: ...destro 4 Modificare il DIP switch del flusso d aria verso l alto 5 Utilizzare un reticolo mobile all uscita dell aria per consentire la regolazione della direzione del flusso di aria fredda calda 6 Le...
Страница 18: ...essere adeguatamente isolata con almeno 10mm di materiale isolante per prevenire formazione di condensa Rimuovere i filtri dell aria e versare dell acqua nella vasca raccolta condensa Accertarsi che l...
Страница 19: ...l rumore prodotto dall unit esterna e le vibrazioni Il rumore di tipo meccanico e le vibrazioni possono dipendere da come stata installata l unit e dalla tipologia di ambiente nella quale essa viene u...
Страница 20: ...rifacimento della cartella Togliere la sbavatura all estremit del tubo con uno svasatore Questa operazione molto importante per ottenere una cartellatura di buona qualit Attenzione Quando procedete a...
Страница 21: ...to sulle unit accertarsi che sia stata tolta l alimentazione elettrica generale Prima di interrompere l alimentazione dall interruttore spegnere il climatiz zatore con il telecomando Alimentazione del...
Страница 22: ...possono causare scosse elettriche o incendi 2 Non introdurre all interno del prodotto pezzi acquistati a livello locale Non far derivare l energia per la pompa di scarico ecc dalla morsettiera Questo...
Страница 23: ...ione IFEEL SWING Per attivare o arrestare l oscillazione del deflettore di regolazione verticale e impostarne il flusso d aria verso l alto o il basso secondo le proprie preferenze CLOCK Utilizzato pe...
Страница 24: ...ffreddamento Ventilazione ad alta velocit Ventilazione a velocit media Ventilazione a bassa velocit Mostra la temperatura Display d impostazione del timer Display dell orario attuale Velocit del venti...
Страница 25: ...interna Il telecomando non deve essere Bagnato Fatto cadere Lasciato alla diretta esposizione della luce del sole Lasciato vicino a fonti di calore Lampade fluorescenti o cordless potrebbero disturba...
Страница 26: ...ura desiderata nell ambiente 16 30 C La temperatura pu essere impostata di grado in grado Premendo il pulsante FAN SPEED selezionare la velocit desiderata del ventilatore Automatica Alta Media Bassa N...
Страница 27: ...bassa temperatura ed umidit elevata sull unit esterna si accumula brina che riduce le prestazioni del climatizzatore Allo scopo di prevenire questa riduzione delle prestazioni il climatiz zatore dota...
Страница 28: ...elezionare la posizione dei deflettori desiderata 4 Premendo il pulsante FAN SPEED selezionare la velocit desiderata del ventilatore Il pulsante SMART non funziona nella modalit SUPER Il pulsante ECON...
Страница 29: ...nto Nel caso ci accada arrestare prima l unit interna quindi disattivare e riattivare l alimentazione elettrica Si consiglia di non inclinare il deflettore verticale verso il basso per molto tempo dur...
Страница 30: ...ermarlo Risultato Si avvertir un segnale acustico Bip ON smetter di lampeggiare e rimane visibile L indicatore del TIMER dell unit interna si accende 4 Sul telecomando dopo una visualizzazione di 5 se...
Страница 31: ...b Tset Tset 1 Tset 2 Time h Raffreddamento MODALIT SLEEP 3 Tamb Tset 3 Tset OFF Time h 0 1 2 3 4 5 6 7 8 Tset 1 0 1 2 3 4 5 6 7 8 0 1 2 3 4 5 6 7 8 0 1 2 3 4 5 6 7 8 0 1 2 3 4 5 6 7 8 0 1 2 3 4 5 6 7...
Страница 32: ...1 2 3 4 5 6 7 8 Time h Time h 0 1 2 3 4 5 6 7 8 8 USO DEL CLIMATIZZATORE Per annullare la modalit SLEEP premere uno trai seguenti pulsanti SUPER SMART MODE SLEEP e FAN Il condizionatore si spegne auto...
Страница 33: ...solo ventilatore La temperatura si imposta automaticamente ai 16 C ed il ventilatore funziona ad alta velocit 2 Premendo il pulsante durante la modalit riscaldamento La temperatura si imposta automat...
Страница 34: ...peratura incorporato nel telecomando attivato Questo sensore in grado di rilevare la temperatura circostante e trasmet tere il segnale all unit interna la quale in grado di regolare automatica mente l...
Страница 35: ...i calore sottrae il calore dell aria esterna con l aiuto del refrigerante per riscaldare l ambiente interno Pertanto la capacit di riscaldamento del climatizzatore diminuisce con il calo della tempera...
Страница 36: ...e Se il climatizzatore non viene usato per un lungo periodo di tempo staccare l alimentazione elettrica tramite l apposito interruttore a monte dell impianto non fornito Utilizzare i deflettori in man...
Страница 37: ...atamente con acqua e detergente neutro ad una temperatura massima di 40 C Asciugare con un panno morbido Non usare benzina solventi chimici polveri detergenti e o abrasivi lucidanti per mobili panni r...
Страница 38: ...ell aria dal pannello anteriore Per rimuovere la polvere accumulata sul filtro dell aria usare un aspirapol vere e o lavarlo in una soluzione di detergente neutro ed acqua tiepida Lasciarlo asciugare...
Страница 39: ...scarico condensa dopo 1 ora di funzionamento del climatizzatore In caso di mancata fuoriuscita d acqua richiedere l intervento del centro assistenza autorizzato per le dovute verifiche 9 6 Prima di u...
Страница 40: ...atizzatorepresentasuper ciconcondensaspecialmente in prossimit dell uscita dell aria fredda Se l ambiente molto umido il fenomeno da ritenersi normale Se l ambiente non eccessivamente umido bisogna ve...
Страница 41: ...a di controllo dell unit esterna 1 Ricollegare il cavo facendo riferimento allo schema elettrico delle unit interna ed esterna 2 Ricollegare il cavo di comunicazione facen do riferimento allo schema e...
Страница 42: ...are il cavo del sensore di tempera tura ambiente 2 Sostituire il sensore di temperatura ambiente 3 Sostituire la scheda di controllo 83 Errore sensore temperatura batteria scambio 1 Il cavo del sensor...
Страница 43: ...a scheda di controllo dell unit interna sbagliata 3 Il cavo di collegamento tra la scheda display e la scheda di controllo dell unit interna guasto 4 La scheda display guasta 5 La scheda di controllo...
Страница 44: ...a utile esaurite deve essere separato dai rifiuti domestici e deve essere conferito in un centro di raccolta differenziata come disposto dalla Direttiva 2006 66 CE Se sotto il cestino c un simbolo chi...
Страница 45: ...Umidit DISPLAY BOARD Scheda Display PUMP MOTOR Motore Pompa WATER LEVEL SWITCH Interruttore Livello Acqua 1 DESCRIZIONE DEI COMPONENTI IT IT 12 SCHEMI ELETTRICI E CONNESSIONI 12 1 Schema elettrico X R...
Страница 46: ...bassa della scocca anteriore b Spostare le 2 linguette su OPEN per aprire il pannello frontale c Svitare le 2 viti presenti nella parte alta della scocca anteriore d Svitare la vite per rimuovere la...
Страница 47: ...inuisce di 1 Selezionare la configurazione desiderata 3 o 4 vedere tabella premere ENTER per confermare In seguito alla conferma il simbolo non lampeggia pi e ricomincia a lam peggiare il numero 25 Pr...
Страница 48: ...to dell apparecchiatura EMMETI in base alle indicazioni presenti nel relativo manuale d installazione procede con la registrazione dei dati sul sito www emmeti com nella sezione GARANZIA e nel caso d...
Страница 49: ...rared remote control 8 USE THE AIR CONDITIONER 72 8 1 Operation in ventilation FAN ONLY 8 2 Cooling functioning COOL 8 3 Heating functioning HEAT 8 4 Dehumidification functioning Dry 8 5 Automatic fun...
Страница 50: ...other one 1 2 Refrigeration circuit Refriggerant circuit can be exemplified as follow Fig 1 1 Evaporation Room air is pushed from a fan through a heat exchanger called evaporator indoor unit in Coolin...
Страница 51: ...wing table you may identify the set model or the model of the single unit of the air conditioner Type Potntiality on kBtu h Model Set UI UE Outdoor Unit Indoot Unit Single Hi Wall 9 X REVO 0919 X REVO...
Страница 52: ...e appliance in a safe way and understand the hazards involved children shall not play with the appliance Cleaning and user maintenance shall not be made by children without supervision Don t blow the...
Страница 53: ...ctor swinging while the conditioner is in operation The high speed of the fan is very dangerous and can cause injury Avoid the use of heating equipments near the air conditioner Select the most suitab...
Страница 54: ...gaz fluor s effet de serre pr vus e de Kyoto er les gaz s chapper dans l atmosph re Kg Kg Kg 410 A 1 1 2 2 2 2 1 1 1 1 2 2 B C D prodotto contiene gas fluorurati ad effetto serra inclusi tocollo di Ky...
Страница 55: ...efighting procedures In the event of fire stop the leak if no danger subsists Do not extinguish the flames on leak because the possibility of an uncontrolled explosive reignition exists Spray continuo...
Страница 56: ...Do not discharge into any place where its accumulation could be dangerous Consult your supplier for specific recommendations Do not discharge it in areas where a risk of forming explosive atmospheres...
Страница 57: ...ibilities Before throwing away the packages make sure that all accessories supplied have been removed from them Handling To move the units use the pre cut handles if placed on the short sides of the p...
Страница 58: ...in the following places a Places where there are machines oils or other oils fumes b Along the coast with high salt concentration in the air c Near resurgences with high content of sulphuric gases d I...
Страница 59: ...2014 of the European Parliament and of the Council Installation must be performed by qualified and authorized personnel Do not attempt to install the unit by yourself For any repairs contact the serv...
Страница 60: ...cutters necessary for the passage of the pipes in the lower part of the frame using pliers Clip Front panel Front grill To remove the panel front Open the front grille Remove the 4 screws and the fron...
Страница 61: ...allation use the 6 holes Holes 1 and 2 as shown in the figure Three right side holes three left side holes Fix the unit adequately with screws plugs Use the installation diagram supplied with the unit...
Страница 62: ...Unit mm FLOOR on the back Open size Opening hole Installation of the additional plate for fixing the main unit The back of the unit can be secured with screws at the points shown in the following ill...
Страница 63: ...le reticle at the air outlet to allow adjustment of the flow direction of cold hot air 6 The reticle size should be equal to or greater than 70 of the opening frequency Partition plate on the right si...
Страница 64: ...ted with at least 10mm of insulating material to prevent conden sation Remove the air filters and pour water into the condensate collection tank Make sure that the water flows properly that there are...
Страница 65: ...and warranties may depend on how it was installed by default and the type of environment in which it is used See the manual for installing the outdoor unit for the maximum pipe length For multiple con...
Страница 66: ...unions placed on the pipe fittings of the units are to be immediately removed before use working in such a way that the cocks remain open for the minimum time possible 6 4 Refrigerating circuit piping...
Страница 67: ...areful control about com patibility between the electrical supply line and the features of the unit you want to connect In the electrical supply line of the unit it is mandatory to foresee a bipolar s...
Страница 68: ...les strands extensions or radial connections since they overheat easily they can cause shocks electrical or fire 2 Do not introduce pieces purchased in local Not derive power supply for the drain pump...
Страница 69: ...function Pressing it again it will disable the IFEEL function SWING Used to activate or stop the oscillation of the vertical regulation deflector and set the air flow upwards or downwards according t...
Страница 70: ...ows the temperature Timer setting display of the current time Display dell orario attuale Automatic fan speed O N O F F Smart Mode Indicator Low consumption indicator Ifeel Silent Indicator Sleep mode...
Страница 71: ...ndoor unit Avoid having obstructions between the remote control and the receiver on the indoor unit The remote control should not be Allowed to get wet Dropped Exposed to the direct sun light Exposed...
Страница 72: ...conditioner remains operative for long periods of time with high humidity levels it can show condensation drops on the surface Anti freezing protection In the event anti freezing protection of the ind...
Страница 73: ...rature Note Air conditioner modulate the compressor frequency automatically to maintain the set temperature Anti cool air protection Indoor fan functioning depends on the Indoor Unit exchanger tempera...
Страница 74: ...not optimal yet 3 By pressing button select the deflectors desired position 4 Press Button FAN SPEED select the desired speed fan The SMART button does not work in SUPER mode The ECONOMY button does n...
Страница 75: ...that you do not tilt the vertical deflector DOWNWARDS for a long time during the COOLING mode or DRY mode to PREVENT the condensed water dripping from the drainage Checking the VERTICAL AIR FLOW with...
Страница 76: ...tioner program Press button once Result ON 12 00 flashes on the display 2 Press the buttons Result 1 minute Increase or decrease every time you press the button By pressing the button for a second and...
Страница 77: ...MER OFF so that the device switches off at the desired time Cooling MODE SLEEP 1 Tamb Tset 2 Tset OFF Time h Tamb Tset Tset 2 OFF Time h MODE SLEEP 2 Tamb Tset 2 Tset OFF Time h Tset 1 Tamb Tset Tset...
Страница 78: ...fan speed is automatically set as low SLEEP function is actionable in HEAT COOL AND DRY modes In FAN mode is not actionable Tset OFF Time h Tset 2 Time h MODE SLEEP 3 Tamb Tset 3 Tset OFF Time h 0 1 2...
Страница 79: ...er or fan only only fan The temperature is automatically set to 16 C and the fan works at high speed 2 Pressing the button during heating mode The temperature is automatically set at 30 C and the fan...
Страница 80: ...orated into the remote control is activated This sensor can detect the temperature in the surrounding area and transmit the signal to the indoor unit which is able to automatically adjust the temperat...
Страница 81: ...minates in cooling mode and the temperature is automatically set to 16 C To switch it off press ON OFF button 8 18 User advices Efficiency in Heating mode This air conditioner is equipped with a heati...
Страница 82: ...mode Use the Timer effectively If the air conditioner is not used for a long period of time disconnect the electrical power supply via the switch located up the line from the system not included Use t...
Страница 83: ...ly soaked with water and alcohol at a temperature not exceeding 40 C Dry with a soft cloth The insecticide could damage the unit Never use fuel chemical solvents detergent and or abrasive powders furn...
Страница 84: ...r from the front panel To remove the dust accumulated on the air filter use a vacuum cleaner and or wash it in a solution of neutral detergent and warm water Allow it to dry completely in the shade be...
Страница 85: ...from the remote control Cover the outdoor unit with a suitable protective cover 9 7 At the air conditioner restart after a long inactivity Remove the protective cover from the outdoor unit and check...
Страница 86: ...dow The indoor unit of the air conditioner has surfaces with condensation especially in the vicinity of the cold air output If the environment is very wet this phenomenon is considered to be normal If...
Страница 87: ...OMALIES AND FUNCTIONING 10 1 Error codes displayed on the indoor unit display Error codes referring to the indoor unit Error code Description Causes How to Deal With 64 Communication between Indoor Ou...
Страница 88: ...he wiring controller is failure 5 The indoor control board is abnormally 1 Reconnect the wiring between the wiring controller to the indoor control board 2 Replace the wiring between the wiring contro...
Страница 89: ...ed and or re used The symbol of the crossed out rubbish bin indicates that the product batteries at the end of its useful life must be handled separately from domestic waste and must be sent to a sepa...
Страница 90: ...DISPLAY BOARD Scheda Display PUMP MOTOR Motore Pompa WATER LEVEL SWITCH Interruttore Livello Acqua 1 DESCRIZIONE DEI COMPONENTI IT IT 12 ELECTRICAL DIAGRAMS AND CONNECTIONS 12 1 Electrical wiring diag...
Страница 91: ...control Proceed as follows a Remove the 2 screws in the lower part of the front body b Move the 2 tabs to OPEN to open the front panel c Unscrew the 2 screws in the upper part of the front body d Unsc...
Страница 92: ...ntrol Before making any intervention on the unit make sure that the power supply has been removed 1 To access the unit control board follow the procedure carried out in chapter 12 2 2 Connect the pres...
Страница 93: ...eplaced or repaired free of charge The transporting components cost and work costs necessary for replacement activities are not included 2 Any tampering with electrical system or structural part of un...
Страница 94: ...e kept Please print in block letters GUARANTEE CERTIFICATE Slip A GUARANTEE CERTIFICATE Slip B Slip C Model Serial Number Date installation first running User Street Zip Town Country Slip B for Distri...
Страница 95: ......
Страница 96: ...mail info emmeti com Rev B 09 2019 Ufficio Tecnico Emmeti Spa AM Rispetta l ambiente Per il corretto smaltimento i diversi materiali devono essere separati e conferiti secondo la normativa vigente Re...