2
Installing a Deskside DPE
2-13
Installing a Deskside DPE
11. If you want to daisy-chain multiple deskside DAEs, cable them
together with copper cables only. Refer to the illustration that
follows.
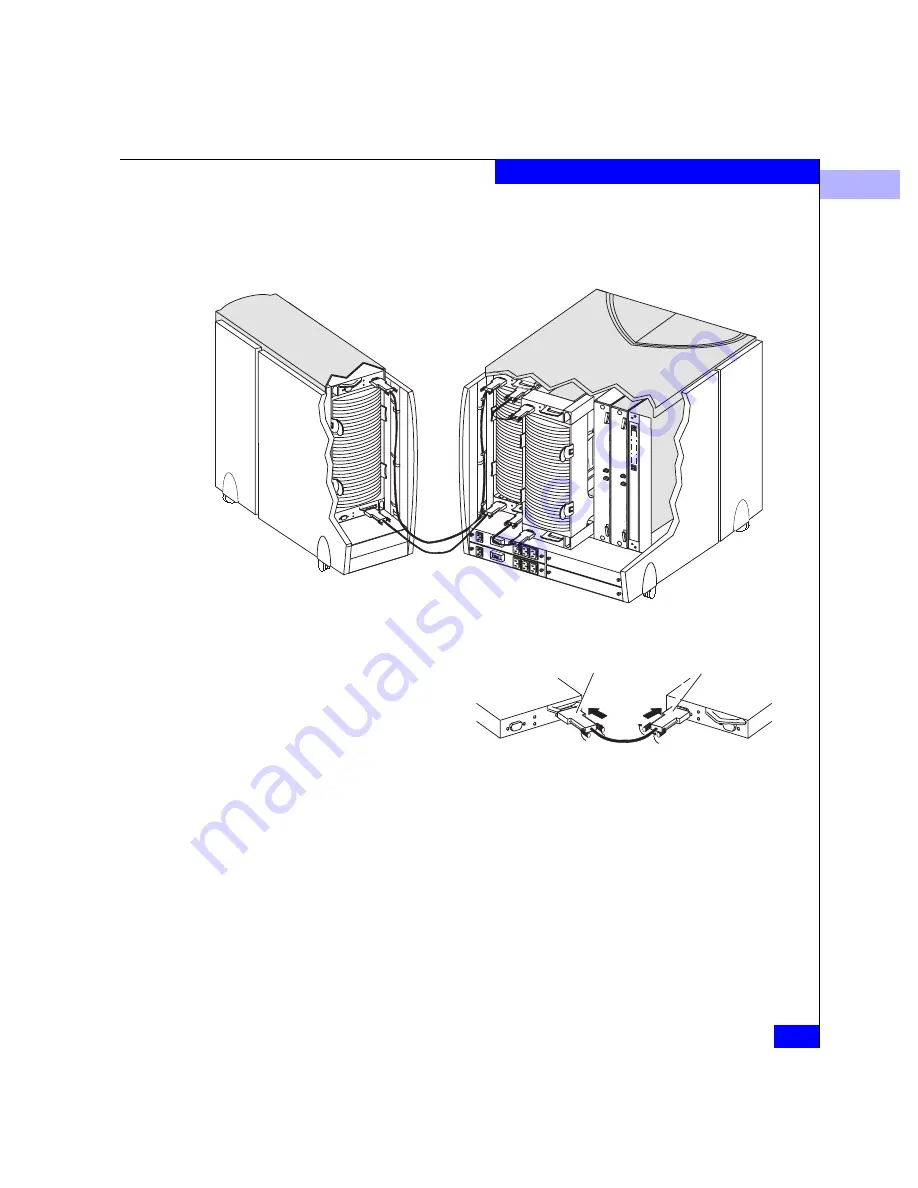
Figure 2-11
Daisy-Chaining a 10-Slot Deskside DAE from a Deskside DPE with
Copper Cable
12. Make sure all the slots in the deskside DPE contain either CRUs
or filler modules (for proper cooling and normal operation).
A.
Plug one end of the copper cable into the
expansion (EXP) connector on the DAE
LCC in the deskside DPE.
B.
Tighten the two screws on the
cable’s connector.
C.
Plug the other end of the copper
cable into the primary (PRI)
connector on the add-on LCC in
the 10-slot DAE.
D.
Tighten the two screws on the
cable’s connector.
Copper cable
LCC to LCC
Primary connector
PRI
Expansion connector
EXP
Содержание FC4400
Страница 6: ...EMC Disk Array Processor Enclosure DPE Deskside Model FC4400 4500 Hardware Reference vi Contents ...
Страница 10: ...x EMC Disk Array Processor Enclosure DPE Deskside Model FC4400 4500 Hardware Reference Figures ...
Страница 12: ...xii EMC Disk Array Processor Enclosure DPE Deskside Model FC4400 4500 Hardware Reference Tables ...
Страница 16: ...xvi EMC Disk Array Processor Enclosure DPE Deskside Model FC4400 4500 Hardware Reference Preface ...
Страница 128: ...g 6 EMC Disk Array Processor Enclosure DPE Deskside Model FC4400 4500 Hardware Reference Glossary ...
Страница 134: ...EMC Disk Array Processor Enclosure DPE Deskside Model FC4400 4500 Hardware Reference i 6 Index ...


