background image

73

F

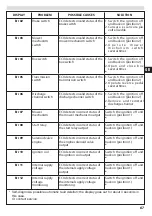
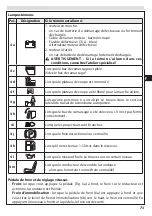
Lampes témoins

Pos.

Désignation

Si le témoin est allumé :

4 a

1. moteur en marche:


- en cas de batterie de démarrage défectueuse où fortement 

déchargée


- Câble de liaison moteur - batterie coupé


- Fusible défectueux (15 A - bleu).


- Alternateur moteur défectueux
2. moteur à l’arrêt :


- en cas de batterie de démarrage fortement déchargée.

  AVERTISSEMENT - Si le témoin s’allume dans ces 

conditions, consultez l’atelier spécialisé!

4 c

Lorsque le bac de ramassage est plein.
Videz le bac de ramassage !

4 d

Lorsque le plateau de coupe est commuté.

4 f

Lorsque le plateau de coupe a été libéré pour la marche arrière.

4 g

Lorsqu’une personne ou un objet se trouve dans le secteur 
latéral de travail de la tondeuse autoportée.

4 h

Lorsque le bac de ramassage a été enlevé ou s’il n’est pas fermé 
correctement.

4 i

Lorsque les projecteurs sont branchés.

4 j

Lorsque le frein est actionné ou verrouillé.

4 k

Lorsqu’il ne reste max. 1,5 litres dans le réservoir.

4 l

Lorsque le niveau d’huile se trouve sous un certain niveau.

4 m

Lorsque le conducteur descend de la tondeuse


- alors que le moteur tourne (frein verrouillé)

Pédale de frein et de réglage vitesses


Frein:  Lorsque vous appuyez la pédale (Fig. 6a) à fond, le frein sur le réducteur est 

actionné, la tondeuse est freinée.


Frein d’immobilisation: Lorsque la pédale de frein (6a) est appuyée à fond et que 

vous tirez le levier de frein d’immobilisation (6b) vers le haut, le frein est verrouillé. En 
appuyant à nouveau à fond sur la pédale, le frein est desserré.

Содержание EF 105

Страница 1: ...EF95 EF105 EF125 OM95 OM105 OM125 MANUALE USO E MANUTENZIONE I OPERATOR S INSTRUCTION BOOK GB MANUEL D UTILISATION ET D ENTRETIEN F ...

Страница 2: ... 4 9 8 16 17 6 11 2 1 1A 3 7 12 5 13 15 14 max 10 17 1 2 OM 125 23 H 68079020 GARDEN TRACTOR 13 5 kW 275 kg 105 2014 Via E Fermi 42011 Bagnolo in Piano RE Italy 27 햺 햹 햾 햻 햽 햲 햵 햳 햶 햴 햷 햿 햸 707 XXX 0001 2 ...

Страница 3: ...a b a b a b c a a b e f b a d c d e f g h i j k l m n 1 0 1 0 3 5 7 9 4 6 8 10 3 ...

Страница 4: ... Click a b a Click a b c a 1 2 1 2 1 2 11 13 15 17 12 14 16 18 4 ...

Страница 5: ...a b c a a 19 21 23 25 20 22 24 26 5 ...

Страница 6: ... L OPERATORE ADDETTO UN LIVELLO DI ESPOSIZIONE PERSONALE E GIORNALIERO A RUMORE PARI O SUPERIORE A 85 dB A INDICE 1 NORME DI SICUREZZA contiene le norme per utilizzare la macchina in sicurezza 7 2 SPIEGAZIONE SIMBOLI E AVVERTENZE DI SICUREZZA spiega come identificare la macchina e il significato dei simboli 8 3 COMPONENTI PRINCIPALI spiega l ubicazione degli elementi principali che compongono la m...

Страница 7: ...Tenere sempre il manuale a portata di mano In caso di smarrimento del manuale richiederne una copia 3 L uso della macchina è riservato a operatori adulti in grado di comprendere e rispettare le norme di sicurezza le precauzioni e le istruzioni contenute in questo manuale L uso della macchina da parte di minorenni non deve essere mai consentito 4 Non maneggiare né utilizzare la m a c c h i n a i n ...

Страница 8: ...essarie per garantire la propria sicurezza in particolare sui pendii sui terreni accidentati scivolosi o mobili 18 Sui pendii agire sempre con cautela operando in salita o in discesa mai in senso trasversale Non utilizzare la macchina su terreni con pendenza superiore a 10 17 19 Ricordare che il proprietario o l operatore è responsabile degli incidenti o dei rischi subiti da terzi o da beni di lor...

Страница 9: ...o cesto elettrico solo nei modelli che ne sono provvisti 17 Sensore cesto di raccolta 4 ASSEMBLAGGIO PER LA RIMOZIONE DELL IMBALLO E IL M O N TAG G I O D E L T R AT TO R I N O ATTENERSI ALLE ISTRUZIONI DI MONTAGGIO ACCLUSE ATTENZIONE Pericolo dovuto a montaggio incompleto Il trattorino non deve essere utilizzato prima di essere stato completamente montato Svolgere tutti i lavori descritti nelle re...

Страница 10: ...funzione III Posizione di accensione per avviare il motore Non appena il motore parte rilasciare la chiave che si riporterà automaticamente nella posizione d esercizio II Quadro comandi con display e senza display Se il trattorino dispone di un display Fig 4 oltre al quadro comandi standard Fig 3 leggere questo capitolo Tasti funzione e indicatori del display Pos Denominazione Funzione 4 b Nel dis...

Страница 11: ...o c è una persona o un oggetto 4 h se è stato rimosso il cesto di raccolta o se non è stato collegato secondo in base alle istruzioni 4 i nel caso in cui vengano accesi i fari 4 j se il freno viene azionato o in caso di freno bloccato 4 k se nel serbatoio è rimasta solo una quantità di carburante massima di ca 1 5 litri 4 l se il livello dell olio è inferiore a un determinato valore 4 m se il guid...

Страница 12: ...iù livelli 1 Spostare la leva di regolazione 7b nella direzione desiderata Leva verso il basso significa altezza di taglio bassa leva verso l alto invece aumenta l altezza di taglio ATTENZIONE Non lasciare la leva in posizione intermedia tra due tacche Rischio di movimento improvviso del piatto di taglio Inserimento del piatto di taglio Inserimento elettrico nella zona del quadro comandi si trova ...

Страница 13: ...tenza Autorizzato Evitare di eseguire operazioni che non si ritengono alla propria portata Non utilizzare l unità se non si ha la possibilità di richiedere soccorso in caso di incidente Non tentare di rimuovere il materiale tagliato mentre il motore è in funzione o l apparato di taglio è in movimento per evitare di procurarsi gravi lesioni Può accadere talvolta che alcuni rami o alcune sterpaglie ...

Страница 14: ... pendii rappresenta una delle operazioni a maggior rischio di perdita di controllo e ribaltamento della macchina entrambi i casi possono provocare danni seri o addirittura mortali Procedere con la massima cautela Se non si è in grado di affrontare la salita o se ci si sente insicuri evitare di tagliare il prato in pendenza ATTENZIONE Procedere in discesa con il gruppo di taglio nella posizione più...

Страница 15: ...estato L uso di un olio non detergente o per motori a due tempi può ridurre la durata del motore A motore fermo controllare il livello dell olio motore che deve essere compreso fra le tacche MIN e MAX dell astina Benzina ATTENZIONE La benzina è un carburante altamente infiammabile prestare estrema attenzione durante l uso Non fumare né portare fonti di fuoco o fiamme in prossimità del carburante o...

Страница 16: ... luogo aperto e ben aerato Ricordare sempre che i vapori di benzina sono infiammabili NON AVVICINARE FIAMME ALLA BOCCA DEL SERBATOIO PER VERIFICARE IL CO N T E N U TO E N O N F U M A R E DURANTE IL RIFORNIMENTO Verificare che non vi siano perdite di carburante se viene rilevata una perdita eliminarla prima di utilizzare l unità Se necessario rivolgersi a un officina autorizzata Riempimento del ser...

Страница 17: ...onando il pedale del freno 6a 4 Cercare di avviare il motore chiave di accensione in posizione III ATTENZIONE Il motore non deve avviarsi Verifica del sensore del piatto di taglio Il sensore del piatto di taglio assicura che il motore non possa essere avviato quando il piatto di taglio è attivo 1 Il motore è spento 2 Prendere posto sul sedile di guida 3 Pigiare il pedale del freno 6a e azionare il...

Страница 18: ...trebbero venire catturati ed espulsi ad alta velocità Prestare attenzione ai corpi estranei anche durante il taglio Svolgere tutti i lavori descritti nella messa in funzione Questo vale in particolare per il controllo dei dispositivi di sicurezza Pe r t r a i n a re c a r i c h i u t i l i z z a re esclusivamente il dispositivo di rimorchio Non superare il carico verticale Non è consentito traspor...

Страница 19: ...e sul minimo 3 Premere il pedale del freno 6a e bloccarlo con la leva del freno di stazionamento 6b 4 Ruotare la chiave di accensione 3d in posizione 0 5 Sfilare la chiave di accensione ATTENZIONE Pericolo motore molto caldo Nel fermare il motore prestare attenzione che le parti molto calde come la marmitta non incendino oggetti o materiali presenti nelle vicinanze Guidare il trattorino ATTENZIONE...

Страница 20: ... tosaerba non dovrebbe trovarsi nell erba alta 1 Avviare il motore 2 Muovere il regolatore 3b per il numero di giri motore in posizione di esercizio 3 Portare il piatto di taglio alla massima altezza di taglio 7b 4 Attivare il piatto di taglio con l interruttore 3e posizione I 5 Con la leva manuale impostare l altezza di taglio desiderata 7b 6 Partire con il trattorino Taglio dell erba in retromar...

Страница 21: ...gliare l erba con il prato ben asciutto 3 La lama deve essere integra e ben affilata in modo che la recisione sia netta e senza sfrangiature che portano ad un ingiallimento delle punte 4 Il motore deve essere utilizzato al massimo dei giri sia per assicurare un taglio netto dell erba che per ottenere una buona spinta dell erba tagliata attraverso il canale d espulsione 5 La frequenza delle rasatur...

Страница 22: ...caldi PERICOLO DI TAGLIO In caso di lavori sugli utensili di taglio prestare attenzione alle lame affilate Nel caso di utensili di taglio a più taglienti il movimento di uno di loro può indurre il movimento in un altro Pulizia del sacco di raccolta Per compiere questa operazione rimuovere il sacco di raccolta e spruzzarlo all interno e all esterno con un tubo flessibile dell acqua Sporcizia fortem...

Страница 23: ... giri medio 3 Abbassare il piatto di taglio all altezza di taglio più bassa 4 Inserire il piatto di taglio 5 Dopo pochi minuti il sistema di taglio è pulito 6 Disattivare il piatto di taglio 7 Fermare il motore 8 Spegnere l acqua e rimuovere il tubo 9 Avviare il motore un altra volta e lasciare il piatto di taglio in funzione ancora alcuni minuti per rimuovere l acqua tramite azione centrifuga 10 ...

Страница 24: ...ate Nel caso di utensili di taglio a più taglienti il movimento di uno di loro può indurre il movimento in un altro In caso di sostituzione di componenti utilizzare solo parti originali In caso di dubbi visitare un officina specializzata oppure contattare il costruttore Il fluido idraulico in caso di fuoriuscita sotto pressione può causare ferite gravi in tal caso cercare immediatamente assistenza...

Страница 25: ...ico dell olio è agevolata se l olio è caldo ATTENZIONE Eliminare l olio per motore usato in conformità con le norme per il rispetto dell ambiente È obbligatorio consegnare a un officina autorizzata l olio usato in un contenitore sigillato Non gettarlo nella spazzatura né versarlo in un lavandino sul terreno o nella rete fognaria Piano di lubrificazione Per garantire la funzionalità delle parti mob...

Страница 26: ...sclusivamente con batterie da 12 V e collegato a una presa di corrente efficiente e sicura con tensione e frequenza corrispondente a quella indicata sulla targhetta del carica batterie Il carica batterie è fornito con pinze a coccodrillo per collegamenti volanti alla batteria Collegare le pinze rispettando la polarità Cavo rosso Polo positivo Cavo nero Polo negativo ATTENZIONE Se la batteria non v...

Страница 27: ...più presto possibile AT TENZIONE PERICOLO DI CORTOCIRCUITO Non collegare mai direttamente tra di loro i poli positivo e negativo della batteria con un cavo o altro oggetto di metallo Non appoggiare utensili sul piano della batteria Utilizzare unicamente utensili un cacciavite o una pinza provvisti di manico isolato CAUTELA Se la batteria non è sufficientemente carica la scheda elettronica della ma...

Страница 28: ... di un fusibile Sulla macchina sono previsti tre fusibili Fig 27 di diversa portata le cui funzioni e caratteristiche sono le seguenti Fusibile da 10 A modelli senza display 7 5 A modelli con display a protezione dei circuiti generali e di potenza della scheda elettronica il cui intervento provoca l arresto della macchina Fusibile da 15 A a protezione del circuito di ricarica il cui intervento si ...

Страница 29: ...li appositi centri di raccolta che provvederanno al riciclaggio dei materiali Demolizione e smaltimento Al momento della messa fuori servizio non abbandonare la macchina nell ambiente ma rivolgersi a un centro di raccolta Buona parte dei materiali impiegati nella costruzione della macchina sono riciclabili tutti i metalli acciaio alluminio ottone si possono consegnare ad un normale ferro recupero ...

Страница 30: ...iore alla velocità massima della macchina senza accessori trainati 12 S e g u i re l e i s t r u z i o n i p e r l a manutenzione e la lubrificazione degli accessori da traino descritte in questo manuale per il loro ottimale funzionamento durante il lavoro Montaggio Per il montaggio vedi il relativo manuale del carrello Utilizzo Consultare anche il manuale degli accessori da traino ATTENZIONE Per ...

Страница 31: ...ggio al gancio di traino della macchina e relativo perno con olio automobilistico Ingrassare o oliare i cuscinetti delle ruote periodicamente Utilizzare grasso per cuscinetti delle ruote o olio automobilistici Controllare periodicamente il serraggio di tutta la bulloneria Tenere sempre adeguatamente gonfiati i pneumatici Non superare mai la pressione massima consigliata Pneumatici non gonfiati cor...

Страница 32: ... marcia avanti km h 0 9 0 11 in retromarcia km h 0 4 0 5 Livello pressione acustica LpA EN ISO 5395 1 5395 3 dB A 90 Incertezza dB A 2 Livello potenza acustica misurato LwA 2000 14 CE EN ISO 3744 EN ISO 5395 1 EN ISO 5395 3 dB A 96 101 Incertezza dB A Livello di potenza acustica garantito LwA 2000 14 CE EN ISO 3744 EN ISO 5395 1 EN ISO 5395 3 dB A 100 105 Livello di vibrazioni EN ISO 5395 1 EN ISO...

Страница 33: ...ioni della direttiva 2006 42 EC 2000 14 EC 2014 30 EU è conforme alle disposizioni delle seguenti norme armonizzate EN ISO 5395 1 EN ISO 5395 3 EN ISO 14982 Procedure per valutazione di conformità seguite Annex VI 2000 14 EC Livello di potenza acustica misurato 96 dB A OM 95 OM 105 EF 95 EF 105 101 dB A OM 125 EF 125 Livello di potenza acustica garantita 100 dB A OM 95 OM 105 EF 95 EF 105 105 dB A...

Страница 34: ...zia timbrato dal rivenditore compilato in tutte le sue parti e corredato di fattura d acquisto o scontrino f i s c a l m e n t e o b b l i g a t o r i o comprovante la data d acquisto 4 La garanzia decade in caso di Assenza palese di manutenzione Utilizzo non corretto del prodotto o manomissioni Utilizzo di lubrificanti o combustibili non adatti Utilizzo di parti di ricambio o accessori non origin...

Страница 35: ...clienti Troppo carburante nella camera di combustione a causa di ripetuti tentativi di avviamento Svitare e asciugare la candela di accensione 2 Lo starter non funziona Batteria di avviamento scarica o debole Caricare la batteria di avviamento Interruttore di sicurezza del sedile di guida non in funzione Prendere posto correttamente sul sedile di guida interruttore guasto Interruttore di sicurezza...

Страница 36: ...o si asciughi Lama fortemente usurata Sostituire lama Servizio officina clienti Erba troppo alta Tagliare l erba in due passaggi 1 Passaggio altezza di taglio max 2 Passaggio altezza di taglio desiderata Sacco in tessuto intasato non passa aria Pulire il sacco in tessuto Canale di espulsione piatto di taglio sporco Pulire canale di espulsione piatto di taglio intasati 8 La spia di riempimento non ...

Страница 37: ...e posizione 2 2 Smontare e rimontare più v o l t e i l c a n a l e d i espulsione Err 07 Piatto di taglio L elettronica riconosce uno stato errato dell uscita del piatto di taglio Disattivare e riattivare l accensione posizione 1 Err 08 Relè di avviamento L elettronica riconosce uno stato errato dell uscita relè di avviamento Disattivare e riattivare l accensione posizione 1 Err 09 Elettro valvola...

Страница 38: ...POSE THE OPERATOR TO A PERSONAL DAILY NOISE LEVEL EQUAL TO OR HIGHER THAN 85 dB A CONTENTS 1 S A F E T Y P R E C A U T I O N S precautions for using the machine safety 39 2 S YM B O L S A N D S A F E T Y WARNINGS explanations on how to identify the machine and the meaningofthesymbols 40 3 MAIN COMPONENTS position of the main parts that make up the machine 41 4 ASSEMBLY explanations on how to remov...

Страница 39: ... Minors should never be allowed to use the machine 4 Do not handle or operate the machine when you are fatigued ill or upset or if you have taken alcohol drugs or medication You must be in good physical condition and mentally alert Using the machine is strenuous if you have any condition that might be aggravated by strenuous work check with your doctor before operating the machine Be more cautious...

Страница 40: ...fitted with different accessories It is the owner s responsibility to ensure that these tools or accessories conform to a p p l i c a b l e E u r o p e a n s a f e t y regulations Using non certified accessories can jeopardise your safety 22 Do not become distracted or lose concentration during work WARNING Never use a machine with faulty safety equipment The machine s safety equipment must be che...

Страница 41: ...owing the instructions given in the engine manual WA R N I N G U n p a c k i n g a n d completing the assembly should be done on a flat and stable surface with enough space for handling the machine and its packaging always making use of suitable equipment The packaging should be disposed of in accordance with local regulations in force 5 COMMANDS AND CONTROL INSTRUMENTS The following section descr...

Страница 42: ...keys and display Item Designation Function 4 b The display shows Daily operating hours indicated to one decimal place CAUTION The daily operating hours are indicated using the decimal system 1 5 h 1 h 30 min or Total operating hours indicated without decimal place CAUTION The total operating hours start counting as soon as the ignition key is turned to position I 4 e To change over the display Tot...

Страница 43: ...g If a person or an object is located in the working area to the side of the lawn tractor 4 h With the grass catcher removed or not closed according to the regulations 4 i With the headlights switched on 4 j If the brake is applied and with the brake locked 4 k There are only about 1 5 litres of fuel at most remaining in the tank 4 l If the oil level is below a particular level 4 m If the operator...

Страница 44: ...ting height is low when the lever is up the cutting height is high WARNING Do not leave the lever positioned between two notches Risk of sudden movement of the cutting deck Switching on the mower mechanism Switching on electrically There is a switch 3e in the area of the dashboard Use this to switch the mower mechanism on 6 INSTRUCTIONS FOR USE Prohibited uses WARNING Use the machine solely for cu...

Страница 45: ...t to remove cut material while the engine is running or the cutter assembly is rotating as this can result in serious injury Sometimes branches or grass may get caught between the speed adjustment pedals Always stop the engine before cleaning Never leave the machine unattended with the engine running or with the ignition key inserted Always stop the blade engage the parking brake switch off the en...

Страница 46: ...ydrostatic drive s braking effect and the accelerator lever To work on sloping ground proceed as follows Mow up and down never side to side Never drive the machine on terrain that slopes more than 10 17 Avoid starting or stopping on a slope If the tyres begin to slip stop the blade and drive slowly down the slope Always drive evenly and slowly Make no sudden changes in speed or direction Avoid unn...

Страница 47: ...l onto plastic parts to prevent them being damaged In the event of accidental spillages rinse immediately with water The warranty does not cover for damage to plastic parts of the bodywork or the engine caused by petrol Loosen fuel cap slowly to release pressure and to keep fuel from escaping around the cap Clean surface around fuel cap to prevent contamination Prior to replacing the fuel cap clea...

Страница 48: ... must be pushed into the opening in the rear wall Make sure the fill level sensor is in the correct position Push it into the opening straight and without excessive force until you can feel it engage Hooking in the grass catcher 1 Hold the grass catcher with one hand on the catcher handle 12a and your other hand on the holding opening at the back 12b 2 Place the grass catcher symmetrically onto th...

Страница 49: ... contact switch The discharge channel contact switch ensures that the lawn tractor cannot be started when the discharge channel is removed 1 Remove the grass catcher 2 Remove the discharge channel 3 Sit on the operator s seat 4 Press the brake pedal 6a and the parking brake 6b 5 Start the engine CAUTION The engine is not allowed to start WARNING Do not use the machine if you are unsure whether it ...

Страница 50: ... side down fully and lock it using the locking lever 6b 3 Make sure the mower mechanism is not switched on Check the position of the toggle switch 3e for this purpose 4 Move the controller 3b for the engine speed to the top stop The choke symbol is located there depending on the equipment variant If it is not pull the separate choke button 3a 5 Insert the ignition key into the ignition lock 3d 6 T...

Страница 51: ...chieve a tidy mowing result Select at most two thirds of the possible driving speed at the pedal when mowing The maximum speed of the tractor is exclusively intended for driving without the mower mechanism switched on Normally the cutting height is 4 5 cm This corresponds to the 2nd or 3rd position of the height adjustment 7b Please mow with a higher cutting height if the grass is moist or wet If ...

Страница 52: ...er opens 3 Move the grass catcher backwards with the lever until the catcher engages Sloping ground See paragraph Using the machine on sloping ground on page 46 Mulching kit If in addition to discharging cuttings onto the ground you want them to be chopped up more finely the machine is supplied with a mulching kit WARNING For mounting use the appropriate manual Mounting mulching kit Lawn maintenan...

Страница 53: ... outside of the machine empty the grass catcher and shake it to remove residual grass and earth Do not use a high pressure cleaner for cleaning The water jet from a high pressure cleaner or a garden hose can damage the electrical system or bearings In particular make sure that no water comes into contact with the engine transmission and deflection pulleys as well as the entire electrical system WA...

Страница 54: ...nections for a half inch water hose coupling 20a on the mower deck The mowing system can be cleaned by connecting a water hose The grass catcher or a suitable accessory such as a deflector must be installed during the cleaning process 1 Connect the water hose to the lawn tractor 20a and turn on the water 2 Start the engine and set it to a medium engine speed 3 Lower the mower mechanism to the lowe...

Страница 55: ... hot DANGER OF LACERATIONS When working on the cutters pay attention to the sharp blades In mowers with more than one blade moving one cutter can cause the other to move as well Parts are only allowed to be renewed by genuine spare parts If in doubt always visit a specialist w o r k s h o p o r c o n t a c t t h e manufacturer The hydraulic fluid may cause serious injury in the event of leakage un...

Страница 56: ...o ensure that moving parts can move freely we recommend lubricating the following points at least once a year Use a cloth to clean all points to be lubricated before greasing or spraying Do not use water so as to avoid possible corrosion Lubricating points Grease the grease nipples on the right and left steering knuckles 23 using multi purpose grease Spray oil onto the bearings of the front axle o...

Страница 57: ...er socket and then connect the crocodile clips to the battery terminals To disconnect the battery charger first disconnect the black clip negative terminal to prevent accidental short circuits Do not leave the battery charger disconnected from the mains while connected to the battery this may discharge the battery Red LED on the battery is connected with reversed polarity Green LED on the battery ...

Страница 58: ...trolyte comes into contact with the eyes wash with copious amounts of water and seek medical attention Store the battery out of reach of children Do not store the battery in closed containers If keeping in enclosed rooms make sure that there is sufficient ventilation Leaking gas may cause explosions fires damage to property and bodily injury Disposal The battery and battery charger must never be d...

Страница 59: ...uce vibrations If the cut is uneven check the tyre pressure Blade WARNING Always wear work gloves to check the condition of the blade A damaged or bent blade must always be replaced Never repair a damaged blade by welding straightening or modifying it This may cause the blade to come off and result in serious or fatal injuries Always use original marked blades Check periodically that the bolt is t...

Страница 60: ...erly or if the user fails to understand how to make them work correctly Pay attention at all times when using such accessories 1 Read this manual and the manual supplied with the trailer before assembly and use 2 Read the manual of the machine to which the towed accessories will be hitched so that you fully understand how it works before using it 3 It is strictly prohibited to transport people or ...

Страница 61: ...onditions are much more demanding Trailer To unload material from the trailer s tipper body remove the cotter pin and the pin that keep the body fixed to the frame When removing the pin keep the tipper body handle pressed with your other hand to prevent the body from tipping up suddenly Then pull the handle upward to unload the material NOTE The handle is extractable to reduce the effort needed fo...

Страница 62: ...e km h 0 9 0 11 in reverse drive km h 0 4 0 5 Sound pressure level LpA EN ISO 5395 1 5395 3 dB A 90 Uncertainty dB A 2 Measured sound power level LwA 2000 14 CE EN ISO 3744 EN ISO 5395 1 EN ISO 5395 3 dB A 96 101 Uncertainty dB A 4 Guaranteed sound power level LwA 2000 14 CE EN ISO 3744 EN ISO 5395 1 EN ISO 5395 3 dB A 100 105 Vibration level EN ISO 5395 1 EN ISO 5395 3 steering wheel m s2 2 2 2 1...

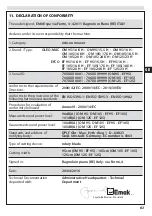
Страница 63: ...nts of Directives 2006 42 EC 2000 14 EC 2014 30 EU conforms to the provisions of the following harmonised standards EN ISO 5395 1 EN ISO 5395 3 EN ISO 14982 Procedures for evaluation of conformity followed Annex VI 2000 14 EC Measured sound power level 96 dB A OM 95 OM 105 EF 95 EF 105 101 dB A OM 125 EF 125 Guaranteed sound power level 100 dB A OM 95 OM 105 EF 95 EF 105 105 dB A OM 125 EF 125 Sta...

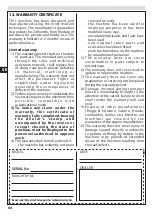
Страница 64: ... m p a n d accompanied by the invoice or receipt showing the date of purchase must be displayed to the personnel authorised to approve work 4 The warranty shall be null and void if the machine has evidently not been serviced correctly the machine has been used for improper purposes or has been modified in any way unsuitable lubricants and fuels have been used non original spare parts and accessori...

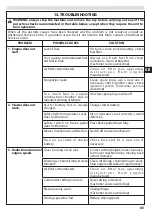
Страница 65: ...tem Customer service workshop Too much fuel in engine combustion chamber due to repeated starting attempts Unscrew spark plug and dry off 2 Starter does not work Starter battery flat or weakly charged Charge starter battery Safety switch on operator s seat does not function Sit on operator s seat correctly switch defective Safety switch on brake pedal does not function Press brake pedal down fully...

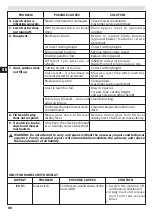
Страница 66: ...verely worn Change blade Customer service workshop Grass in lawn too tall Mow in 2 passes 1st pass max cutting height 2nd pass desired cutting height Fabric bag blocked does not allow air to pass Clean fabric bag Discharge channel mower deck contaminated Clean discharge channel mower deck 8 Fill level display does not respond Mown grass stuck to fill level display lever Remove mown grass from fill...

Страница 67: ...ch the ignition off and back on position 2 2 Remove and reinstall discharge channel Err 07 Mower mechanism ECU detects incorrect status of the mower mechanism output Switch the ignition off and back on position 1 Err 08 Start relay ECU detects incorrect status of the start relay output Switch the ignition off and back on position 1 Err 09 Solenoid valve engine ECU detects incorrect status of the e...

Страница 68: ...GIN PEUT REPRÉSENTER POUR L OPÉRATEUR PRÉPOSÉ UN NIVEAU D EXPOSITION PERSONNELLE ET QUOTIDIENNE AU BRUIT ÉGALE OU SUPÉRIEURE À 85 dB A SOMMAIRE 1 RÈGLES DE SÉCURITÉ contient les consignes d utilisation de la machine en sécurité 69 2 EXPLICATION DES SYMBOLES ET AVERTISSEMENTS DE SÉCURITÉ comment identifier la machine et la signification des symboles 70 3 COMPOSANTS PRINCIPAUX emplacement des compos...

Страница 69: ...onnement et soyez en mesure de les appliquer avant toute utilisation de la machine 2 S assurer de toujours avoir le manuel à portée de la main En cas de perte en demander une copie 3 L utilisation de la machine est réservée à des opérateurs adultes en mesure de comprendre et de respecter les normes de sécurité les précautions et les instructions contenues dans ce manuel L utilisation de la machine...

Страница 70: ...s nécessaires pour garantir sa propre sécurité surtout en cas de terrains en pente accidentés glissants et meubles 18 Sur les pentes toujours agir prudemment en montée ou descente jamais dans un sens transversal Ne pas utiliser la machine sur des terrains dont l inclinaison dépasse 10 17 19 Se rappeler que le propriétaire ou l opérateur est responsable des accidents ou des dommages aux tiers aux b...

Страница 71: ...ment électrique du bac umiquement pour les modèles qui en sont équipés 17 Capteur de bac de ramassage 4 ASSEMBLAGE Respectez la notice de montage fournie pour le déballage et le montage de la tondeuse ATTENTION Risques suite au montage incomplet La tondeuse ne doit pas être employée si elle n est pas totalement montée Effectuez tous les travaux de montage décrits dans la notice de montage En cas d...

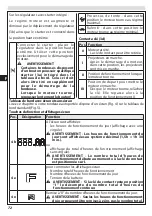
Страница 72: ...ition de départ pour mettre le moteur en marche Dès que le moteur tourne relâchez la clé Elle repasse alors à la position de fonctionnement II Tableau de bord avec écran et sans écran Lisez ce chapitre si votre tondeuse autoportée dispose d un écran Fig 4 sur le tableau de bord standard Fig 5 Touches de fonction et affichages écran Pos Désignation Fonction 4 b A l écran sont affichées les heures d...

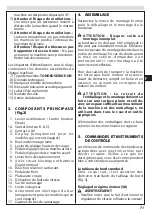
Страница 73: ...ve dans le secteur latéral de travail de la tondeuse autoportée 4 h Lorsque le bac de ramassage a été enlevé ou s il n est pas fermé correctement 4 i Lorsque les projecteurs sont branchés 4 j Lorsque le frein est actionné ou verrouillé 4 k Lorsqu il ne reste max 1 5 litres dans le réservoir 4 l Lorsque le niveau d huile se trouve sous un certain niveau 4 m Lorsque le conducteur descend de la tonde...

Страница 74: ...e Réglage de la hauteur de coupe plateau de coupe de la tondeuse peut être réglé en hauteur sur plusieurs niveaux grâce à un levier 7b se trouvant à droite du siège conducteur 1 Actionnez le levier de réglage 7b dans la direction souhaitée Le levier vers le bas signifie coupe plus basse le levier vers le haut coupe plus haute ATTENTION Ne pas laisser le levier en position intermédiaire entre 2 rep...

Страница 75: ... À DES TIERS Avant d utiliser la machine Lire les prescriptions générales de sécurité avec une attention particulière à l avance et à la coupe sur les sols en pente Lire attentivement les instructions d utilisation prendre familiarité avec les commandes et l arrêt rapide de la lame et de la machine ATTENTION En présence de situations pour lesquelles vous ne savez pas comment agir consulter un expe...

Страница 76: ...es ATTENTION To u j o u r s s e r r e r l e f r e i n d e stationnement avant d abandonner la machine sans surveillance Sur les terrains en pente commencer l avance en prêtant une attention particulière pour éviter que la machine se cabre Réduire la vitesse avant tout changement de direction sur les sols en pente Ne pas actionner la pédale de réglage de vitesse en marche arrière pour réduire la vi...

Страница 77: ...avant de commencer le travail Avant de commencer à travailler procéder à une série de contrôles et d opérations pour garantir que le travail se déroule d une façon profitable dans la sécurité maximum Ravitaillements AVERTISSEMENT Les types d essence et d huile préconisés sont indiqués dans le livret d instructions du moteur Huile AVERTISSEMENT LA MACHINE EST LIVRÉE SANS HUILE Remplir le moteur en ...

Страница 78: ...rvoir de carburant directement au soleil Conserver et transporter le carburant dans des récipients propres homologués pour cet usage Entreposer le carburant dans un endroit sec frais et suffisamment ventilé Entreposer la machine et le carburant dans un endroit à l abri de toute source d étincelles ou de flammes nues de chauffe eau de moteurs électriques d interrupteurs de fours etc susceptibles d ...

Страница 79: ...lors de la vérification des dispositifs de sécurité La vérification des dispositifs de sécurité ne doit être effectuée qu à partir du siège conducteur et lorsque aucune personne ni animal ne se trouve à proximité Effectuez toutes ces vérifications sur une surface plane afin que la tondeuse ne puisse pas rouler involontairement Vérifier le contacteur de frein Le contacteur de frein garantit que le ...

Страница 80: ...c attention la notice d utilisation complète avant de démarrer Veillez plus particulièrement aux consignes de sécurité Effectuez tous les travaux de montage et de mise en route de manière consciencieuse En cas de doute demandez au fabricant Mesures générales de préparation Pendant l opération de coupe portez toujours des chaussures solides et des pantalons longs Ne jamais effectuer la coupe les pi...

Страница 81: ...e régime moteur vers la butée supérieure Selon le type d équipement le symbole du starter s y trouve Si non tirez sur le bouton individuel de starter 3a 5 Introduisez la clé dans le contact 3d 6 Tournez la clé de contact en position III et maintenez la dans cette position jusqu à ce que le moteur démarre AVERTISSEMENT Afin de ménager la batterie de démarrage une tentative de démarrage ne devrait p...

Страница 82: ...e Coupe de l herbe en marche avant Pour obtenir un résultat de coupe propre il convient d adapter la vitesse à l état du gazon Pour la coupe optez pour un maximum de 2 3 des possibilités de vitesse sur la pédale La vitesse maximale de la tondeuse est réser vée au déplacement sans que le plateau de coupe soit branché La hauteur de coupe normale est de 4 5 cm Cela correspond au cran 2 ou 3 du réglag...

Страница 83: ...onnez le commutateur 8a sur le côté gauche du siège conducteur 2 Pour fermer le bac de ramassage actionnez à nouveau le commutateur Vider le bac de ramassage avec le levier de commande 1 Tirez le levier de commande du bac de ramassage 18 2 Appuyez sur le levier dans le sens de la marche afin que le bac de ramassage s ouvre 3 Déplacez le bac de ramassage avec le levier vers l arrière jusqu à ce que...

Страница 84: ...secondes avant d éteindre le moteur Retirer la clé avant de laisser la machine sans surveillance AVERTISSEMENT Pour éviter que la batterie se décharge ne pas laisser la clé en position de MARCHE II quand le moteur ne marche pas Si le commutateur d allumage est endommagé placer l accélérateur sur STARTER pour arrêter le moteur Nettoyage de la machine Après chaque utilisation nettoyer l extérieur de...

Страница 85: ...e à l eau Nettoyage du canal d éjection Le réglage de la hauteur de coupe est assuré par le nettoyage régulier Le canal d éjection est constitué de deux pièces imbriquées l une dans l autre La pièce inférieure est fixée dans le carter de la tondeuse La pièce supérieure peut être retirée pour le nettoyage 1 Enlevez le bac de ramassage 2 Enlevez les vis 19a à gauche et à droite du canal d éjection 3...

Страница 86: ...le véhicule ou le chariot utiliser des courroies de tension approuvées contrôler que l arrimage soit correct et robuste et 4 cales installées sur les roues arrière ATTENTION Le frein à main seul ne garantit pas la stabilité de la machine pendant le transport Pendant le transport personne ne doit rester assis sur la machine Avant le transport sur voie publique consulter et appliquer le code de la r...

Страница 87: ...lame 2 25 heures 10 Contrôle de toutes les fixations 25 heures 11 Lubrification générale 3 25 heures 1 Contacter votre revendeur aux p r e m i e r s s i g n e s d e dysfonctionnement 2 Opération à confier au revendeur ou un centre d assistance autorisé 3 La lubrification générale de toutes les articulations devrait en outre être faite chaque fois que l on prévoit une longue inactivité de la machin...

Страница 88: ...tterie de démarrage pour le stockage d hiver dans un local frais et sec 10 15 C Les températures inférieures à 0 C doivent être évitées pour le stockage Ne laissez pas la batterie de démarrage déchargée pendant une longue période Lorsque la batterie de démarrage n a pas été utilisée pendant une longue période vous devez la recharger à l aide d une chargeur approprié Ne pas détruire la batterie de ...

Страница 89: ...vous ne respectez pas la procédure et ne chargez pas la batterie il pourrait se produire des dommages irréparables aux composants de la batterie Une batterie déchargée doit être rechargée au plus vite Branchement batterie Respectez avant la charge de la batterie de démarrage les recommandations de la notice d utilisation du fabricant de chargeurs 1 Retirez la clé de contact 3d 2 Ouvrez le capot mo...

Страница 90: ...s cales sous un élément portant du châssis après l avoir soulevé du côté de la roue à remplacer Les roues sont fixées par un circlip 21b protégé par un couvercle 21a tous deux amovibles par tournevis AVERTISSEMENT En enlevant la roue de l essieu arrière ne perdez pas la clavette REMARQUE En cas de remplacement d une des roues arrière vérifier que les différences éventuelles du diamètre externe ent...

Страница 91: ... avec desserrage de la lame pendant le travail avec des conséquences dangereuses pour l opérateur Pour cette raison l équilibrage et le remplacement de la lame doivent être confiés à un SAV agréé Démonter le plateau de coupe Contacter un Centre d Assistance Agréé Remplacer la courroie trapézoïdale Contacter un Centre d Assistance Agréé 8 PROTECTION DE L ENVIRONNEMENT La protection de l environneme...

Страница 92: ...ugmenter progressivement la vitesse en l adaptant toujours aux conditions d utilisation 7 Remorquer les accessoires à vitesse réduite sur les terrains accidentés les collines ou les berges des torrents et fossés pour éviter le retournement ou la perte de contrôle Ne jamais conduire trop près des torrents et fossés 8 Les accessoires de remorquage peuvent entraîner des problèmes de stabilité pendant...

Страница 93: ...rs le haut pour effectuer le déchargement REMARQUE Le manche peut être extrait pour permettre de réduire l effort de relevage Après le vidage pousser le manche vers le bas et bloquer le caisson en réinstallant l axe et la goupille ATTENTION Avant d effectuer les opérations de vidage toujours contrôler l absence de personnes ou choses dans les abords du chariot Dimensions 112x85x28 cm Entretien Ava...

Страница 94: ...rche avant km h 0 9 0 11 en marche arrière km h 0 4 0 5 Niveau de pression acoustique LpA EN ISO 5395 1 5395 3 dB A 90 Incertitude dB A 2 Niveau de pression acoustique mesurée LwA 2000 14 CE EN ISO 3744 EN ISO 5395 1 EN ISO 5395 3 dB A 96 101 Incertitude dB A 4 Niveau de pression acoustique garanti LwA 2000 14 CE EN ISO 3744 EN ISO 5395 1 EN ISO 5395 3 dB A 100 105 Niveau de vibrations EN ISO 5395...

Страница 95: ...ions des directives 2006 42 EC 2000 14 EC 2014 30 EU est conforme aux prescriptions des normes harmonisées EN ISO 5395 1 EN ISO 5395 3 EN ISO 14982 Procédures d évaluation de conformité effectuées Annex VI 2000 14 EC Niveau de puissance acoustique mesuré 96 dB A OM 95 OM 105 EF 95 EF 105 101 dB A OM 125 EF 125 Niveau de puissance acoustique garanti 100 dB A OM 95 OM 105 EF 95 EF 105 105 dB A OM 12...

Страница 96: ...dessous portant le cachet du revendeur dûment rempli et accompagné de la facture d achat ou du ticket de caisse obligatoire reportant la date d achat 4 La garantie s annule en cas de d absence manifeste d entretien d utilisation incorrecte ou de manipulation du produit d utilisation de lubrifiants ou de carburants inadéquats d utilisation de pièces détachées ou d accessoires non originaux d interv...

Страница 97: ... de combustion en r a i s o n d e s n o m b r e u s e s tentatives de démarrage Dévisser la bougie et la sécher 2 Le démarreur ne fonctionne pas Batterie de démarrage à plat ou faible Charger la batterie de démarrage Le commutateur de sécurité du siège du conducteur est hors fonction S assoir correctement sur le siège du conducteur commutateur défectueux Le commutateur de sécurité de la pédale de ...

Страница 98: ...heure de la tonde jusqu à ce que l herbe ait séché Lame très usée Remplacer la lame Atelier de service après vente Gazon trop haut Couper le gazon sur 2 x 1 Débit hauteur de coupe maximale 2 Débit hauteur de coupe souhaitée Sac en toile bouché absence de passage d air Nettoyer le sac en toile Canal d éjection plateau de coupe encrassé Canal d éjection nettoyer le plateau de coupe 8 L indicateur de...

Страница 99: ...le contact position 2 2 Démonter et remonter plusieurs fois le canal déjection Err 07 Plateau de coupe Le système électronique détecte l état invalide de la sortie du plateau de coupe Éteindre et remettre le contact position 1 Err 08 Relais de démarrage Le système électronique détecte l état invalide de la sortie du relais de démarrage Éteindre et remettre le contact position 1 Err 09 Électro vann...

Страница 100: ... it Mod 3056380A Ott 2016 I ATTENZIONE Questo manuale deve accompagnare la macchina durante tutta la sua vita GB WARNING This owner s manual must stay with the machine for all its life F ATTENTION Le manuel doit accompagner la machine pour toute sa vie ...

Отзывы: