www.emachines.com
37
6
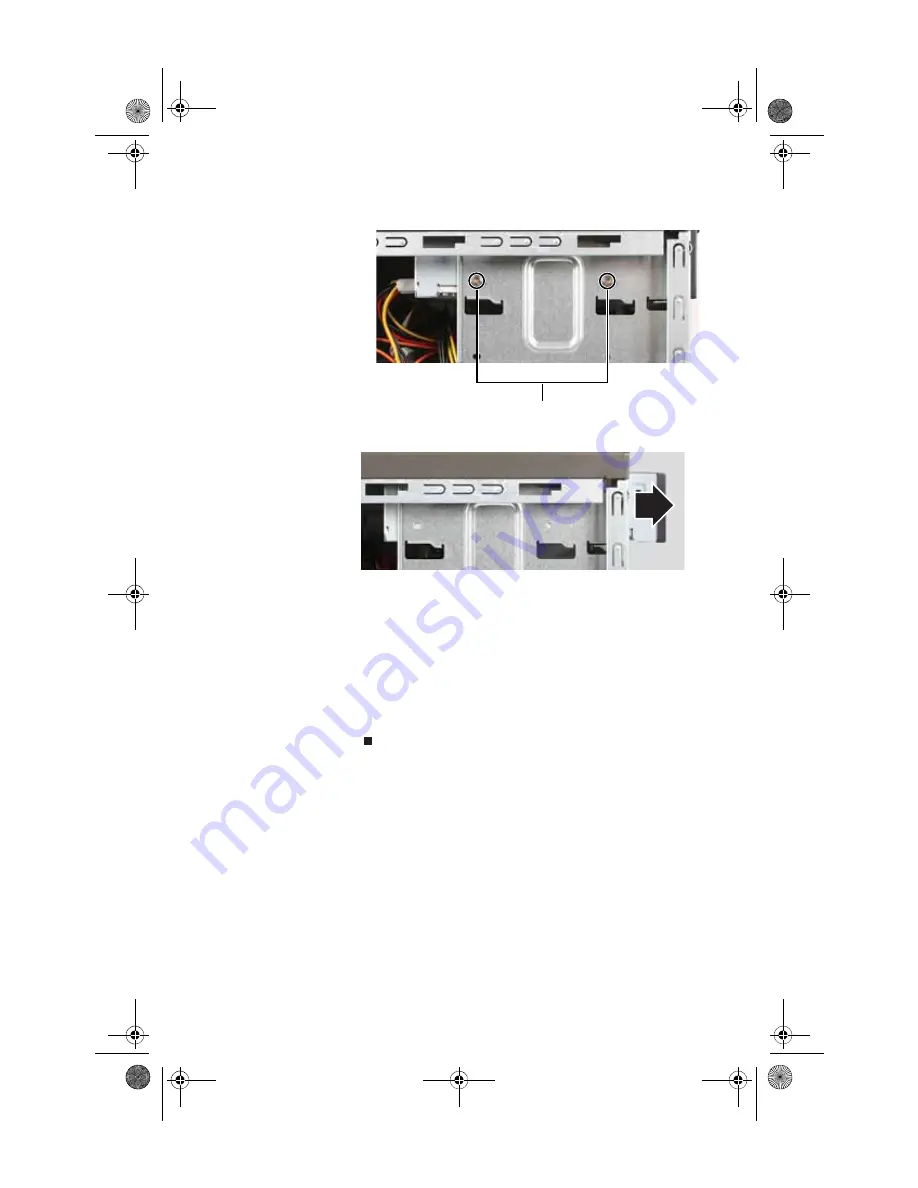
Remove the two drive retention screws.
7
Slide the drive forward and out of the drive bay.
8
Slide the new drive into the drive bay, line up the screw
holes on the drive bay with the screw holes on the drive,
then replace the two drive retention screws.
9
Reconnect the drive cables using your notes from
, or according to the manufacturer’s instructions.
10
Replace the front bezel by following the instructions in
“Replacing the front bezel” on page 33
.
11
Replace the side panel by following the instructions in
“Replacing the side panel” on page 33
Drive retention screws
8512042.book Page 37 Monday, December 18, 2006 10:15 AM
Содержание E4264
Страница 1: ...Computer Reference Guide 8512042 book Page a Monday December 18 2006 10 15 AM...
Страница 2: ...8512042 book Page b Monday December 18 2006 10 15 AM...
Страница 6: ...Contents iv 8512042 book Page iv Monday December 18 2006 10 15 AM...
Страница 10: ...Chapter 1 About This Reference 4 8512042 book Page 4 Monday December 18 2006 10 15 AM...
Страница 11: ...Chapter 2 5 5 Checking Out Your Computer Front Back 8512042 book Page 5 Monday December 18 2006 10 15 AM...
Страница 34: ...Chapter 3 Setting Up and Getting Started 28 8512042 book Page 28 Monday December 18 2006 10 15 AM...
Страница 54: ...Chapter 4 Upgrading Your Computer 48 8512042 book Page 48 Monday December 18 2006 10 15 AM...
Страница 104: ...Chapter 6 Troubleshooting 98 8512042 book Page 98 Monday December 18 2006 10 15 AM...
Страница 114: ...Appendix A Legal Notices 108 8512042 book Page 108 Monday December 18 2006 10 15 AM...
Страница 122: ...116 Index 8512042 book Page 116 Monday December 18 2006 10 15 AM...
Страница 123: ...8512042 book Page 117 Monday December 18 2006 10 15 AM...
Страница 124: ...MAN ECOOPER HW REF R1 12 06 8512042 book Page 118 Monday December 18 2006 10 15 AM...


