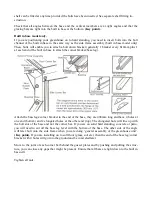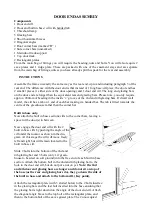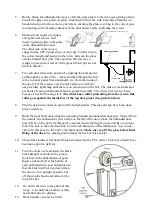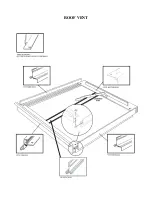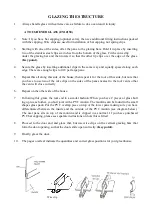
Before sliding the vent onto the ridge, slide a piece of vent tube into the vent hinge socket. Slide the
vent onto the ridge from either end and into the desired position.
The vents can go in any position (except adjacent) on either side of
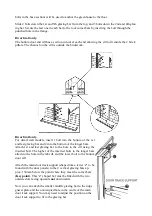
the ridge. Fit the slam bar immediately under the vent bottom rail and
secure with the bolts previously inserted in the roof bars. Now you
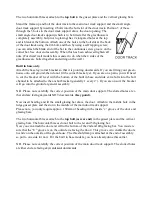
need to fit the intermediate roof glazing bar from the gutter to the un-
occupied hole in the slam bar(s). The precise position of the slam bar
can be determined by inserting the correct pane of glass (see glass
plan at the back of this booklet) under the vent and moving the slam
bar down to touch the glass.
Do not fit the door at this stage.
CORNER BRACKETS/ BASE LEGS
(BUILT IN BASE MODEL ONLY)
The corner bracket/base legs (approx. 400mm) has 4 holes and 2 slots per bar. The 2 slots are to be
secured to the bolt channel of the built in base using the bolts inserted earlier.
For fixing to hard standing, offer the corner bracket/base legs to the base with the end of the brack-
ets with 4 holes pointing down. Mark on the bracket where it is level with the bottom of the built in
base. Cut off the bracket and discard the end with 4 holes. Fix the remaining part of the bracket to
the bolt channels of the base in each corner of the greenhouse.
For fixing on soft standing, attach the bracket in the same way as above, but do not cut. The part of
the bracket pointing down will be lowered into the hole in the ground that you have already dug.
PATIO FLOOR
Having established the square of the greenhouse, attach a corner bracket/base leg onto each bolt
previously inserted during base assembly, drill the patio or concrete in the required positions, fit
plastic plugs and screw the brackets firmly to the ground using 35mm x 8mm round head screws.
(Screws and plugs not supplied).
SOIL FLOOR
Determine the square of the greenhouse as described above, dig holes approx. 12” (300mm) in each
corner, make a mix of concrete and put a couple of shovelfuls around the base of each stake. When
the concrete has gone off back fill with the soil excavated earlier on.
DO NOT ANCHOR DOWN OR CONCRETE UNTIL YOU ARE CERTAIN THE GREEN-
HOUSE (INCLUDING ROOF) IS LEVEL AND SQUARE.
Содержание 6'3" WIDE THYME
Страница 1: ......
Страница 2: ......
Страница 3: ......
Страница 11: ...REAR END ASSEMBLY dotted line indicates corner bracket base leg going into ground ...
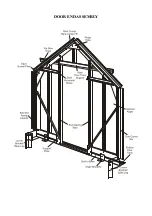
Страница 16: ...DOOR END ASSEMBLY ...
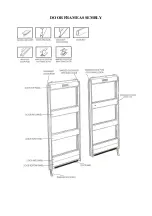
Страница 19: ...DOOR FRAME ASSEMBLY ...
Страница 21: ...ROOF VENT ...
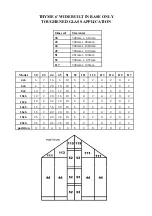
Страница 33: ...THYME 6 GLAZING PLAN BUILT IN BASE ONLY ...
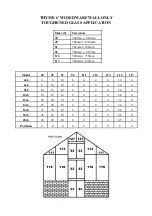
Страница 35: ...THYME 6 GLAZING PLAN DWARF WALL ONLY ...
Страница 36: ...ELITE 1601 ...

