background image

I

NTRODUCTION

10

Preparing for hardware installation or service procedures

Before installing or servicing the E-42, follow general precautions and obtain the correct tools.

Precautions

Always observe the following general precautions when installing or servicing the E-42:

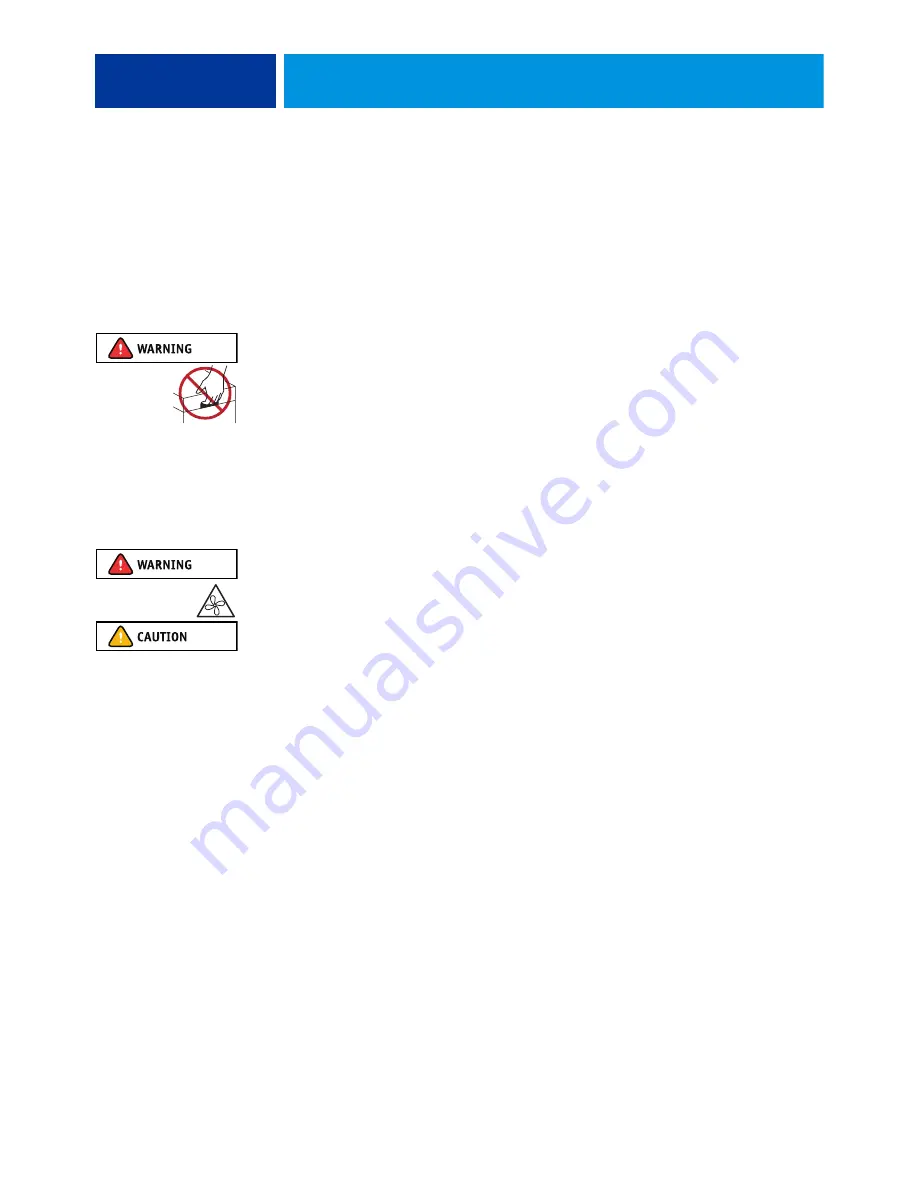
• The E-42 weighs approximately 20Kg. Be careful when moving the device.

• Never lift the E-42 by grasping the top panel. The top panel does not support the weight of 

the system.

ATTENTION:

 Ne jamais soulever le serveur d’impression par sa partie supérieure : celle-ci ne peut pas supporter le poids du système.

AVVERTENZA: 

Il server di stampa non deve essere mai sollevato afferrandolo dal pannello superiore, in quanto quest’ultimo non può 

sostenere il peso dell’intero sistema.

WARNUNG:

 Heben Sie den Druckserver nicht an der oberen Gehäuseabdeckung an. Die obere Gehäuseabdeckung ist nicht dafür 

ausgelegt, das Gesamtgewicht des Systems zu tragen.

ADVERTENCIA:


No levante nunca el servidor de impresión agarrándolo por el panel superior. El panel superior no soporta el peso del 

sistema.

ADVERTÊNCIA: 

Nunca erga o servidor de impressão pelo painel superior. O painel superior não suporta o peso do sistema.

WAARSCHUWING:

 Til de afdrukserver nooit op door het bovenpaneel vast te nemen. Het bovenpaneel kan het gewicht van het 

systeem niet dragen.

• The E-42 contains hazardous moving parts. When servicing the E-42, keep away from moving 

fan blades.


• Avoid pressing the surface of the LCD.

Applying excessive pressure to the LCD window causes it to change color.

• Use a soft cloth moistened with Lens and Mirror Cleaner to clean the surface of the E-42 

display window. 

Other solvents, such as water, may damage the polarizer on the display window.

Содержание E-42

Страница 1: ...Color Controller E 42 Installation and Service Guide A guide for service technicians Replacement parts and specifications are subject to change 45113361 01 February 2013 ...

Страница 2: ...tation is subject to change without notice and does not represent a commitment on the part of EFI The documentation is further covered by Legal Notices distributed with this product The documentation may be provided in conjunction with EFI Software Software and any other EFI product described in the documentation The Software is furnished under license and may only be used or copied in accordance ...

Страница 3: ...ill need 13 INSTALLING HARDWARE 14 Installation sequence 14 Checking the customer site 15 Copier printer readiness 15 Setting customer expectations 16 Unpacking the E 42 17 Connecting the E 42 19 Connecting the monitor keyboard mouse and power 19 Configuring a static IP address for the E 42 22 Completing installation and starting up 23 USING THE E 42 24 Using the E 42 control panel 24 Buttons 25 A...

Страница 4: ...components 40 Shutting down the system 40 Removing and replacing boards 48 Printer interface board 48 User interface board assembly 50 Motherboard 53 Removing the motherboard 53 Verifying new motherboard installation and transferring options and BIOS information 61 Replacing parts on the motherboard 63 DIMMs 63 CPU 64 Jumpers 71 Fan 72 Power supply 73 Hard disk drive 76 Switch bank assembly 81 DVD...

Страница 5: ...ng up and restoring the E 42 and the system configuration 93 TROUBLESHOOTING 94 Preliminary on site checkout 94 Checking internal components 95 Error messages and conditions 101 SPECIFICATIONS 112 Hardware features 112 Physical specifications 112 Networking and connectivity 112 SERVICING THE E 42 WITH FURNITURE 114 Procedures 114 INDEX 124 ...

Страница 6: ... components 38 FIGURE 9 Power and data cable connections 39 FIGURE 10 Removing replacing the side panels 44 FIGURE 11 Removing replacing the front panel 45 FIGURE 12 Removing replacing the top panel 46 FIGURE 13 Diagram of the printer interface board 48 FIGURE 14 Diagram of the user interface board front and back 50 FIGURE 15 Removing replacing the user interface board 51 FIGURE 16 Removing replac...

Страница 7: ...replacing the hard disk drive from in the hard disk drive bracket 78 FIGURE 25 component sled with switch bank assembly 81 FIGURE 26 Removing replacing the component sled from the chassis 82 FIGURE 27 Removing replacing the switch bank assembly 83 FIGURE 28 Removing replacing the DVD drive 85 FIGURE 29 Normal startup sequence 100 FIGURE 30 E 42 installed on the furniture 114 ...

Страница 8: ... Adobe Multiple Master fonts used for font substitution when printing PDF files Use Command WorkStation or any third party LaserWriter downloader such as the Adobe Font Downloader to download additional fonts Use built in ColorWise color management and NetWise network features The E 42 also supports the Microsoft version of Internet Printing Protocol IPP for Windows XP Windows Vista Windows Server...

Страница 9: ...ller PCI bus Upper RJ 45 network interface 1000BaseT controller copier printer interface Lower RJ 45 User interface board Keyboard and mouse option Monitor option PCI X 133 100 SATA 0 USB devices Dongles E 42 DIMM 4 PCI North bridge memory controller Printer interface PCI E Graphics controller Empty DIMM 2 Empty Reset PCI X not used DVD drive HDD SATA 2 SATA 4 SATA 1 SATA 3 SATA 5 PCI E x 8 slots ...

Страница 10: ...UNG Heben Sie den Druckserver nicht an der oberen Gehäuseabdeckung an Die obere Gehäuseabdeckung ist nicht dafür ausgelegt das Gesamtgewicht des Systems zu tragen ADVERTENCIA No levante nunca el servidor de impresión agarrándolo por el panel superior El panel superior no soporta el peso del sistema ADVERTÊNCIA Nunca erga o servidor de impressão pelo painel superior O painel superior não suporta o ...

Страница 11: ...reaks and the liquid crystal inside leaks out avoid contact If you come in contact with the liquid crystal immediately wash it off your skin with soap and water Use care when handling parts of the E 42 as some edges on the unit may be sharp Do not install third party applications onto the E 42 Third party applications are not supported and can cause system problems Although virus scans are permitt...

Страница 12: ...trap grounded at the same place as the antistatic mat If that is not possible do the following Attach a grounding strap to your wrist Attach the other end to a good ground When you unpack the E 42 from the carton for the first time touch a metal area of the copier printer to discharge the static on your body Before you remove any of the E 42 panels and handle internal components touch a metal part...

Страница 13: ...uit breaker no larger than 120 VAC 15A U S 240 VAC 10A international is used on the phase conductors all current carrying conductors Tools you will need To install or service the E 42 you will need the following tools and parts ESD wrist grounding strap and antistatic mat Flathead screwdriver 0 1 and 2 Phillips head screwdrivers Needlenose pliers E 42 documentation including the customer media pac...

Страница 14: ...s which are part of the user documentation set Installation sequence Because the E 42 is a node on the customer s computer network make sure that you coordinate your scheduled installation with the network administrator at the customer site For Network Setup information refer the network administrator to Configuration and Setup which is part of the user documentation set NOTE You can change the de...

Страница 15: ...hat accompanies the copier printer Is space available near the copier printer for the E 42 and the furniture Make sure that adequate space is available for the E 42 and the furniture Allow enough space at the connector panel for the cables to route easily and at the side panel so that the E 42 does not interfere with use of or service to the copier printer such as clearing a paper jam You may need...

Страница 16: ...The network administrator must be available during the installation for network connectivity Equipment downtime and impact on the network can be minimized if the network administrator installs a network connector for the E 42 and confirms network functionality with the connector in place before the date scheduled for the E 42 installation The network administrator must make a networked computer av...

Страница 17: ...rga o servidor de impressão pelo painel superior O painel superior não suporta o peso do sistema WAARSCHUWING Til de afdrukserver nooit op door het bovenpaneel vast te nemen Het bovenpaneel kan het gewicht van het systeem niet dragen TO UNPACK THE E 42 1 Open the box and remove the packing material Save the original boxes and packing material in case you need to transport the E 42 at a later date ...

Страница 18: ...INSTALLING HARDWARE 18 FIGURE 2 Affixing the decal to the copier printer EFI Fiery decal ...

Страница 19: ...sembly instructions that accompany the furniture 2 Place the keyboard in the keyboard tray on the underside of the furniture table top Place the mouse on the table top 3 Connect the keyboard and mouse cables to the USB ports on the E 42 connector panel 4 If the monitor VGA cable is not already attached to the monitor attach it according to the instructions provided with the monitor Connect the oth...

Страница 20: ...the copier printer NOTE The straight through network cable at the customer site and the scan crossover cable included with the E 42 look similar but are not interchangeable Make sure that you connect the scan crossover cable to the lower RJ 45 port on the E 42 connector panel FIGURE 3 Straight through and crossover Ethernet cables 1 2 3 4 1 2 3 4 Straight through cable wire arrangements are identi...

Страница 21: ...ed 10BaseT Category 3 or higher 100BaseTX Category 5 or higher 4 pair 8 wire short length 1000BaseT Category 5e or higher 4 pair 8 wire short length After power on the network administrator should perform Network Setup verify the network connection verify that the E 42 appears in the list of printers and then print a few test documents from a networked computer that will use the E 42 For more info...

Страница 22: ...Enter Fiery 1 Press OK Type Fiery 1 exactly as shown The password is case sensitive for example fiery 1 will not work 5 On the Setup screen do the following Press WINS If enabled yellow press Use WINS to disable this feature Press Save Press DNS If enabled yellow press Get DNS address automatically to disable this feature Press Save Press IP Address Enter an IP address Press Save Press IPv4 Addres...

Страница 23: ...he E 42 service upgrade Updates to Fiery Server Software may be available for the E 42 from a variety of sources for example System Updates see page 92 patches provided on CD or patches downloaded by the customer Windows operating system updates should be obtained from Microsoft directly Because such updates are available directly from Microsoft EFI does not maintain or provide them via the System...

Страница 24: ...e E 42 allows you to do the following Eject CDs and DVDs a hardware eject button is also provided below the disc slot Replace the motherboard when the motherboard replacement dongle is inserted into a USB port View the IP address of the E 42 Shut down restart or reboot the E 42 see page 32 NOTE You can also shut down and restart the E 42 through the copier printer touch panel see page 27 Interact ...

Страница 25: ...t Down System and Reboot System options Flashing amber The E 42 is starting up and the BIOS has established communication with the User Interface Board UIB Flashing green The E 42 is continuing startup and the Windows operating system has established communication with the UIB Solid green The E 42 is powered on and is in the Idle state Solid amber The E 42 is powered off but the printer interface ...

Страница 26: ...e current IP address of the E 42 Restart Server Includes options to Restart soft reset or Reboot hard reset the E 42 Selecting Restart resets the E 42 server software but does not reboot the entire system Selecting Reboot shuts down all E 42 activity and reboots the system When you select Restart or Reboot network access to the E 42 is temporarily interrupted and all currently processing jobs are ...

Страница 27: ...ntMe subscription For more information see Printing Guide NOTE PrintMe cloud printing must be enabled in Configure for the PrintMe tab to display in the menu Main Waiting Jobs Idle Paper Tray Status Document 3 Document 4 Document 1 Document 2 Printed Jobs Suspend Printing Start Sample Print Login Job List PrintMe Tools Scan Suspend Printing Suspend print activity between the E 42 and the copier pr...

Страница 28: ...splay the Properties of the job On the Properties tab you can change the number of copies but not any other job properties Tools tab The Tools tab allows you to perform tray alignment and calibration Scan tab The Scan tab allows you to scan documents For more information see Utilities Active Jobs currently waiting to print Held Held jobs Printed Printed jobs Secure Allows you to log on to display ...

Страница 29: ...e IP address of the E 42 and a log of system updates Color Charts Prints samples of the RGB CMY and PANTONE colors available from the E 42 Custom Paper Instructions Provides the instructions for setting up custom paper entry Calibration Instructions Prints the information on how to perform the calibration Job Log Prints a log of the last 55 jobs E mail Log Prints a log listing recent e mail activi...

Страница 30: ... panel and allow it to start up completely approximately three minutes 3 Make sure that Idle appears on the Fiery Main menu If Busy or Printing appears the E 42 is processing and you must wait until Idle appears 4 Touch the Fiery tab 5 Touch Printable Info and then select the page that you want to print The E 42 sends the selected page s to the copier printer 6 If you printed the Test Page examine...

Страница 31: ...t Network status LEDs Two LEDs next to the Ethernet connector indicate the network speed When a data transfer occurs between the E 42 and the network the appropriate LED s blink to indicate network activity For additional network information see Configuration and Setup which is part of the user documentation set NOTE Network connectivity is supported only through the upper RJ 45 port on the E 42 c...

Страница 32: ...if the system is unresponsive to keyboard or mouse actions TO START THE E 42 1 Make sure that the power cable is attached and that the power switch is in the ON position 2 Make sure that the power cable is attached and that the power switch is in the ON position 3 Press the power button on the front panel 4 Press the power button on the front panel 5 Check the Activity light on the control panel T...

Страница 33: ...tion To restart or reboot the E 42 select Restart Server A submenu displays allowing you to select Restart Server Reboot System or Cancel To shut down the E 42 immediately select Shut Down System NOTE Use the reset button on the front of the E 42 only if the system is unresponsive to keyboard or mouse actions Allow the system to shut down and power off or restart If you selected Restart Server you...

Страница 34: ... Press the Fiery tab 4 Press Restart Fiery 5 At the next screen select one of the following options Restart Fiery Service soft reset Resets the E 42 server software but does not reboot the entire system Network access to the E 42 is temporarily interrupted and all currently processing jobs are aborted and may be lost If you choose this option you may need to wait 1 minute or more for the server so...

Страница 35: ... drive Replacement parts are available from your authorized service representative The terms replace and replacing are used throughout this document to refer to the reinstallation of existing components Install new components only when necessary If you determine that a component that you have removed is not faulty reinstall it NOTE Replacement parts and specifications are subject to change Install...

Страница 36: ...utton Control panel DVD drive Reset button NOTE Use the reset button only if the system is unresponsive to keyboard or mouse actions Eject button Power connector Network port RJ 45 Printer interface RJ 45 Ethernet crossover cable USB ports x2 DVI port not used USB ports x2 Monitor VGA port Power switch Power On O Power Off ...

Страница 37: ...rt for option monitor 5 Scan port 6 USB ports x2 7 USB ports x2 8 Printer interface board 9 CPU cooling assembly 10 Power supply 11 DIMM slots 12 DVD drive 13 Removable drive option 14 Hard disk drive in bracket 15 Motherboard 16 Front fan NOTE Cables UIB and front panel USB ports are not shown 1 2 3 5 6 9 7 15 16 14 13 12 8 11 4 10 ...

Страница 38: ... sled 5 Switch bank assembly 6 DVD drive 7 Front panel 8 Upper faceplate 9 UIB cable 10 Hard disk drive bracketDIMMs 11 CPU 12 13 Hard disk drive 14 Side panel left 15 Hard disk drive data cables 16 DVD drive power data combination cable 17 CPU cooling assembly 18 Printer interface board 19 Battery 20 Motherboard 21 Fan 22 Chassis 23 Power supply 24 Side panel right NOTE UIB buttons CPU fan cable ...

Страница 39: ...e 4 Power and reset cables Front panel Motherboard connector JP4 see detail above 5 Speaker cable Front panel Motherboard connector J40 see detail above 6 Front panel fan cable Front panel fan Motherboard connector FAN 4 see detail above 7 DVD drive power data combo cable DVD drive Motherboard connector SATA 0 see detail above 8 Hard disk drive HDD data cable Hard disk drive HDD Motherboard connec...

Страница 40: ...g the internal components Remember that when the E 42 is powered off network access to the copier printer is interrupted Always obtain permission from the network administrator before you take the E 42 off the network If you are cycling power wait at least 10 seconds before powering back on If you are unable to shut down the E 42 through the control panel or the copier printer touch panel power of...

Страница 41: ...conds after the system reaches Idle before beginning the shutdown procedure 2 If the logo screen is displayed press the Menu button once to display the Functions menu 3 Select Shut Down System NOTE Use the reset button on the front of the E 42 only if the system is unresponsive to keyboard or mouse actions Allow the system to shut down and power off Before accessing internal components following a...

Страница 42: ...ars on the touch panel the E 42 is processing You must wait until the system finishes and reaches Idle before restarting or shutting down If the system has just finished processing wait at least five seconds after the system reaches Idle before beginning the shutdown procedure 3 On the copier printer touch panel press the Fiery tab and then press Restart Fiery 4 At the next screen select Shut Down...

Страница 43: ...l peso del sistema AVISO Nunca erga o servidor de impressão pelo painel superior O painel superior não suporta o peso do sistema WAARSCHUWING Til de afdrukserver nooit op door het bovenpaneel vast te nemen Het bovenpaneel kan het gewicht van het systeem niet dragen TO OPEN THE E 42 1 Shut down the E 42 see page 40 2 Remove all cables from the back of the E 42 3 Remove the E 42 from the furniture s...

Страница 44: ...he panel off the chassis FIGURE 10 Removing replacing the side panels 3 To replace the panel fit the front edge of the panel on the pivot post in the chassis 4 Rotate the panel closed against the back of the chassis and replace the screws that you removed earlier Make sure not to damage cables as you replace the panel Fold all cables inside the chassis before closing the panel against the chassis ...

Страница 45: ...ure the front panel to the chassis and then lift the panel off of the chassis First remove the two top tabs then the two middle tabs and then the two bottom tabs FIGURE 11 Removing replacing the front panel 3 To replace the front panel align the four cutouts in the panel with the power and reset buttons and front USB ports 4 Press the panel against the chassis to snap it into place Snap the tabs i...

Страница 46: ...Slide the top panel a few inches toward the front of the chassis to disengage the hooks in the panel from the slots in the top of the chassis NOTE You may need to tap the back edge of the panel toward the front of the chassis to disengage the panel 3 Detach the UIB cable from the motherboard 4 Remove the panel from the chassis Carefully route the UIB cable out of the hole in the top of the chassis...

Страница 47: ...into the slots in the top of the chassis and then slide the top panel toward the back of the chassis to engage the hooks NOTE You may need to tap the front edge of the panel toward the back of the chassis to engage the panel completely 7 Replace the plug on the top panel Correctly align the plug and then place it into the receptacle on the top panel Secure the plug by replacing the locking bolt th...

Страница 48: ...d see the documentation that accompanies the particular option kit Printer interface board The printer interface board provides the print interface between the E 42 and the copier printer It is installed in motherboard connector J17 The printer interface board processes the image data and sends it to the copier printer through the Ethernet crossover cable connected to lower RJ 45 port available on...

Страница 49: ...e board from the chassis Grasp the printer interface board at the front and back edges and gently pull the board straight out of its motherboard connector 5 Place the printer interface board in an antistatic bag TO REPLACE THE PRINTER INTERFACE BOARD 1 Seat the printer interface board in the mother connector and then secure it to the chassis with the board mounting bracket screw that you removed e...

Страница 50: ... Up and Down buttons Menu button Jewel lights NOTE The buttons are not included in the user interface board spare kit The UIB cable is routed from a connector on the back of the user interface board to connector J38 on the motherboard see Figure 17 on page 54 FIGURE 14 Diagram of the user interface board front and back Back Front Line selection button pads UIB cable connector J38 Activity lights L...

Страница 51: ...he connector on the back of the UIB Detach the UIB cable by grasping the cable connector Avoid pulling on the cable 4 Remove the four screws that secure the UIB to the underside of the top panel 5 Remove the UIB from the top panel Be sure to remove the plastic lens that covers the display window of the UIB FIGURE 15 Removing replacing the user interface board 6 If you are removing the UIB to repla...

Страница 52: ...ay window of the UIB 5 Secure the UIB to the underside of the top panel Grasp the UIB in one hand while using the other hand to hold the plastic lens steady against the UIB display window Place the UIB in the mounting area of the top panel and carefully fit the buttons through the cutouts in the top panel as you hold the plastic lens in place Replace the four screws that secure the UIB to the unde...

Страница 53: ... motherboard including the motherboard power cable CPU power cable front panel fan cable hard disk drive data cable DVD drive power and data combination cable power button cable reset button cable speaker cable front panel USB port cables and UIB cable This section also includes information about the following Replacing or adding DIMMs Replacing the CPU Replacing the battery Clearing the CMOS Jump...

Страница 54: ...1 9 Printer interface board PCI E X16 10 DIMM 1 11 DIMM 2 12 DIMM 3 13 DIMM 4 14 CPU fan power FAN 1 15 Speaker J83 16 UIB cable J38 17 SATA 0 DVD drive data connection 18 SATA 1 hard disk drive data connection 19 Front panel cable J22 20 Power and Reset J20 21 Front panel fan FAN 4 22 Clear CMOS Jumper J4 MH Mounting holes 16 MH MH MH MH MH MH 11 MH MH 1 2 3 4 5 6 7 8 9 10 12 13 14 15 17 18 19 20...

Страница 55: ...an reinstall the board in the same slot later 3 Remove the following cables from the old motherboard NOTE First remove any plastic cable clamp s securing internal cables and tie wraps Front panel fan cable Reset button cable Power button cable Speaker cable UIB cable Front panel USB port cables DVD drive cables SATA data cable Power and data combination cable Hard disk drive cables SATA data cable...

Страница 56: ...ached to the connector panel remove the two mounting screws and remove the DVI port cover 3 Remove all the mounting screws securing the motherboard to the chassis for screw locations see page 53 4 Remove the motherboard from the chassis Lift the edge of the motherboard Make sure that the motherboard connectors clear the chassis while you lift it out of the chassis Do not touch the contacts and avo...

Страница 57: ...sted If troubleshooting strategies checking cables and connections reinstalling system software and so forth do not solve the problem and you suspect that the hard disk drive or the motherboard is faulty always troubleshoot in the following order Troubleshooting in the wrong order will cause the system to malfunction In general it is highly unlikely that both the hard disk drive and the motherboar...

Страница 58: ... remain in Service Mode indefinitely Use Service Mode to carefully verify the new motherboard before transferring options to the new motherboard Transferring options to the new motherboard permanently customizes the new motherboard Once customized the motherboard cannot be returned to inventory or installed in another E 42 If the new motherboard does not solve the problem in Service Mode do not tr...

Страница 59: ...motherboard Doing so can damage the E 42 BIOS chips are not interchangeable 2 Install the motherboard in the chassis Angle the motherboard so that the motherboard connectors fit into the cutouts in the back of the chassis Make sure that the flexible grounding tabs on the cutouts for the network ports make contact with the outside of the ports Do not allow the tabs to fold over or become bent insid...

Страница 60: ...cable Front panel fan cable 3 Secure cables as necessary with any plastic cable clamp that you may have removed earlier 4 Replace the printer interface in motherboard connector J17 see Figure 17 on page 54 Make sure to install the board mounting bracket screw to secure the board to the chassis Press down firmly on the top of the board as you insert the screw NOTE Make sure that unused connector pa...

Страница 61: ...ode If the new motherboard solves the problem that you are troubleshooting use the motherboard replacement dongle to transfer options to the new motherboard If you determine while in Service Mode that the problem you are troubleshooting was not fixed by installing a new motherboard do not expend the motherboard replacement dongle to transfer options to the new motherboard described below do not in...

Страница 62: ...anel 5 Print the E 42 Test Page 6 Ask the network administrator to connect the E 42 to the network and download a print job over the network see Configuration and Setup which is part of the user documentation set If the problem that you are troubleshooting persists or if you are unable to perform steps 4 through step 6 above while in Service Mode you may conclude that the old motherboard was not t...

Страница 63: ... process ends and you return to the Functions menu 6 Reboot the E 42 7 Remove the motherboard replacement dongle after the FieryBar reaches Idle 8 Reinstall system software Replacing parts on the motherboard Before you remove and replace the DIMMs CPU and battery on the motherboard shut down and open the E 42 see page 40 DIMMs When installing DIMMs note the following Different capacity DIMMs look ...

Страница 64: ...compatibility between the new component and the previous settings stored in the BIOS Make sure that the power cable is removed from the power outlet before clearing the CMOS Remove the battery see page 69 Wait two minutes to allow the motherboard electrical components to fully discharge Reinstall the battery 6 If you installed a new DIMM and cleared the CMOS make sure to reset the time and date in...

Страница 65: ...ve plastic cover on the CPU socket Transfer the protective cover to the CPU socket of the old motherboard to protect the circuitry Follow standard ESD precautions while handling the motherboard and all components TO REMOVE THE COOLING ASSEMBLY 1 Shut down and then open the E 42 see pages 40 and 43 To access the CPU you must remove the left panel Fastener screw 1 of 4 CPU fan Heatsink CPU Yellow tr...

Страница 66: ...t up on the fastener cap until the peg is out of the motherboard You may need to use moderate force to pull the pegs out of the motherboard Be careful not to damage the components on the motherboard or the CPU cooling assembly when pulling up on the fasteners 4 Lift the cooling assembly off the CPU socket and set it aside Be aware that the cooling assembly and the CPU may be very hot You may need ...

Страница 67: ...the motherboard to install it on a new motherboard make sure that you completely remove any thermal compound residue on the surface of the CPU and at the base of the heatsink It may help to scrape all the residue off of the surface using the flat edge of something non conductive 5 Prepare the CPU socket by ensuring that The socket lever is in the open position The load plate is open 6 Place the CP...

Страница 68: ...Engage all four pegs NOTE Do not rotate the fasteners after installation Engaging the pegs at alternate corners applies clamping force equally over the CPU and socket Avoid using excessive force and take care not to flex the motherboard when you engage the pegs 4 Connect the CPU fan cable to the motherboard connector FAN 1 If you are installing a new CPU secure slack in the fan cable using a tie w...

Страница 69: ...de type anbefalt av apparatfabrikanten Brukte batterier kasseres i henhold til lokal lovgivning VARNING Risk för explosion om batteriet byts ut mot en felaktig batterityp Byt bara ut batteriet mot en batterityp som har godkänts av tillverkaren Hantera använda batterier enligt lokal miljölagstiftning CUIDADO Existe peligro de explosión si la batería se sustituye por una batería del tipo incorrecto ...

Страница 70: ...until it snaps into place Make sure that the battery is securely installed in the socket 8 Reassemble the system and verify its functionality see page 87 9 Configure the time and date in Setup see Configure Help for more information Failure to configure the time and date will cause the E 42 to hang when user software is being installed on the E 42 See page 107 ...

Страница 71: ... see page 69 5 Reassemble the E 42 and verify its functionality see page 87 6 Reset the time and date in Setup see Configure Help for more information Failure to configure the time and date will cause the E 42 to hang when user software is being installed on the E 42 see page 107 Jumpers Jumper configurations should not be changed Jumper Description J4 J4 is the Clear CMOS and Password jumper Defa...

Страница 72: ...tor FAN 4 3 Release the fan from the fan bracket by bending the hooks on the bracket FIGURE 21 Removing the fan 4 Remove the fan from the chassis TO REPLACE THE FAN 1 Align the fan An arrow on the side of the fan indicates the airflow direction Make sure that the fan is positioned so that the arrow points inside the E 42 and the fan cable extends downward toward the motherboard see Figure 21 2 Pre...

Страница 73: ...ctor PW2 5 Remove the 8 pin CPU power cable from motherboard connector PW1 6 Remove the tie wrap securing the power cables to the chassis support beam 7 Remove the ferrites that are installed around the hard disk drive power cables Carefully pry open the latches on the sides of the ferrites and remove the ferrites from the cables Set the ferrites aside so that you can replace them later 8 Remove f...

Страница 74: ...REPLACING PARTS 74 FIGURE 22 Removing replacing the power supply Screw 1 of 4 Power supply Connector panel Power supply cables Chassis support beam ...

Страница 75: ...erboard power cable to motherboard connector PW2 5 Connect the power and data combination cable to the DVD drive 6 Install the ferrite around the hard disk drive power cable Use the ferrite that you removed earlier Place the ferrite around the cable near the connector and snap the edges of the ferrite closed 7 Connect the power cable to the hard disk drive Connect the thin black SATA power cable c...

Страница 76: ...drive install system software and then check to see if the problem persists If it does perform other procedures such as replacing the motherboard see page 57 Proper handling Improper handling can damage a hard disk drive Handle the hard disk drive with extreme care Use proper ESD practices when grounding yourself and the E 42 Keep magnets and magnetic sensitive objects away from the hard disk driv...

Страница 77: ...rd disk drive 5 Remove the screw securing the hard disk drive bracket to the bracket shelf 6 Slide the hard disk drive bracket off the shelf and lift it out of the chassis see Figure 23 Unlock the hard disk drive bracket by moving the latch toward the connector panel and then sliding the bracket off the bracket shelf Avoid striking the DIMMs as you remove the hard disk drive bracket NOTE You will ...

Страница 78: ...ws on the hard disk drive cover Loosening these hard disk drive screws breaks the seal and voids the hard disk drive warranty Do not touch the drive with magnetic objects such as magnetic screwdrivers and avoid placing magnetic sensitive objects such as credit cards and employee ID cards near the hard disk drive Replacement hard disk drives are not shipped with preinstalled system software After y...

Страница 79: ...earlier to attach the hard disk drive to the bracket 4 Slide the bracket all the way onto the shelf and lock it by moving the latch toward the front panel Avoid striking the DIMMs as you replace the hard disk drive bracket NOTE You will encounter slight resistance as you slide the bracket onto the shelf The resistance is caused by two tension points on the bottom of the bracket The resistance help...

Страница 80: ...the power outlet and then remove the battery see page 69 Wait two minutes to allow the motherboard electrical components to fully discharge Reinstall the battery After reassembling the system reset the time and date in Setup see Configure Help for more information If a startup error displays on the control panel when you power on the E 42 check the connections 10 Verify functionality see page 87 ...

Страница 81: ...ents DVD drive Power button and cable Reset button and cable Speaker and cable Front USB ports and cables NOTE For more information about servicing the DVD drive see page 85 FIGURE 25 component sled with switch bank assembly Switch bank assembly with DVD drive Component sled Guide latch 1 of 2 NOTE Printer interface and internal cables are not shown ...

Страница 82: ...herboard Carefully pry open the latch on the side of the ferrite and remove the ferrite from the cables Set the ferrite aside so that you can replace it later 4 Unharness the cables from the cable clamp s and tie wraps inside the chassis 5 Remove the component sled from the chassis see Figure 25 on page 81 Press the guide latches on the sides of the component sled and carefully pull the sled out o...

Страница 83: ...t out of the component sled FIGURE 27 Removing replacing the switch bank assembly NOTE Guide the cables as you remove the assembly from the component sled Be careful not to damage the EMI gasket around the opening in the component sled 7 If you are removing the switch bank assembly to replace it with a new assembly remove the DVD drive see page 85 Component sled Switch bank assembly Screw 1 of 3 ...

Страница 84: ...les of the switch bank assembly in through the chassis so that the cables are within reach of their connectors on the motherboard Slide the sled into the front of the chassis until the guide latches click into place NOTE Be careful not to damage the EMI gasket around the slot in the chassis when installing the component sled 4 Connect the following cables see Figure 17 on page 54 for the location ...

Страница 85: ...VD drive 3 Remove the component sled from the chassis and then remove the switch bank assembly from the component sled see page 82 4 Remove the four screws that secure the DVD drive to the switch bank assembly Set aside the screws so that you can replace them later NOTE On some systems a small metal post in the switch bank assembly is used in place of one of the screws 5 Remove the DVD drive from ...

Страница 86: ...need to clear the CMOS after installing a new DVD drive to ensure compatibility between the new component and the previous settings stored in the BIOS Make sure the power cable is removed from the power outlet before clearing the CMOS Remove the battery see page 69 Wait two minutes to allow the motherboard electrical components to fully discharge Reinstall the battery 5 If you installed a new DVD ...

Страница 87: ...le slack is secured with a tie wrap 2 Restore the E 42 to the upright position 3 Replace any panels that you removed earlier as described on page 43 4 If you replaced the motherboard make sure that the new motherboard solves the problem that you are troubleshooting and then transfer options to the new motherboard see page 61 5 Connect the power cable to the E 42 see page 19 6 If you cleared the CM...

Страница 88: ...t all the customized settings and jobs on the HDD s will be restored If this backup is not available restore the image from recovery partition which is provided with the E 42 by default This will restore the E 42 to the factory default setting You must install the system software using the System Software DVDs only when you replaced the hard disk drive or restoring the backup does not solve the pr...

Страница 89: ...IP address if applicable work with the network administrator as described on page 22 User documentation All user documentation files resident on the E 42 are deleted when you install system software If user documentation is resident on the E 42 remind the site administrator to reinstall the documentation files after you finish installing the system software Custom simulation and output profiles Cu...

Страница 90: ... administrator at the customer site that some archived jobs may no longer print after you install an updated version of system software 1 Back up the E 42 configuration if possible For more information see Configuration and Setup which is part of the user documentation set 2 If you have not done so already allow the network administrator the opportunity to print the Job Log and save any custom sim...

Страница 91: ...nd date were not configured in the BIOS following removal of the motherboard battery To troubleshoot see page 107 11 Remove the User Software DVD when it ejects automatically 12 If a monitor mouse and keyboard are present The Log On to Windows dialog box appears on the monitor under the Administrator account Type Fiery 1 in the password field and then click OK NOTE Type Fiery 1 exactly The passwor...

Страница 92: ...for Product Updates In a Web browser connect to the IP address of the E 42 click the Configure tab and then click Check for Product Updates 17 Reinstall fonts or custom simulations that may have been deleted when you installed the software 18 If the E 42 requires a static IP address for example in a non DHCP network environment work with the network administrator to configure it as described on pa...

Страница 93: ...u can back up and restore the system configuration if you need to make any changes to the system software Additionally you can also back up or restore the E 42 to recover from a system crash or hard disk failure For more information see Configuration and Setup which is part of the user documentation set ...

Страница 94: ...sted in page 10 Preliminary on site checkout Most problems with the E 42 are caused by loose board or cable connections This section describes the quick checks that you can do to locate and fix obvious problems It describes how to eliminate any problems with external connections to the back of the E 42 and then addresses checking internal board and cable connections Check external and internal con...

Страница 95: ...nents To review the safety precautions see page 10 TO CHECK INTERNAL COMPONENTS 1 Shut down and then open the E 42 see page 40 2 Before you touch any components inside the E 42 attach a grounding strap to your wrist and discharge any static electricity on your body by touching a metal part of the E 42 3 Inspect the inside of the E 42 Make sure that no foreign materials have been dropped into the c...

Страница 96: ...rences When the problem occurs verify that Power cable is connected properly into the power outlet Chassis fans are operating Network link activity LED on RJ 45 connector is blinking All external cables required are present in correct connectors and well seated Cables cable connectors and mating connectors appear undamaged External connectors chassis fans and power button page 95 and page 95 If th...

Страница 97: ...are not oxidized DIMMs for E 42 page 63 Each board required is Present Installed in the correct slot Well seated Appears undamaged Required cables if applicable are Present Firmly connected in the correct connectors Not visibly damaged Printer interface page 48 User interface board UIB is Present Correctly attached to its bracket Appears undamaged UIB cable is Present Firmly connected in the corre...

Страница 98: ... damaged Cable connectors are Firmly connected Not visibly damaged Installed in the correct devices Power supply page 73 The hard disk drive required is Present Correctly installed Not visibly damaged Jumpered as the master primary according to label Hard disk drive data cable is Present Firmly connected to motherboard connector SATA 2 Not visibly damaged Hard disk drive page 76 TABLE 1 Verifying ...

Страница 99: ... Hard disk drive data cable page 76 Printer interface cable page 48 DVD drive power and data combination cable page 85 Power cable s page 73 If included in the system the required mouse monitor and keyboard are present and appear undamaged The mouse and keyboard are connected to the correct ports on the E 42 connector panel The cables required are Present Installed in the correct connector Well se...

Страница 100: ...zes and configures areas on the motherboard Windows operating system establishes communication with E 42 devices System software on the hard disk drive completes startup process The E 42 is at Idle Activity light is off 3 seconds 45 seconds 2 minutes 30 seconds 1 2 3 Power on S T A R T I N G U P Activity light blinks orange Server name Server name Activity light blinks orange S T A R T I N G U P A...

Страница 101: ...lling system software and so forth do not solve the problem and you suspect that the hard disk drive or motherboard is faulty note that it is highly unlikely that the hard disk drive and the motherboard are both defective therefore avoid replacing both to solve one problem Always troubleshoot in the following order First replace the hard disk drive and install system software Always replace a faul...

Страница 102: ...ard or both Faulty power cable Faulty power supply power supply may not be supplying power to the motherboard The CMOS jumper is not in the default position Faulty motherboard motherboard power plane may not be supplying power to components 1 Recheck all cables and connections 2 Make sure the connector panel power switch is in the ON position see page 40 3 Listen for the power supply fan and feel ...

Страница 103: ...ronize with the firmware on the new user interface board Wait five minutes power off using the power button wait 10 seconds and then press the power button to power on again NOT following installation of a new user interface board system stops responding at this screen Possibly one of the following Faulty BIOS Faulty motherboard 1 Recheck all cables and connections 2 Reboot the E 42 3 If the probl...

Страница 104: ...e Windows operating system 1 Recheck all cables and connections 2 Reboot the E 42 3 If the problem persists restore the backup or reinstall system software see page 90 Activity light status progresses from solid green to solid red Possibly one of the following Problem with system software Print job is corrupt or too large Faulty UIB cable CPU overheated Faulty motherboard 1 If you suspect that the...

Страница 105: ...et For information on how to check and set the time and date on the copier printer see the copier printer documentation 4 Reboot the E 42 see step 1 on page 119 After the LED display reaches and remains at 00 reboot the copier printer If the Fiery icon still fails to appear reboot the E 42 again 5 Check and reseat the cable connections between the E 42 and the copier printer 6 Replace the external...

Страница 106: ...r faulty System software is corrupted Missing or faulty DIMM s CPU is overheated or faulty CMOS settings need to be reset or are corrupted Motherboard is faulty 1 Recheck all cables and connections 2 Make sure that the CPU is firmly seated in its socket and that the fan cable is connected to the motherboard 3 If the problem persists restore the backup or reinstall the system software see page 90 4...

Страница 107: ...wer on the E 42 and immediately press F2 repeatedly to start the BIOS setup utility Configure the time and date To navigate use the tab key and the keys Save changes and exit F10 When the E 42 reaches Idle power off and then begin a full software installation again starting with the System Software DVD see page 90 2 If the problem persists obtain another User Software DVD and begin software instal...

Страница 108: ...le is connected to the network port Network cable or connection is faulty Network is faulty If the E 42 requires a static IP address for example in a non DHCP network environment it may need to be reconfigured A static IP address is deleted when system software is reinstalled System software is corrupted Network interface on the E 42 motherboard is faulty 1 If the problem persists have the network...

Страница 109: ...he problem may be with the network 3 If the problem persists restore the backup or reinstall system software see page 90 Corrupt system software may cause the system to hang 4 If the rest of the network is functioning properly and the problem persists replace the motherboard see page 57 Printing NOTE Intermittent print quality and color quality problems are difficult to trace Before you try to tro...

Страница 110: ...E 42 print job 2 If this fails to clear the problem reboot the E 42 3 If the problem persists choose the Clear Server command from Command WorkStation 4 Set Print Cover Page to Yes and resend the problem job The Cover Page will indicate PS Error For more information about the PostScript error double click the problem job in the Command WorkStation window 5 If the problem persists restore the backu...

Страница 111: ...h is part of the user documentation set If the user can print the E 42 Test Page but cannot print a job from a computer on the network make sure that the network administrator has Checked all components of the network including cables connectors terminators network adapter boards and network drivers Activated the network and used it to communicate with other printers Confirmed that the applicable ...

Страница 112: ... drive standard Built in DVD drive Physical specifications Operating Environment Temperature 5 C to 40 C Relative Humidity 10 85 non condensing Power Supply Rating 100 240V 50 60Hz 6A Power Supply Voltage Input 100 240V 50 60Hz Power Supply Current Input 100V 6A Max 240V 3A Max Rated Power Consumption 350W Dimensions Height x Depth x Width 48 84 cm 19 23 in x 48 26 cm 19 00 in x 21 23 cm 8 36 in W...

Страница 113: ...art 15 Verification NA Class A UL 60950 1 2007 TUV NRTL ICES 003 NA Class A CAN CSA 22 2 60950 1 07 TUV NRTL EN55022 2010 EU Class A GS mark by TUV EN60950 1 2006 A11 A1 A12 2nd edition certificate and critical component part list C TICK mark Australia and New Zealand EN55024 2010 EU Class A EN610003 2 2006 Plus A1 2009 A2 2009 EU Class A EN610003 3 2008 EU Class A EN62311 2008 EU Class A VCCI CCC...

Страница 114: ...the E 42 from the furniture in order to access internal components for service Procedures If the E 42 is installed in the optional furniture you must remove it from the furniture before performing most service procedures FIGURE 30 E 42 installed on the furniture Drawer E 42 Table top Monitor Monitor pole Stand ...

Страница 115: ...ight of the system 1 Make sure that the E 42 is shut down and that all the cables are removed from the back of the E 42 2 Remove the cable cover and disconnect the two monitor cables power and video Power from the back of the monitor and from the wall outlet Video from the back of the monitor and from the back of the E 42 Video cable Cable cover Power cable ...

Страница 116: ...attach the E 42 stability bracket to the stand 4 Lift the bracket and gently pull the E 42 away from the table top Make sure to pull the E 42 out just enough so that the front panel of the E 42 is aligned with the back edge of the table top Stability bracket Thumbscrews ...

Страница 117: ...SERVICING THE E 42 WITH FURNITURE 117 5 Remove the E 42 left side panel two screws so that you can access the monitor pole tightening mechanism Monitor pole tightening mechanism Left side panel ...

Страница 118: ...w that secures the monitor pole to the E 42 The allen key should be stored in the side drawer of the furniture 7 Holding the monitor pole gently lift the monitor pole assembly up and out of the E 42 monitor mount 8 Continue servicing the Fiery controller Allen key Monitor pole ...

Страница 119: ...d Slide the E 42 forward just until its front panel is aligned with the back edge of the table top Use the handle on the stability bracket to lift the rear of the E 42 and slide it forward 3 Route the monitor cables power and video into the cutout in the back of the top panel Pull each cable out of the cutout in the top panel Video cable Power cable Top cutout Back cutout Top panel ...

Страница 120: ...E 42 WITH FURNITURE 120 4 Lift up the pole assembly and insert the pole into the top of the E 42 so that it is inside the monitor mount Tighten the assembly into place using the allen key Tighten the monitor assembly ...

Страница 121: ...SERVICING THE E 42 WITH FURNITURE 121 5 Replace the left side panel on the E 42 with the screws that you removed earlier ...

Страница 122: ...rward into the stand Lock the E 42 into place with the two thumbscrews that you removed earlier 7 Connect the two monitor cables power and video Power to the back of the monitor and to the wall outlet Video to the back of the monitor and to the back of the E 42 Stability bracket lock into place with two thumbscrews Video cable Power cable ...

Страница 123: ...ERVICING THE E 42 WITH FURNITURE 123 8 Replace the cable cover over the cables and monitor pole 9 Replace the allen key in the furniture drawer and continue reassembling the Fiery controller Cable cover ...

Страница 124: ...e calls 15 23 87 Clear Server command 29 clearing the CMOS 71 after installing a new CPU 68 after installing a new DIMM 64 after installing a new DVD drive 86 after installing a new HDD 80 after installing a new motherboard 60 to troubleshoot slow performance 106 clock 106 closing the system 87 CMOS 60 64 68 71 80 86 106 troubleshooting start up problems 102 Color Charts 29 color profiles 89 Comma...

Страница 125: ...8 EMI approvals 113 error messages check power and cable 23 when transferring options to new motherboard 105 Ethernet address 108 cable 17 21 connector 21 36 exploded view CPU and cooling assembly 64 print server 38 F FACI monitor 19 fan CPU 64 66 front panel 72 ferrite installing on the front panel USB port cables 84 installing on the power supply 75 removing from the front panel USB port cables ...

Страница 126: ...ing in Service Mode 57 61 62 mouse 19 move left right buttons 50 N network cable twisted pair 21 connector 21 36 supported types 112 network administrator 14 16 networks availability during installation 16 checklist 16 supported 8 normal startup sequence 100 O opening the system 43 operation panel copier 27 P panels removing 43 45 PANTONE 29 password 62 Portable Document Format PDF 8 PostScript 8 ...

Страница 127: ...onnections 95 checking internal connections 95 control panel functions 105 control panel messages 105 DVD drive 106 error messages and conditions 101 network 108 normal startup sequence 100 preliminary on site checkout 94 printing 109 110 startup problems 102 system performance 106 107 twisted pair network cable 21 U UIB cable routing diagram 39 unpacking 17 up button 24 50 updating software 92 up...

Отзывы: