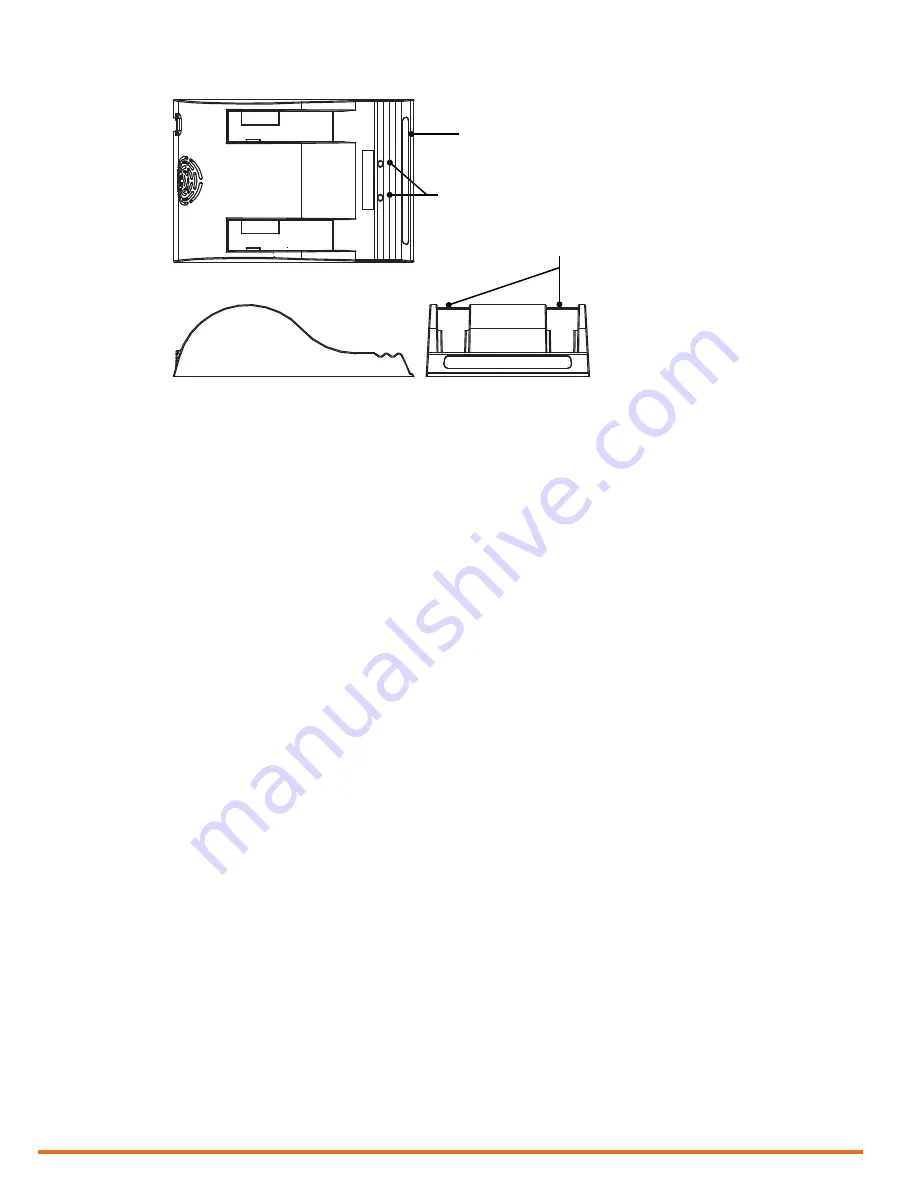
Status window
Calibration buttons
Battery slots
12 | www.eddyfi.com
Reddy Overview
Figure 1–4
Optional battery charger
To charge the batteries with the optional charger:
1.
Place the charger on a flat and level surface, away from heat and moisture sources.
2.
Insert the power supply’s DC connector into the back of the external charger.
3.
Connect the power supply to an AC supply using the supplied cable.
All the LEDs flash momentarily to let you know that power is present.
4.
Insert the batteries into the battery slots while making sure that the contacts are fully seated.
The charger automatically begins charging the batteries and the LEDs in the status window display
the following information:
•
Blinking green: battery charging
•
Green: battery fully charged
•
Blinking blue: battery calibrating
•
Blue: battery charge gauge calibrated
•
Blinking red: battery charge gauge in need of calibration
•
Red: error
Calibrating Batteries
To ensure that your batteries perform at their full capacity for the longest possible time, it is important
to calibrate them on a regular basis. Calibration involves a standard battery charge followed by a deep
discharge, and then a complete charge. This procedure usually takes 10 to 13 hours, whereas a standard
charge only takes approximately 3.5 hours.
Calibrate batteries by placing them in the optional charger and then pressing the calibration button. We
recommend calibrating your batteries at least every six months.
Storing Batteries
Whenever transporting Reddy in its case,
remove the batteries
from the instrument and make sure
that they
cannot come in contact
during transport, as this is a significant fire and explosion hazard.
Reddy’s transport case is outfitted with two slots intended for the batteries. We recommend that you
take advantage of them.
Содержание Reddy
Страница 1: ...User s Guide...
Страница 9: ...ix...
Страница 10: ...x www eddyfi com General Precautions and Conventions General Precautions and Conventions...
Страница 15: ...xv General Precautions and Conventions...
Страница 16: ...2 www eddyfi com Reddy Overview Chapter 1 Reddy Overview...
Страница 27: ...13 Reddy Overview...
Страница 28: ...14 www eddyfi com MagnifiGO Overview Chapter 2 MagnifiGO Overview...
Страница 34: ...20 www eddyfi com MagnifiGO Overview Figure 2 6 Acquisition Summary Figure 2 7 Report Summary...
Страница 35: ...21 MagnifiGO Overview Figure 2 8 Save Figure 2 9 Material Database...
Страница 36: ...22 www eddyfi com Preferences Chapter 3 Preferences...
Страница 38: ...24 www eddyfi com Preferences Figure 3 3 Analysis preferences Figure 3 4 Help...
Страница 39: ...25 Preferences...
Страница 40: ...26 www eddyfi com Keypad and Keyboard Functions Chapter 4 Keypad and Keyboard Functions...
Страница 42: ...28 www eddyfi com Using Reddy with Sharck Probes Chapter 5 Using Reddy with Sharck Probes...
Страница 62: ...48 www eddyfi com Maintenance and Troubleshooting Chapter 6 Maintenance and Troubleshooting...
Страница 66: ...52 www eddyfi com Specifications Chapter 7 Specifications...
Страница 69: ...55 Specifications...
Страница 70: ...56 www eddyfi com Connector Reference Appendix A Connector Reference...
Страница 74: ...60 www eddyfi com Using the Optional Harness Appendix B Using the Optional Harness...
Страница 82: ...www eddyfi com...


