background image

61

61

Types of Playable Discs

This equipment conforms to NTSC color television methods, so please use discs that display
“NTSC” on the disc or package. This equipment cannot play discs using color television
methods other than NTSC (such as PAL, SECAN).

ATTENTION

The playback status may be determined in response to the DVD or software creator's intention.
This receiver plays disc contents intended by the software creator; therefore, functions may not
operate as you intend. Be sure to read the user's guide that comes with the disc to be played.

Region Code of Playable Disc

 (region code), which is indicated on some DVDs, represents areas they can be played in.

This receiver cannot play discs that do not have “1” or “ALL” indicated on this mark. If you
attempt to play such a disc, the message “you cannot play this disc.” will appear. Note also that
some discs may be subject to regional restrictions, meaning that this receiver will not play
them, even though they list or state a region code.

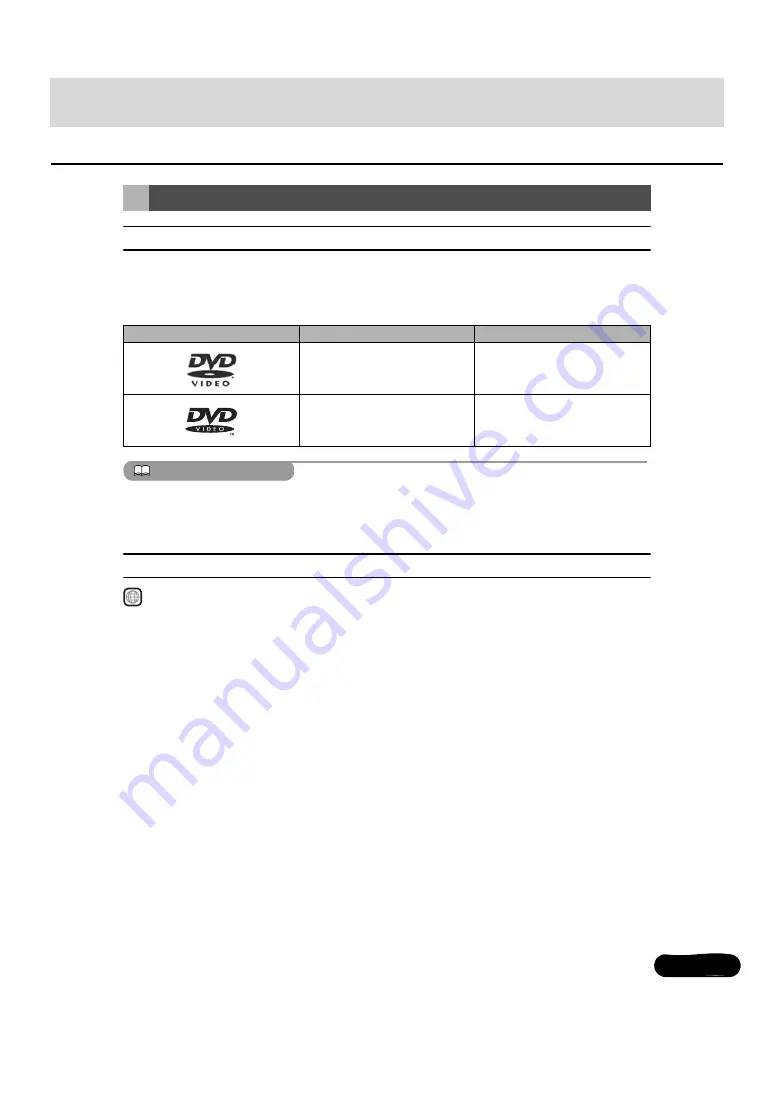
Discs

Type and mark of playable disc

Size/playing side

Max. playing time

12cm/1 side
1 layers
2 layers

<MPEG 2 system>
133 min.
242 min.

12cm/2 sides
1 layers
2 layers

<MPEG 2 system>
266 min.
484 min.

1

Содержание AVN4430

Страница 1: ...4 3 Portable Navigation Built in Bluetooth wireless technology We appreciate your purchase of this receiver Please read through this manual for correct operation We suggest that after reading it you keep this manual in a safe place for future reference ...

Страница 2: ...ry CAUTION This sign indicates a situation in which incorrect handling through disregard of a sign might result in personal injury or may result solely in damage to property IMPORTANT Follow this advice to prevent malfunctions or damage to the main unit Perform the indicated action in the event of a malfunction ATTENTION Useful information for the smooth operation of the main unit Facts to keep in...

Страница 3: ...om the Main Unit 19 Attaching the PND 19 Using the Audio Cover 20 Using the Audio Cover 20 Fitting the Audio Cover 20 How to Detach the Audio Cover from the Main Unit 20 Hands Free Microphone and Light Sensor 20 Adjusting the Display Angle 21 Loading Unloading a Disc 22 Loading Steps 22 CD DVD unloading steps 23 Operation Conditions of this Receiver 24 2 Setup of This Receiver 25 Setup of This Rec...

Страница 4: ...quality 32 Switching Audio Control Modes 32 Adjusting the BASS 32 Adjusting the MIDDLE 32 Adjusting the TREBLE 32 Balancing the Right and Left Speakers BALANCE 32 Balancing the Front and Rear Speakers FADER 32 Adjusting non fader level NON FADER LEVEL 32 Selecting phase NON FADER PHASE 33 Adjusting frequency filtering settings Low Pass Filter for Sub Woofer output 33 Setting the loudness mode LOUD...

Страница 5: ...hin the selected category 38 Selecting a category 38 Selecting a channel 38 Selecting a channel by direct input 38 Memorizing Channels 39 Selecting a preset channel 39 Preset Scan 39 Displaying information about the current broadcast on the sub display 39 3 How to use the XM satellite radio 40 Listening to XM satellite radio 40 Checking the RADIO ID 40 Changing the XM band 41 Selecting the channel...

Страница 6: ... Fast Forward Rewind 47 Returning To the Root Directly 47 Finding a Desired Music File 48 Repeating a Music File 48 Random Play 49 Displaying the information on the sub display 50 Switching Between CD DA and MP3 WMA 50 MP3 WMA 51 Playable MP3 File Standards 51 Playable WMA File Standards 51 ID3 WMA Tags 52 Supported Media Types 52 Format of Discs 52 File Names 53 Multi sessions 53 Playing MP3 WMA ...

Страница 7: ...rations 1 Before Using the DVD Player 60 Advantages of Digital Versatile Disc DVD 60 Multi Audio Function 60 Multi Angle Function 60 Subtitle Display Function 60 Discs 61 Types of Playable Discs 61 Region Code of Playable Disc 61 Mark Indicated on Disc 62 Disc Configuration 62 Products equipped with Macrovision 63 Operation Flow 63 2 Using the DVD Player 64 Watching a DVD Video 64 Video Operations...

Страница 8: ...io Language 70 Entering the Code 71 Specifying the Subtitle Language 71 Entering the Code 72 Specifying the Menu Language 72 Entering the Code 72 Specifying the Parental Screening Level 73 Switching the Video Output 74 Language Code List 75 3 Using the VTR 76 Switching the VTR Mode ON and OFF 76 Playing the VTR 77 Changing the VTR Setting Screen 77 Turning Off the VTR 77 How to operate portable au...

Страница 9: ...ctions 84 Reading the steering wheel switch data 85 Manual setting of steering wheel switch functions 85 Compatibility with Steering Wheel Switches 87 2 Backeye Camera Operations 89 Playing a Video through the Backeye Camera 90 When the Camera Is Set to MANUAL or AUTO 90 When the Camera Is Set to AUTO 90 Reference 1 Necessary Information 92 If the Following Messages Appear 92 When You Think There ...

Страница 10: ...installing Secure wiring with non conductive tape or plastic ties so that wires do not interfere with vehicle operation including the brake pedal gear shifter and steering Position wires so that they will not be rubbed abraded or damaged by moving vehicle components including power seats To avoid damage to the main unit and vehicle including fire never supply power to an installed main unit in a w...

Страница 11: ... unit smoke or a strange odor may be emitted If this occurs stop using the main unit immediately and contact your dealer Accidents fire or shocks may result if you continue to use the main unit under these conditions The driver should not change the Disc or USB memory while driving Doing so may result in as accident You must first stop or park your car in a safe location and then proceed to remove...

Страница 12: ...ntact with metal parts The wiring maybe be damaged by contact with metal parts resulting in fire and shocks Avoid all contact with hot surfaces when wiring the main unit High temperatures may damage wiring causing shorts arcing and fires When changing the installation location for this main unit please consult the dealer where you bought it for safety reasons Expertise is necessary for removal and...

Страница 13: ...ayed position This device is a precision engineered equipment and the information that you record on it after purchase can be lost as a result of static electricity electrical noise vibration and other influences It is recommended that you keep a separate record of the information you store in the main unit Note that the following events are not covered by the warranty a Corruption or loss of the ...

Страница 14: ...ses or abnormal odors are noticed turn off the power immediately Immediately turn off the audio in such situations Exercise caution regarding the temperature inside the vehicle The temperature inside the vehicle can increase during hot weather Wait for the temperature inside the vehicle to drop before using this receiver Otherwise damage may result Do not disassemble or modify this receiver The ma...

Страница 15: ...ers or other objects caught behind the monitor when it is being retracted into place Interference can cause an injury or damage the main unit When removing a disc from the main unit remove it in the horizontally level direction Do not pull them up or press down on them forcibly while removing them Improper removal may result in the disc becoming scratched cause the receiver to emit unusual noises ...

Страница 16: ...ormat is supported and a disc having the following logo can be played This product is manufactured under license from Dolby Laboratories Dolby and the double D symbol are registered trademarks of Dolby Laboratories It is possible that a CD R CD Recordable or CD RW CD ReWritable disc will not play on the main unit due to the characteristics of the recording or special disc scratches dirt or deterio...

Страница 17: ...e recording side or label side of a disc Damage could result Keep cracked or warped discs out of the player to avoid damaging the main unit Do not touch the recording area the rainbow colored side of a disc Otherwise the disc may become dirty and playback may be intermittent If you play a dirty disc the disc surface may be scratched and its play may be intermittent Use a commercially available com...

Страница 18: ...ttempt to play them even with an adapter since they may damage the player Do not use accessories stabilizers protective seals laser lens cleaners etc sold for improving sound performance or protecting CDs The changes in CD thickness or outside dimensions made by these accessories may cause problems in the player Please be sure NOT to attach any ring shape protector or other accessory to your discs...

Страница 19: ... audio controls Long press Switches to the Adjustment screen while in the video mode You can switch to the setting mode when PND is connected and PWR switch is OFF d VOL rotary knob Adjusts volume e SCREEN AV NAV button Short press Switches between the NAVI screen and AV screen Turns the PND display ON when it is OFF Long press Displays the CAMERA screen when a camera is connected f BAND button Ch...

Страница 20: ...Tilts the front panel step by step or forcibly ejects the disc when the front panel is open k Release button Removes the right side of the PND from the main unit Turning the POWER ON or OFF When the main unit s power is turned on for the first time or if the battery terminals have been disconnected e g for vehicle maintenance and the power is then turned back on the main unit will start up in the ...

Страница 21: ...Press the right hand side of PND until it clicks in position Turning the PND Display ON and OFF 1 When the PND display is ON hold down the MUTE button for 1 or more seconds 2 When the PND display is OFF press the SCREEN AV NAV button Detaching the PND When detaching the PND take care NOT to touch its rear side After detaching the PND mount the connector cover to the PND rear side Take care not to ...

Страница 22: ...move it The PND is equipped with a built in hands free microphone and a light sensor For details on how to use the hands free call function or configure light sensor settings refer to the operation manual of the PND IMPORTANT Using the Audio Cover 1 Mount the left end of audio cover on this receiver 2 Mount the entire Audio Cover on this receiver 1 Press the Release button 2 Remove the audio cover...

Страница 23: ...set angle Adjusting the Display Angle When adjusting its angle take care not to pinch your fingers Otherwise you may hurt yourself or the display may fail Do not mount a disc when the display is tilted Otherwise the disc or this receiver will be scratched and damaged When adjusting the display angle use the following notes Automatic transmission AT car Adjust the display angle not to limit the dri...

Страница 24: ...when the gearshift lever is set to P in an automatic transmission car 1 3 5 or R in a manual transmission car or a bottle or a similar object is placed in the cup holder To open or close the display safely set the gearshift lever to N automatic transmission car or to the Neutral position manual transmission car in advance or empty the cup holder Make sure that the car is not in motion by applying ...

Страница 25: ...1 3 5 or r position shift it to the Neutral position Take care NOT to close the display when the ejected disc remains in the slot If this caution is not observed this receiver or the disc may be scratched Do not push and close the display by hand or the display will be damaged Wipe and clean the display immediately if juice or another type of liquid spills onto it If it is not cleaned the display ...

Страница 26: ... installing this device to vehicles please be sure to connect the parking brake signal If the parking brake signal is not connected this device will not operate normally Engine switch OFF LOCK ACC ON With parking brake set ACC ON With parking brake released Display opened Audio function c Some functions are inoperable for safety reasons Voice guidance continues Video function c For your safety onl...

Страница 27: ...en the audio other than that of an iPod USB is operated Enable AUX Turn the AUX setting ON or OFF If it is ON you can select the AUX input It turns ON and OFF each time you touch Setup of This Receiver Main Unit Settings 1 Hold down the SRC button for 1 or more seconds to turn the audio mode OFF 2 Press the SCREEN AV NAV button to call the Audio screen 3 Hold down the CTRL button for 1 or more sec...

Страница 28: ...ght view to headlights If Enabled the PND display is switched to the night view mode when you turn on the car lighting It turns ON and OFF each time you touch Illumination The illumination colors can be switched The illumination color is switched between Blue and Red each time you touch 1 Touch 2 Touch 3 Touch 1 Touch 2 Touch 3 Touch Enable VTR Enable VTR Next Done Dim sub display Dim sub display ...

Страница 29: ...on The AUTO and MANUAL operations are switched each time you touch Radio area Select US Latin or Asia as your radio area This function switches only the settings of the main unit The PND map remains unchanged CAUTION The US Latin and Asia radio areas are switched each time you touch When you have stopped the car you can switch from DVD VTR or iPod video image to the Adjustment screen and you can a...

Страница 30: ...uring DVD or VTR image display 1 Adjust the contract of image by sliding from the left end position 0 to the right end position 100 1 Adjust the brightness of image by sliding from the left end position 0 to the right end position 100 1 Touch 2 Adjust the color of image by sliding from the left end position 0 to the right end position 100 1 Touch 2 Adjust the tint of image by sliding from the left...

Страница 31: ...al aspect ratio normal TV screen size is uniformly expanded in the left and right directions Zoom mode The screen with the 3 vertical by 4 horizontal aspect ratio normal TV screen size is uniformly expanded in the up down left and right directions ATTENTION The user should not experience any problems when watching a video on the wide screen on a personal basis If you compress or enlarge the screen...

Страница 32: ... 1 Cannot be selected if the correspond ing device is not connected to the main unit 2 You cannot select it if no disc is loaded 3 Cannot be selected if the AUX setting is set to OFF 4 If the PND is not connected to the main unit you cannot select the USB mode or iPod mode 5 Cannot be selected when the VTR set ting is set to OFF 6 North American models only Switching the audio source 1 Press the S...

Страница 33: ...level appropriately according to the audio source you select For volume control see Adjusting the SVC Source Volume Control on page 33 The sound is muted Press the MUTE button again to return to the previous sound level To cancel muting just increase the volume The volume will increase for the steps you selected from the previous level before muting The navigation voice guidance can be heard even ...

Страница 34: ...t speakers To the right Emphasizes right speakers To the left Emphasizes left speakers Balancing the Front and Rear Speakers FADER You can adjust the balance fading of front and rear speakers To the right Emphasizes front speakers To the left Emphasizes rear speakers Adjusting non fader level NON FADER LEVEL Non fader level for connected sub woofer can be adjusted To the right Increases the sub wo...

Страница 35: ...requencies low range through To the left LPF OFF Allow all frequencies through regardless if the frequencies are low or high Setting the loudness mode LOUDNESS Accentuate low and high frequencies when the volume is low When loudness is ON the apparent deficiency in the high sounds is compensated for To the right Turns ON To the left Turns OFF Adjusting the SVC Source Volume Control In this mode yo...

Страница 36: ...he SRC button repeatedly until FM or AM is displayed on the sub display Tune a Desired Station If the vehicle s battery is disconnected for repairs to the vehicle or for removing the main unit all stations in memory will be lost In such a case set stations in memory again At times it may be difficult to maintain optimum reception because the antenna affixed to your vehicle is in motion constantly ...

Страница 37: ...cy will be shown on the display To manually set additional selected stations for the remaining preset channels repeat this procedure for each channel Six stations can be memorized for each of FM 1 2 and 3 and six stations can be memorized for AM making a total of 24 stations If the stations have been stored in memory a station can be selected by touching a preset switch and the station can be rece...

Страница 38: ... ASM touch This function enables reception of all the stations in the preset switches to be played for five seconds each The stations of preset switches P1 to P6 will be scanned sequentially Each station is turned for five seconds To cancel the preset scan touch The frequency can be displayed on the LCD when the PND is connected You can select a station by simply touching a preset switch any of 1 ...

Страница 39: ... ROCK or you can select a channel by direct input Reception of SIRIUS satellite radio is a paid subscription The SIRIUS ID number is a 12 digit numerical code that is assigned each time the SIRIUS satellite radio tuner is connected A 12 digit numerical code is displayed You can also check the SIRIUS ID by selecting CH0 SRC Channel selection Button Category selection Button TEXT BAND selection Butt...

Страница 40: ... previous category Selecting a channel Right Selects the higher channel Left Selects the lower channel Right Selects the next preset channel Left Selects the previous preset channel Selecting a channel by direct input Changing the SIRIUS band 1 Press the BAND button Selecting the channel you want to listen to 1 Press the SELECT Up or SELECT Down button 1 Press the SELECT Up or SELECT Down button f...

Страница 41: ...rent broadcast such as the channel category track title artist and channel number can be displayed with the PND disconnected The channel number is shown on the sub display 3 Input a channel 4 Touch Memorizing Channels If the vehicle s battery is disconnected for repairs to the vehicle or for removing the main unit all channels in memory will be lost In such a case set channels in memory again 1 Tu...

Страница 42: ... ROCK or you can select a channel by direct input Reception of XM satellite radio is a paid subscription The RADIO ID number is a 8 digit numerical code that is assigned each time the XM satellite radio tuner is connected An 8 digit numerical code is displayed You can also check the RADIO ID by selecting CH0 SRC Channel selection Button Category selection Button TEXT BAND selection Button Listenin...

Страница 43: ...the higher channel Left Selects the lower channel Searches the channel in the category currently selected Right Selects the next preset channel Left Selects the previous preset channel Selecting a channel by direct input Changing the XM band 1 Press the BAND button Selecting the channel you want to listen to 1 Press the SELECT Up or SELECT Down button 1 Press the SELECT Up or SELECT Down button fo...

Страница 44: ...channel artist feature song and program title can be displayed with the PND disconnected Information on the music being played will be shown on the sub display and switched as follows channel No J channel name J artist feature J song program title J channel No J 3 Input a channel 4 Touch Memorizing Channels If the vehicle s battery is disconnected for repairs to the vehicle or for removing the mai...

Страница 45: ...point Fast forward rewind button Song information switching button SRC Listening To a CD Do not press the OPEN EJECT button when you are inserting a CD into disc slot This may cause a personal injury and damage to the front panel Do not drive your car while the front panel of this receiver is kept open The panel may cause unexpected personal injury in the case of a sudden stop or similar event Do ...

Страница 46: ...r finger from the switch The main unit will play the first 10 seconds of each track When you touch the current track is continued to play The track repeats to play When you touch the track repeats to play until you cancel it Touch again to cancel the repeat play Fast Forward Rewind 1 Hold down the SELECT Right or SELECT Left button for 1 or more seconds Finding a Desired Title 1 Touch SCAN Stop SC...

Страница 47: ... play is canceled The current track number and the elapsed time can be shown on the sub display The display changes as follows each time you press the TEXT button Track No J Elapsed time J Track No J Random Play 1 Touch 2 Touch Displaying the information on the sub display 1 Press the TEXT button Preferences Random songs Random songs Random songs ...

Страница 48: ...he OPEN EJECT button when you are inserting a CD into disc slot This may cause a personal injury and damage to the front panel Do not drive your car while the front panel of this receiver is kept open The panel may cause unexpected personal injury in the case of a sudden stop or similar event Do not attempt to close the front panel by hand Doing so may damage the panel If a non MP3 WMA file has th...

Страница 49: ...ed or rewound until you remove your finger from the switch You can return to the root directory and play its file IMPORTANT You can return to the root directory and play its file For an MP3 WMA file creation example see A configuration example of MP3 WMA supported CD on page 53 Selecting a Desired Folder 1 Press the SELECT Up or SELECT Down button Selecting a Desired Music File If music data CD DA...

Страница 50: ...playing a desired track or file turn the Scan function OFF The entire disc is scanned once and the normal play starts from the position where you started to scan When you select Playing the Start of Tracks Files Repeated Playing or Playing the Tracks Files in Random Order its function is shown as SCAN ALL RPT or RAND on the display 1 Touch 2 Touch or SCAN Current folder First song of each folder C...

Страница 51: ...you touch again the random play is canceled If you touch during random play the current track is repeated When you touch again random play restarts Random Play When you select Playing the Start of Tracks Files Repeated Playing or Playing the Tracks Files in Random Order its function is shown as SCAN ALL RPT or RAND on the display 1 Touch 2 Touch Preferences Random 3 Touch or Current folder All son...

Страница 52: ...e you press the TEXT button File No J Elapsed time J File No J If a disc contains both sound data CD DA and MP3 WMA music files you can switch between them Press the BAND button again to play the CD DA data Displaying the information on the sub display 1 Press the TEXT button Switching Between CD DA and MP3 WMA 1 To play an MP3 WMA music file press the BAND button ...

Страница 53: ... MPEG Audio Layer 3 MPEG1 Audio Layer III MPEG2 Audio Layer III MPEG2 5 Audio Layer III Supported sampling frequencies 8 11 025 12 16 22 05 24 32 44 1 48 kHz Supported bit rates 8 16 24 32 40 48 56 64 80 96 112 128 144 160 192 224 256 320 K bps Supports VBR Does not support free format Supported channel modes Stereo Joint Stereo Dual channels Monaural Playable WMA File Standards Supported standard...

Страница 54: ...ecome incapable of playback Fingerprints or scratches on the disc may prevent playback or cause skipping during playback Sections of CD R CD RW may deteriorate if left inside a vehicle for long periods of time We recommend that you store UV sensitive CD R and CD RW discs in shield cases Format of Discs You can use the following format discs on the player CD ROM formats CD ROM Mode 1 CD ROM XA Mode...

Страница 55: ...e extension it may be recognized erroneously as an MP3 WMA file When such file is played the very large noise is output and speakers may be damaged Do not save a non MP3 WMA file with the mp3 or wma extension Multi sessions Multisessions are supported and CD R RW with recorded MP3 WMA files can be played When written with Track at once however finalize the disc with session close or write protect ...

Страница 56: ... VBR Fast Up Down is operated The making of MP3 WMA files by recording from sources such as broadcasts records recordings videos and live performances without permission from the copyright holder for uses other than personal enjoyment is prohibited Downloading From an MP3 WMA Music Site of Internet You can find various types of MP3 WMA music distribution sites including online shopping trial liste...

Страница 57: ...d plays it correctly However depending on the type of disc being used the disc may not play CAUTION The 128K bps fixed bit rate and 44 1 kHz sampling frequency are recommended to use to have a high quality of playback sound Note that some CD R and CD RW discs may not be read due to their characteristics Because there are many types of MP3 WMA encoding software available including commercial and fr...

Страница 58: ...SB Music Files Connect the USB cable correctly so that it does not interfere with your safe operation of vehicle After connecting the USB memory while a message Don t remove the storage device until scanning is finished is displayed do not turn off the power or remove the PND USB memory Before removing the USB memory switch the display to the audio screen and touch When a USB memory device is atta...

Страница 59: ...SELECT Right or SELECT Left button Finding a Desired Music File Despite a CD ROM disc a folder selection by audio buttons is not supported in the USB mode Before disconnecting the USB memory from this receiver always switch the display to the audio mode screen and touch Loss of data may result if this procedure is not followed If you disconnect the USB memory or the PND from this receiver when a m...

Страница 60: ...USB mass storage such as an externally attached HDD is not supported Playable MP3 File Standards Supported standards MPEG 1 MPEG 2 and MPEG 2 5 Supported sampling frequencies MPEG 1 32 44 1 48 MPEG 2 16 22 05 24 MPEG 2 5 8 11 025 12 Supported bit rates 8 to 320K bps Supported VBR 64 to 320K bps Does not support free format Supported channel modes Monaural Stereo Joint Stereo Dual Channel ID3 Tags ...

Страница 61: ...r name file name and 3 character file extension File name characters that you can use A to Z 0 to 9 and underscore _ Max number of files that can be stored in a single memory 2000 files A total of 2000 files can be created within a single USB memory Files aside from MP3 files Example 004 txt are included in the 2000 files 001 mp3 005 mp3 004 txt 003 mp3 002 mp3 1498 mp3 2000 mp3 1499 mp3 ...

Страница 62: ...the audio language to the desired one The user s ability to change the audio language depends on the DVD Multi Angle Function Some DVDs support the multi angle function that enables you to play the same video scene with multiple angles and change to the desired angles while playing The user s ability to view multiple video angles depends on the DVD The video angle changes Subtitle Display Function...

Страница 63: ...the user s guide that comes with the disc to be played Region Code of Playable Disc region code which is indicated on some DVDs represents areas they can be played in This receiver cannot play discs that do not have 1 or ALL indicated on this mark If you attempt to play such a disc the message you cannot play this disc will appear Note also that some discs may be subject to regional restrictions m...

Страница 64: ...mber of audio tracks Indicates the number of subtitles Indicates the number of angles Indicates the image aspect ratio ratio between the height and width of the TV screen able to be selected 16 9 indicates a wide screen and 4 3 indicates a standard screen Indicates by use of a number regions where the disc can be played ALL indicates that the disc can be played anywhere in the world and the number...

Страница 65: ...eneral households and other limited viewing environments except when expressly permitted by Macrovision Corporation Remodeling or disassembly of this machine is prohibited The section explains how to operate the DVD player or search for images or default settings Touching touch switches displays the operation screens shown below Products equipped with Macrovision Operation Flow Title screen Back B...

Страница 66: ...ted DVD Cannot read disc Please check disc appears If the travel is regulated or the PND is not installed a DVD is automatically played on the rear monitor after 5 seconds has elapsed in the DVD mode IMPORTANT To ensure driving safety you cannot watch a video while driving Chapter selection Fast forward rewind button SRC Watching a DVD Video 1 Press the SRC button repeatedly until DVD is displayed...

Страница 67: ...und until you remove your finger from the switch Fast Forwarding or Rewinding Using Touch Switches When a beep sounds the fast forward or rewind mode starts and the video is fast forwarded or rewound until you remove your finger from the switch Pausing a Video When video is paused and when you short touch the Slow Play starts When you touch the frame by frame play starts Stopping a Video 1 Touch 1...

Страница 68: ... intend You can search for the desired video with a title chapter or menu number number assigned for each content Finding by Chapter To the right When selecting the next chapter To the left When selecting the cue or previous chapter Finding by Title Number Disc Menu Operations 1 Touch or 2 Touch 3 Touch and select the play back menu 4 Touch Menu Top Menu Enter Finding a Desired Video 1 Press the S...

Страница 69: ...cremented by 1 If you touch or the menu number is decremented or incremented by 10 You can change or hide the touch switch display while playing Hiding the Touch Switch Touching the screen will display the touch switches again 2 Touch or and enter the title number 3 Touch 1 Touch 2 Touch 10 10 10 10 Enter Number 3 Touch or and enter the menu number 4 Touch Changing the Touch Switch Display 1 Touch...

Страница 70: ...he Angle If the target disc supports multiple angles you can change them to display a video CHECK While the multi angle mark is displayed on the screen you can change the currently displayed angle Each time you touch the angle number is changed and the angles recorded on the disc are toggled in sequence 1 Touch 2 Touch or Changing the Screen Display and Audio Mode Up Down 1 Touch 2 Touch 3 Touch M...

Страница 71: ...isc are toggled in sequence Depending on the disc it may only be possible to change subtitle languages from the top menu 1 Touch 2 Touch 3 Touch Next Sub title Change subtitle Change subtitle Depending on the disc it may only be possible to change audio languages from the top menu This receiver does not support the dts digital theater system format therefore no audio will be emitted when dts audio...

Страница 72: ...the one displayed on the screen DVD Player Setting 1 Touch 2 Touch 3 If you touch each touch switch you can configure the following setting Next Set up Touch switch Function Page Specifies the audio language of a video to be played 70 Specifies the subtitle language of a video to be played 71 Specifies the language used to display the menu 72 Limits DVD videos that can be played 73 Specifies the s...

Страница 73: ...Subtitle Language You can view the play back video in the desired subtitle If you touch you can specify a language other than the one displayed on the screen If you touch you can play a video without viewing subtitle on the screen 1 Touch on the preferential audio language setting screen 2 Enter the desired language code 3 Touch Other Select Back 1 Touch on the initial setting screen 2 Touch the d...

Страница 74: ...anguage other than the one displayed on the screen Entering the Code For the language code see Language Code List on page 75 Touch to return to the previous page ATTENTION If the selected language is not compatible with the disc you will not be able to change to that language 1 Touch on the preferential subtitle language setting screen 2 Enter the desired language code 3 Touch 1 Touch on the initi...

Страница 75: ...estriction will not be possible Once a code number is specified you must enter it when using this item next time and after Be careful not to forget the code number If you forget the code number touch 10 times while the code number field remains blank you can initialize clear the current code number Parental screening levels are classified into the following three types Level 1 Plays only DVD softw...

Страница 76: ...nd the right edges of the video image are cropped DVDs recorded with the 4 3 ratio are displayed in the original ratio which fits the screen perfectly The Video Out image is usually set to the output display rate Usually use the default 16 9 ratio setting except when you use a 4 3 ratio rear monitor display ATTENTION The user should not experience any problems when watching a video on the wide scr...

Страница 77: ...ortuguese Quechua Rhaeto Romance Kirundi Romanian Kinyarwanda Sanskrit Sindhi Sangho Serbo Croatian Sinhalese Slovak Slovenian Samoan Shona Somali Albanian Serbian Siswati Sesotho Sundanese Swedish Swahili Tamil Telugu Tajik Thai Tigrinya Turkmen Tagalog Setswana Tonga Turkish Tsonga Tatar Twi Ukrainian Urdu Uzbek Vietnamese Volapuk Wolof Xhosa Yoruba Zulu Code Language Code Language Code Language...

Страница 78: ...e the engine switch or ACC is turned on When the source is switched to the VTR while the car is moving only the audio function becomes active Checked VTR setting is ON Not checked VTR setting is OFF To ensure driving safety you cannot watch a video while driving SRC Switching the VTR Mode ON and OFF 1 Hold down the SRC button for 1 or more seconds to turn the audio mode Off 2 Hold down the CTRL bu...

Страница 79: ...orrectly depends on the connected equipment If you have attached your iPod using the iPod cable iPC 409 this iPod connection has the priority and you cannot use the VTR mode To use the VTR unplug the iPod cable first This returns to the VTR operation screen Playing the VTR 1 Press the SRC button repeatedly until VTR is displayed on the sub display Changing the VTR Setting Screen 1 Touch 2 Touch or...

Страница 80: ...re driving safety you cannot watch a video while driving You can play a music file on the iPod only when the PND is attached to this receiver Track selection Fast forward rewind button SRC Listening to the iPod Disconnect headphones and other accessories from the iPod before connecting it to this receiver Failure to do so may make it impossible to operate the iPod from this receiver If the iPod s ...

Страница 81: ...g played Left Press more than two times Returns to the previous file The selected song or the video file will be played CAUTION This displays the list screen of the selected mode Fast Forward Rewind 1 Hold down the SELECT Right or SELECT Left button for 1 or more seconds Selecting the Desired Music or Video File 1 Press the SELECT Right or SELECT Left button Finding a Desired Music File If the iPo...

Страница 82: ...d video file If or appears touch them to change the page of the video file list You can search for a file or artist name by touching You cannot operate the and buttons when your car is running You can search for a video file by entering alphanumeric characters 3 Touch the name of the music file to be played Setting to the iPod Video Mode You can play a video file on the iPod only when the PND is c...

Страница 83: ...nction is released Touch again to cancel the repeat play Once you touch the random play continues until you cancel it Touch again to cancel the random play Playing 1 Touch Pausing 1 Touch Repeatedly Playing the Same Music File 1 Touch 2 Touch Preferences Repeat song Repeat song Repeat song Random Play of Music Files 1 Touch 2 Touch Preferences Shuffle songs Shuffle songs Shuffle songs ...

Страница 84: ...Audio output levels will differ for the various devices that can be connected by this method Carefully adjust the volume until the output level of the connected player is known Before using a portable audio player inside a vehicle read the player s operation manual carefully and confirm you will be able to easily operate the device in the vehicle before proceeding When you connect an optional cabl...

Страница 85: ...r use the batteries that come with the portable audio player If you play the portable audio player while charging with the vehicle power charger or accessory socket additional noises may be heard Listening to the Portable Audio Player Do not operate the portable audio player while driving Audio output levels for the various devices that can be connected using this method will differ You can adjust...

Страница 86: ...act the store from which you purchased your main unit Depending on your vehicle s make and model material downloaded from the website may not be compatible with your steering wheel switch Consult the store from which you purchased your AVN4430 about compatibility and set up procedures Download the steering wheel switch software in the following procedure turn the receiver power switch off standby ...

Страница 87: ...N or OFF on page 18 IMPORTANT The state of a no signal is read Reading the steering wheel switch data Do not turn the ignition switch or the power to the main unit ON or OFF or remove the front panel of the main unit while data reading is in progress Data reading will be interrupted and data may be damaged Only the VOL knob can be operated while the system is reading data 1 When the power switch i...

Страница 88: ...rrectly OK is displayed ATTENTION If NG is shown on the display once again select a desired function to set 6 Press the BAND button 7 Hold down the steering wheel switch button you wish to store in memory and simultaneously press the CTRL button more than two seconds 8 Assign the desired functions to the steering wheel switch buttons by repeating Steps 5 through 7 9 When you have set all functions...

Страница 89: ...return to FM AM When the power is on the mode changes each time MODE is pressed POWER Power switch Slightly press this switch to turn the power off Turns the power off Radio operations u d Channel selection switch Calls up the preset broadcast channels in order Starts the automatic channel selection operation Press u or d briefly to select the next or previous preset channel Press and hold u or d ...

Страница 90: ... d File or folder selection switches Selects the next or previous file Moves to the next or previous folder Press u or d briefly to select the next or previous file Press and hold u or d longer to select the next or previous folder iPod operations u d Track selection switches Selects the next track or previous track or beginning of the current track Press u or d briefly to select the next or previ...

Страница 91: ...tacle displayed on the screen is different from the actual position or difference due to the characteristics of the camera lens Do not subject the camera unit to a strong impact for example hitting the camera unit or impacting the camera unit against a solid object Doing so may displace the camera position or installation angle resulting in the backeye camera malfunctioning The camera unit has the...

Страница 92: ...o the screen If the camera unit is exposed to strong light such as sunlight or headlights a vertically oriented white zone may appear If the camera is used for a long period of time white scratches or vertical lines appear as the temperature rises note that these phenomena are caused due to the CCD characteristics The backeye camera is equipped with a special lens therefore distances perceived thr...

Страница 93: ... temperature near the lens is high or low When there are water drops on the camera or when humidity is high during rain showers etc Foreign substances mud etc have become attached to locations near the camera The camera lens has been exposed directly to sunlight or the rays of headlights If a high intensity point sunlight reflected on the vehicle body etc is reflected on the camera it may result i...

Страница 94: ... OCCURRING Turn the ACC off once before turning it on once again to resume operation If this condition persists please contact your dealer NO SUPPORT PND ERR LCD NO CORRECT FILE IN CD Confirm the file DISC CHECK PND INF3 LCD The CD MP3 WMA DVD is dirty scratched warped or upside down Clean the disc if it is dirty Insert the disc correctly if it is upsidedown Do not use the scratched or warped disc...

Страница 95: ...Import tracks to the USB to play them External USB device is not supported PND ERR LCD Communication or play back error Wait until the error is corrected or change the mode In SIRIUS mode ANTENNA PND ANT LCD The SIRIUS antenna is disconnected Check the connection of the SIRIUS antenna ACQUIRING PND LCD Displayed when the SIRIUS satellite radio signal is lost during access Try receiving the signal ...

Страница 96: ...played when the XM channel you are tuned to is not currently on air Tune to channels currently on air LOADING Obtaining audio and information data for the XM channel Wait for a brief period In iPod mode This device cannot be connected in this way use a different cable PND ERR LCD The iPod has been connected to the USB port Wait until the error is corrected or change the mode READING PND LCD This m...

Страница 97: ...ic of LCD backlighting This is not a malfunction The display will stabilize after a brief period No sound comes out Volume is poorly adjusted or MUTE is functioning Turn the VOL rotary knob to adjust the volume or release MUTE The music is muted when the PND is attached to the main unit and when the voice guidance is ON talking in the hands free mode This is not a malfunction The music can be hear...

Страница 98: ... inserted Insert a CD DVD that is supported in the deck See page 14 Audio is output but not video The screen has been turned off with the screen OFF button Press the SCREEN AV NAV button See page 19 Audio is output but not DVD video With vehicle stopped The emergency parking brake has not be set Set the emergency parking brake Neither video nor audio is output The vehicle ignition switch has not b...

Страница 99: ...e whole unit 4 F to 149 F 20 C to 65 C Operating temperature range PND only 14 F to 131 F 10 C to 55 C PND storage guarantee temperature 4 F to 140 F 20 C to 60 C Storage temperature range audio only 20 F to 185 F 40 C to 85 C Suitable load impedance 4Ω DISPLAY 4 3 WQVGA Resolution 480 272 pixels Frequency Range 87 75 to 107 9 MHz 200 kHz step North America 87 75 to 107 9 MHz 100 kHz step Latin Am...

Страница 100: ...esponse 20Hz to 20 000Hz 3dB Wow Flutter Below measurable limits Channel Separation 65 dB S N Ratio A weighted CD 75 dB DVD 70 dB Dynamic Range 95 dB Total Harmonic Distortion 0 008 USB Interface 1 1 Frequency Response 20Hz to 20 000Hz 3dB S N Ratio A weighted 75 dB Bass Mid Treble Control 11dB at 80 Hz 11dB at 700 Hz 11dB at 10 kHz Power Output 15 W 4 Max 50 W 4 MOS FET Output Level Impedance 3V ...

Страница 101: ...99 Reference 99 How to Contact ECLIPSE Fujitsu Ten Corp of America Eclipse 19600 South Vermont Avenue Torrance CA 90502 Phone 1 800 233 2216 ...

Отзывы: