background image

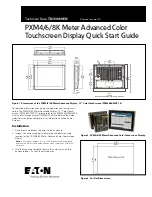
Figure 1. Dimensions of the PXM4/6/8K Meter Advanced Display - 12” Color Touchscreen (PXM468K-DISP-12).

8.

94


(2

27

)

13.31 

(338.07)

Behind Panel Surface for Mounting Hardware

0.33 

(8.4)

2.04 

(51.7)

1.80 

(45.7)

3.94 

(100)

3.

76


(9

5.

5)

11.85 

(301)

12.56 

(319)
9.76 

(248)

7.

34


(1

86

.4

)

9.

65


(2

45

)

3.

94


(1

00

)

9.65  (245)

Be

hi

nd

 P

an

el

 S

ur

fa

ce

 fo

r M

ou

nt

in

H

ar

dw

ar

e

Effective January 2017

Technical Data 

TD150019EN

PXM4/6/8K Meter Advanced Color

Touchscreen Display Quick Start Guide

For detailed information concerning the operation and features avail-

able in the PXM4/6/8K Meter Advanced Display - 12” Color Touch-

screen (PXM468K-DISP-12), please refer to the PXM4000/6000/8000 

User and Installation manual (IM02601004E) available on the Eaton 

website (www.eaton.com/meters) for information on Web Server 

Screens.

Installation

1.  Disconnect and lockout all power to the enclosure.
2.  Inspect the enclosure door to determine the best mounting 

location for the PXM4/6/8K Meter Advanced Color Touchscreen 

Display.

otee:

N

A minimum clearance of 1 in. (25.4 mm) must be maintained 

between the back of the display and any other component within the 

enclosure.

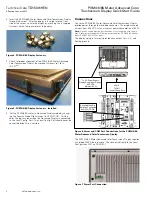
3.  Use the mounting template to mark the cutout area on the 

enclosure door.  Cut out the marked area.

Figure 2. PXM4/6/8K Meter Advanced Color Touchscreen Display.

Figure 3. Cut Out Dimensions.

9.

02


(2

29

)

11.93 

(303)

Mounting Hole

Содержание PXM8K Series

Страница 1: ... Color Touch screen PXM468K DISP 12 please refer to the PXM4000 6000 8000 User and Installation manual IM02601004E available on the Eaton website www eaton com meters for information on Web Server Screens Installation 1 Disconnect and lockout all power to the enclosure 2 Inspect the enclosure door to determine the best mounting location for the PXM4 6 8K Meter Advanced Color Touchscreen Display No...

Страница 2: ...cal Config Port The Local Config Port should never be connected directly to a network Connections To use the PXM4 6 8K Meter Advanced Color Touchscreen Display provide power through the included connector This display accepts an input from 9 36 VDC with a maximum power consumption of 60 W Note N A power supply must be purchased as it is not supplied with the dis play Eaton recommends the following...

Страница 3: ...er open Internet Explorer from the quick launch bar at the lower left of the screen Select the Install SSL Certificate link located in the center of the black bar at the bottom of the page Figure 9 SSL Certificate Link Then select Root CA Certificate to engage the security certificate The file titled meter_ca crt will automatically download Once the file download is complete click on the file in o...

Страница 4: ...upon power up To finish power cycle the display Figure 12 Display Mode Icons On future power ups when the device is properly connected to the meter a grey progress bar will begin to fill in conjunction with the meter s power up sequence After the meter is ready the main screen of the meter interface should appear Figure 13 Main Screen of Meter Interface Display Hot Spots There are a handful of hot...

Страница 5: ...e address This can be set with the rotary switch located on the bottom left side of the meter Please reference the PXM4000 6000 8000 User and Installation Manual for full details Remote access to Ethernet enabled features for 4 6 8K requires LAN connection to PXMCE B Meter Firmware Requirements The minimum meter firmware version required for compatibility is 13 3 6 5 Technical Information 1024 x 7...

Страница 6: ...rt Guide Eaton Electrical Sector 1000 Eaton Boulevard Cleveland OH 44122 United States 877 ETN CARE 877 386 2273 Eaton com 2017 Eaton All Rights Reserved Printed in USA Publication No TD150019EN TBG001242 January 2017 Eaton is a registered trademark All other trademarks are property of their respective owners ...

Отзывы: