background image

INS #

Brand Logo  

reversed out of 

black

INS #

IB519087EN

Installation Instructions – SLSTP 8x4/2 Row Mount Bracket
Directives d’installation – Support en série 8x4/2 SLSTP
Instrucciones de instalación - Soporte de montaje en hilera SLSTP 

8x4/2

IMPORTANT: 

Read carefully before installing row mount bracket. Retain for future reference

WARNING

Risk of fire, electrical shock, cuts and or other casualty 
hazards. This product must be installed in accordance 
with the applicable installation code by a qualified 
electrician or a person familiar with the construction 
and operation of the product and the hazards involved. 
Eaton assumes no responsibility for claims brought 
about by improper or careless installation or handling 
of this product.

WARNING

Risk of Fire and Electric Shock. If not qualified, consult 
an electrician.

CAUTION

Edges May Cut. Handle with care.

CAUTION

Risk of burn. Disconnect power and allow fixture to cool 

before handling fixture.

otice:

N

Minimum 90° supply conductors.

otice:

N

Green ground screw provided in proper location. 

Do not relocate.

ote:

N

Specifications and dimensions subject to change 

without notice. 

8x4/2 Row Mount Bracket

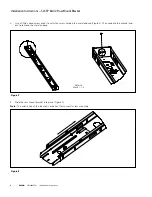
1.  Remove lens and channel cover as shown in Figure 1.

Figure 1

Содержание Metalux SLSTP 8x4/2 Row Mount Bracket

Страница 1: ...rician or a person familiar with the construction and operation of the product and the hazards involved Eaton assumes no responsibility for claims brought about by improper or careless installation or...

Страница 2: ...Philips head screw driver to unfasten screw holding the metal endcap Figure 2 Then squeeze the channel and pull to remove the metal endcap 3 Slide the row mount bracket into place Figure 3 Note N The...

Страница 3: ...tallation Instructions SLSTP 8x4 2 Row Mount Bracket 4 Slide the other end of the bracket into the fixture you wish to row mount to Figure 4 Optional Use included screws to fasten the bracket into pla...

Страница 4: ...r clamations dues une installation ou une manipulation inad quate ou imprudente de ce produit AVERTISSEMENT Risques d incendie et de d charge lectrique Si vous n tes pas qualifi consultez un lectrici...

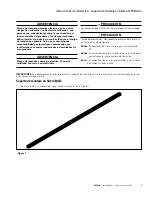
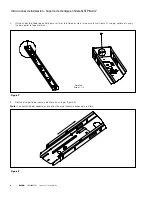
Страница 5: ...ruciforme pour d visser la vis qui retient le capuchon d extr mit en m tal figure 2 Ensuite serrer le canal et tirer pour retirer le capuchon d extr mit en m tal 3 Faire glisser le support en s rie en...

Страница 6: ...tallation Support en s rie 8x4 2 SLSTP 4 Faire glisser l autre extr mit du support sur le luminaire sur lequel vous souhaitez fixer le support Ensuite utiliser les vis fournies pour fixer le support e...

Страница 7: ...aton no asume ninguna responsabilidad por los reclamos ocasionados por instalaciones o manejos inadecuados o descuidados de este producto ADVERTENCIA Riesgo de incendio y descarga el ctrica Si no est...

Страница 8: ...tornillador de estrella para soltar el tornillo que sujeta la tapa met lica Figura 2 Luego apriete el canal y tira para quitar la tapa met lica 3 Deslice el soporte de montaje de hilera en su lugar Fi...

Страница 9: ...talaci n Soporte de montaje en hilera SLSTP 8x4 2 4 Deslice el otro extremo del soporte en la luminaria que desea montar en hilera Luego use los tornillos incluidos para sujetar el soporte en su lugar...

Страница 10: ...10...

Страница 11: ...11...

Страница 12: ...Todas las marcas comerciales son propiedad de sus respectivos propietarios Product availability specifications and compliances are subject to change without notice La disponibilit du produit les sp ci...

Отзывы: