


Easytech s.r.l.
– Genu Iso/Plus User’s Manual
rev. C
Pag.
19
di
97
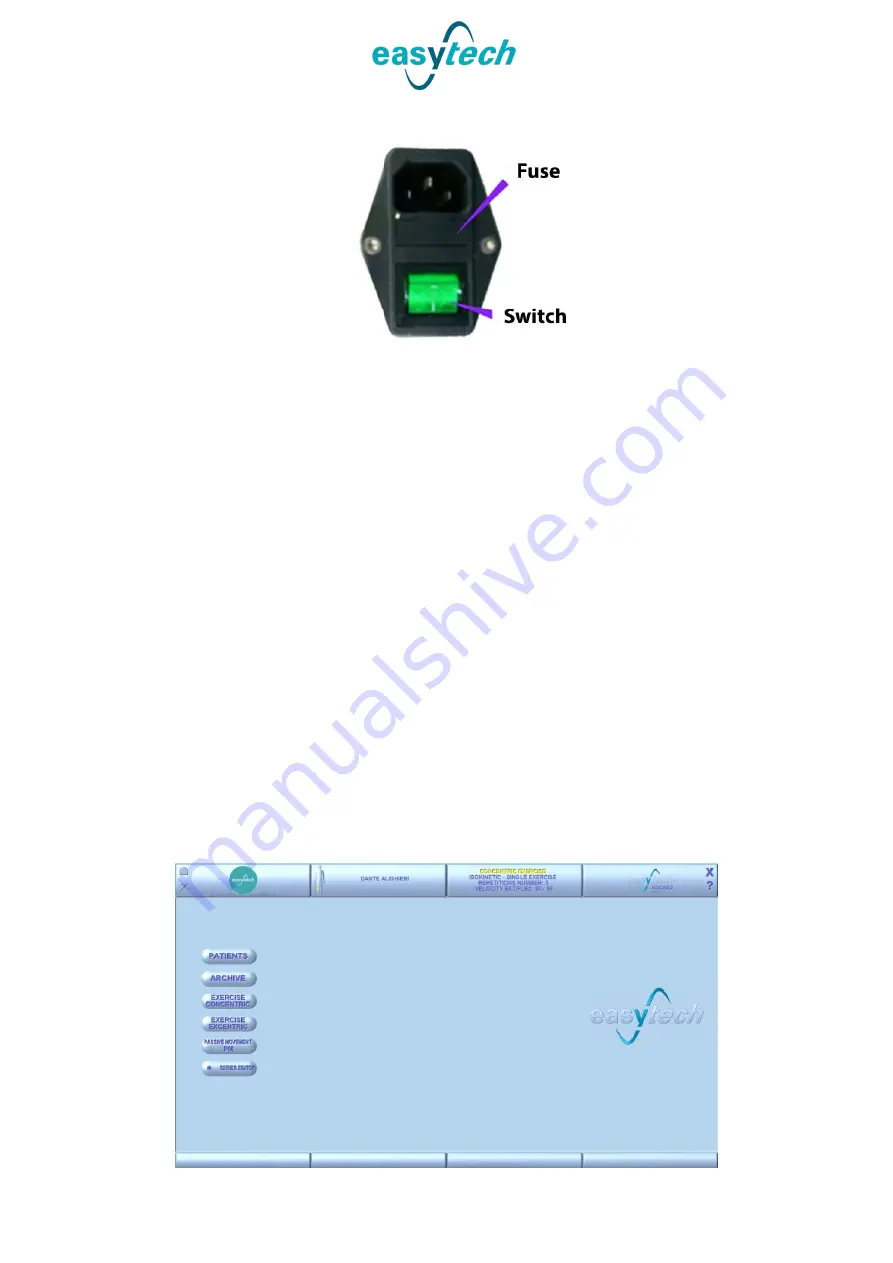
If, after all checks are per
formed, the device still doesn’t power on, refer to Easytech
Technical assistance.
4.2
FIRST START-UP AND START OF THE PROGRAM
If the PC (Unit A) was bought from Esaytech to be used with Genu Unit, the software for
device management is already pre-installed. Otherwise following the procedure
illustrated in Appendix 1.
It is important that the software finds the mechanical part (Unit B) already on, therefore,
please carefully follow the order in which the two units are turned on: first turn on unit
B (mechanical part) and then turn on unit A (personal computer).
The personal computer is turned on by acting on the switch located on the front panel.
Monitor and printer will turn on simultaneously as they are connected to the same
circuit (verify that this occurs).
At the end of the boot phase of the operating system (Windows 7, 8, 8.1, 10) the monitor
will display the windows desktop with the program start icon highlighted.
A do
uble click on the “Isocine3” icon will activate the start of the “Isocine3.exe” program.
The following image will appear:
Содержание Isokinetic Genu Iso
Страница 65: ...Easytech s r l Genu Iso Plus User s Manual rev C Pag 65 di 97 ...
Страница 84: ...Easytech s r l Genu Iso Plus User s Manual rev C Pag 84 di 97 ...
Страница 95: ......
Страница 96: ......