Easy Weigh
O W N E R ’ S M A N U A L
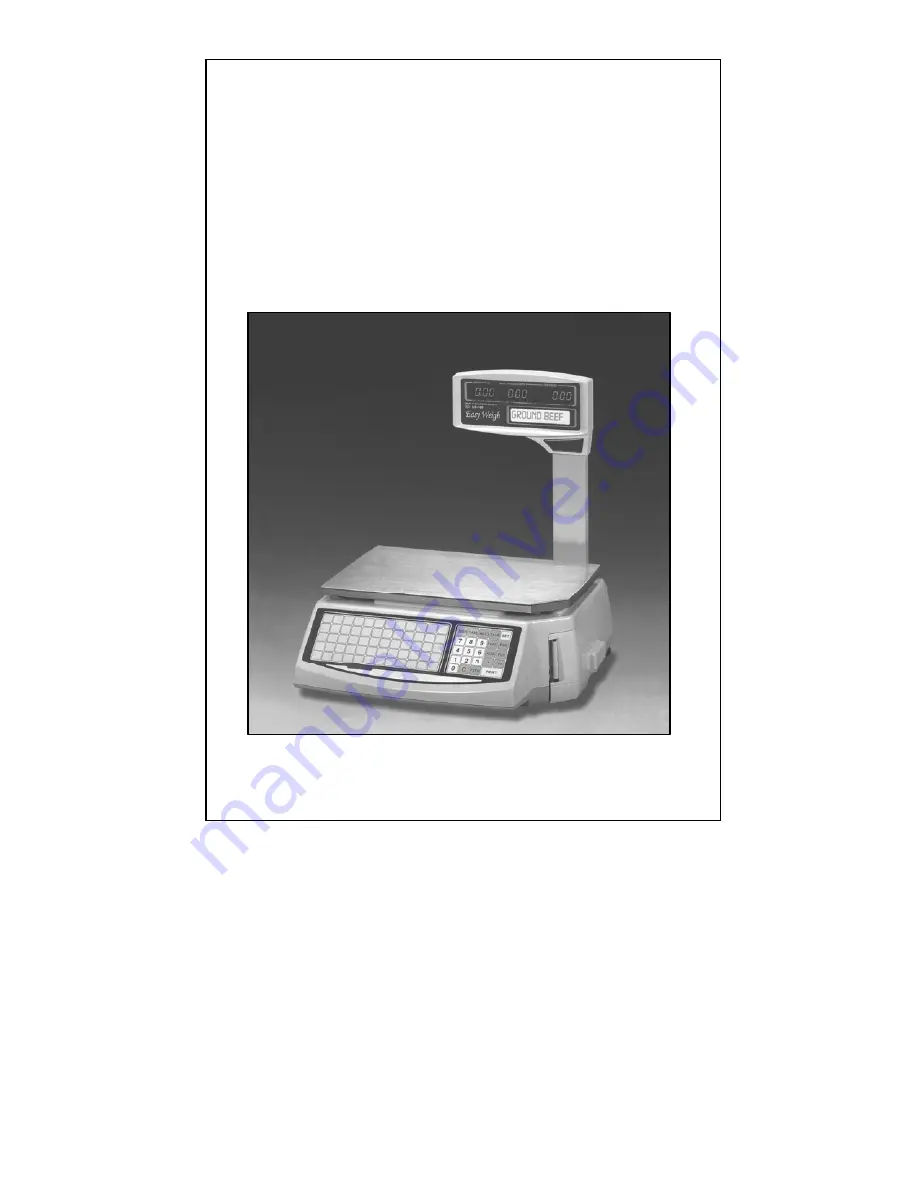
MODEL: LS-100
LABEL PRINTING SCALE
VER 2.00
®
Страница 1: ...Easy Weigh O WN E R S M A NU AL MODEL LS 100 LABEL PRINTING SCALE VER 2 00...
Страница 2: ...igh Brand and product names are trademarks and or registered trademarks of their respective companies This company makes no representations or warranties either expressed or implied with respect to th...
Страница 3: ...tion Safety First 14 Do s Don ts 15 Location Environment 16 Maintenance 16 Power Requirements 18 Set Up Quick Start 19 Password 21 General Programming Main Menu 22 Time Date 23 Store Name Address 24 S...
Страница 4: ...neous PLUs 49 Zero Key 50 Tare Key 51 Save Key 52 Auto Key 53 Pre Pack Key 53 Set Key 54 Esc Key 54 Func Key Voiding 55 X Key 55 For Key 56 Feed Key 56 Print Key 58 C Key Clear 58 1 2 1 4 Keys Fractio...
Страница 5: ...lb 30 to 60 lb x 0 02 lb Maximum Tare Half Capacity 0 00 to 29 99 lb Internal Resolution 60 000 Counts minimum A D Conversion Rate 9 Updates second Direct PLU Keys 60 Direct PLUs Speed Keys PLU Memory...
Страница 6: ...service EW manufactures all of its products using only the best components available and thoroughly tests all of its products to assure a maximum level of quality and dependability Whether its the in...
Страница 7: ...STYROFOAM EA 2 4 3 BODY POLY BAG EA 1 4 4 MANUAL POLY BAG EA 1 4 5 AC CORD EA 1 4 6 MANUAL EA 1 4 7 PAN SCREWS EA 4 4 8 CAL SEALING EA 2 4 9 FUSE EA 1 4 10 CAL PLATE AND GASKET EA 1 4 11 BRACKET COVER...
Страница 8: ...le to the bracket 4 Finally attach the bracket plate to the bracket and fasten it with the 4 smaller screws Pan Screw M3x6 Note Make certain that none of the wires are being crimped when you are insta...
Страница 9: ...s where all of the Speed Keys are located During programming this keypad is also used to navigate menus enter special functions and typing text data The Numeric Keypad is where all numeric data is ent...
Страница 10: ...y need cleaning from time to time however you must remove the platter from the scale platform whenever you clean it Left Side View The Display Bracket is where the display pole is attached to during i...
Страница 11: ...SG Displays This is the user s side display window The Zero Lamp is on to indicate that the scale is at the center of zero when the scale is at gross zero no tare is present or it indicates that the s...
Страница 12: ...with the Auto key When on it means that the scale is in auto print mode when off it means that the scale is in manual print mode Auto print will only print automatically whenever the weight returns t...
Страница 13: ...ick up Clamp f When you do so some of the backing paper may rip this is normal Remove the excess collected backing paper from the Pick up Clamp f and discard the paper making sure NOT to throw out the...
Страница 14: ...the backing paper is NOT between Platen d and the Label Guide bobbin i 5 Next thread the backing paper under the Label Guide bobbin j so that the backing paper is NOT between Platen d and the Label Gu...
Страница 15: ...rinter you should never leave the printer bay exposed for long periods of time Whenever you remove the cassette drawer you must feed out 2 or 3 labels using the FEED key when finished Numeric Keypad T...
Страница 16: ...by number X Key is used to print copies of labels multiple labels FOR Key is used for pricing By Count PLUs C Key is the Clear key and is used to clear numeric entries If you press Clear when the cur...
Страница 17: ...tional pricing feature which enables you to price items at pound or pound This feature can only be enabled by an Easy Weigh Dealer You can use the Fractional Pricing Speed key template that is availab...
Страница 18: ...r key on a PC Shift Key is used like a Shift key on a PC except that it is temporary you must press it before every upper case letter Caps Lock Key is used like a Caps Lock key on a PC Back Space Key...
Страница 19: ...liquid on the scale Do not use any solvents to clean the scale Do not remove the safety ground on the power cord Do not store thermal labels where they may be subject to direct sunlight high humidity...
Страница 20: ...lowing hostile environments Temperatures exceeding 10 C to 40 C 14 F to 104 F Excessive vibration or instability Unstable or flimsy surfaces to use the scale on Dusty dirty or excessively wet environm...
Страница 21: ...sure that the platter is COMPLETELY dry before attaching to the scale platform Also do not use excessive force when reattaching the platter to the scale The printer bay also requires cleaning however...
Страница 22: ...print quality using the FEED key Make sure that the TPH and the Peel Sensor are COMPLETELY dry of the alcohol before plugging the scale into an AC outlet You may also need to clean the Gap Sensor from...
Страница 23: ...llow any of these precautions can result in severe electrical shock Be sure to check the LS 100 Specification Plate located on the left side of the scale The power supply specifications are listed the...
Страница 24: ...feet to adjust the level 4 Place the platter on the scale platform and then connect the AC cord to the LS 100 The AC cord power cord goes connected to the left side of the scale there is a label on t...
Страница 25: ...rse if passwords are disabled then this screen will always be skipped For a new scale you would simply press 0 0 0 0 PRINT and then the scale will proceed to the next screen Passwords are composed of...
Страница 26: ...ld Control 4 Sensor Setting 8 SET System Settings 1 Self Test 1 A D Board 2 Key Board 3 Display 4 RS 232C 5 Printer 6 Sensors 7 Sensor Cal 2 Print PLU List 3 Trans Data 4 Price Change 5 Memory Status...
Страница 27: ...u first turn the scale on and it goes to zero ENTER PLU Time Date To program the scale s time and date 1 Follow steps 1 to 3 of entering Main Menu 2 Press 4 3 Using the numeric keys enter the time in...
Страница 28: ...ever these can change depending on your label format As you type you will see the text in the Alpha Display 4 When you are done with line 1 press PRINT 5 You can type the data you want for line 2 and...
Страница 29: ...steps 1 to 3 of entering Main Menu 2 Press 3 2 3 Enter the group number you wish to edit This number must be from 1 to 99 You will see the group number in the Total Price Display 4 Press PRINT 5 Type...
Страница 30: ...vers the 2 most important printer settings Label Format Setting LFS and Label Feed Adjustment LFA The LFS Label Format Setting tells the scale what label you are using and how you want it to print on...
Страница 31: ...otice the change in adjustment Additionally you may need to repeat this procedure to get your desired alignment Note there is no way to individually align any fields like Total Price Sell By Date etc...
Страница 32: ...ges To change the Password 1 Follow steps 1 to 3 of entering Main Menu 2 Press 8 9 1 3 Type your new password and press PRINT 4 Re type your new password and press PRINT ESC SET 5 You are back in the...
Страница 33: ...d keys allows you to lower the keystroke count to 1 no matter how long the PLU number is Careful consideration should be taken when deciding on PLU numbers This can be especially true when you require...
Страница 34: ...and must be in the format O lb oz where O is the weight in ounces and lb oz is the weight in pound and ounces This weight is only an estimate and so long as it is slightly less than what the package w...
Страница 35: ...T to go step 5 or press ESC SET to exit PLU Create Edit and go back to the Initial State 5 The next screen is PLU Type selection Press 1 for By Weight or 2 for By Count PLU 1 PLU Type 1 By Weight 2 By...
Страница 36: ...ter the group number you want it must be from 1 to 99 As you type the number will appear in the Total Price Display The screen appears as follows PLU 3 Group Code 11 You can press SAVE at to store the...
Страница 37: ...must be from 0 00 to 9999 99 If you enter 0 00 then you will be able to change price during sales if not you may not be able to change the price see Advanced Programming PLU Price Change section The p...
Страница 38: ...0 to 9999 The net weight will appear in the Total Price Display as follows PLU 8 Net Weight oz 21 You can press SAVE to store the PLU as is and go to step 28 or you can press PRINT to continue to step...
Страница 39: ...ntinue to step 26 26 The next screen is the PLU Ingredients Line 2 You can type the ingredients you want for this line and press PRINT to go to the next line of ingredients and repeat this step until...
Страница 40: ...Verification labels print after you press SAVE when you are programming a PLU They look like regular labels BUT they have special data printed on them The simplest way to tell that a label is a verifi...
Страница 41: ...w you that key s current assignment Speed No 1 Assign PLU No 1 5 You can Go back to step 3 to view or assign another key or Type a PLU number to assign to the currently selected Speed key and go to st...
Страница 42: ...Total Price Display will show the new price while the Unit Price Display continues to show the current price Press PRINT to store the new price and go to step 3 Deleting PLUs The LS 100 can store up...
Страница 43: ...r N not to print 7 The next field is PLU Number Press Y to allow it to print or N not to print 8 The next field is Group Code Press Y to allow it to print or N not to print 9 The next field is Barcode...
Страница 44: ...field is Tare If Y is selected then tares will print if N then they will not print Press Y to allow it to print or N not to print 18 Press PRINT ESC SET You are at the Initial State Note Although you...
Страница 45: ...Gap Sensor you may need to use the Feed Adjust function in order to align the print To Change the Sensor Settings 1 Follow steps 1 to 3 of entering Main Menu 2 Press 7 4 3 The display will appear as f...
Страница 46: ...s First read the PLU Creation Guidelines in PLU Programming PLU Create Edit section Keeping PLU numbers equal to UPC Codes equal to ECR POS PLU numbers will eliminate a great number of problems Second...
Страница 47: ...llow steps 1 to 3 of entering Main Menu 2 Press 5 6 3 Select the barcode style that you need Press 1 for UPC A 2 for UPC B and 3 for EAN 8 4 Press PRINT The next screen shows you the barcode format st...
Страница 48: ...ngs 1 Follow steps 1 to 3 of entering Main Menu 2 Press 5 5 3 Press 1 for always on or 2 for Motion Key press The default setting is 2 4 Press PRINT ESC SET to save the setting and return to the Initi...
Страница 49: ...e PLU Temporary Price Change Setting The LS 100 can be set up to allow or disallow temporary price changes during Sales mode operations For example you may have a PLU that is priced at 1 00 lb but you...
Страница 50: ...L of the PLUs or press PRINT to finish prematurely We recommend that you purchase the LS 100 Software Package if you are going to be dealing with over 100 PLUs To view the PLU List 1 Follow steps 1 to...
Страница 51: ...hat they do not peel off When you are ready to start printing press PRINT End PLU No 5 The scale will sequentially go through every PLU in the range that you specified and print out a verification lab...
Страница 52: ...exit and return to the Initial State PLU Key Calling Up PLUs Sales mode is the Initial State This is where you do all of your sales transactions The basic blueprint of a sales transaction is Start at...
Страница 53: ...increase your productivity The easiest way to tell the a PLU is By Count is that the Weight Display is blank Additionally the Pcs Lamp will be on Conversely the lb Lamp will be on for By Weight PLUs S...
Страница 54: ...ect this problem Sometimes small crumbs or debris may accumulate on the platter The scale s AZTM Automatic Zero Tracking Mechanism will automatically press the ZERO key for you so that you can continu...
Страница 55: ...container that you wish to tare and you know it weighs 0 04 lb you can 1 Start from the Initial State 2 Press 4 TARE Clearing tares Both manual and sampled tares are cleared exactly the same way For...
Страница 56: ...tial State 2 Optional Enter a tare 3 Type a price or call up a By Weight PLU 4 Place an item on the scale so that the Total Price 0 00 5 Once the Stable Lamp is on remove the item from the platter 6 T...
Страница 57: ...and or the unit price and tare if any are cleared The Auto Key You can use the AUTO key to have the scale print labels automatically Whenever the Auto Lamp is on it means that the scale will print au...
Страница 58: ...ale will automatically print 6 Optional Remove the item from the platter 7 The PLU and or the unit price and tare if any are not cleared Steps 2 thru 4 can be done in any order To turn Pre Pack off 1...
Страница 59: ...number and then pressing PRINT 5 Enter the dollar amount that you wish to void As you type the amount will be displayed in the Total Price Display 6 Press PRINT The X Key The X key acts like a label...
Страница 60: ...2 Call up a By Weight PLU 3 Press FOR 4 The By Weight PLU temporarily turns into a By Count PLU however if you want the Net Weight Statement to print then you must place the By Count item on the platt...
Страница 61: ...l to the label edges Needs cleaning This pattern indicates that the TPH may need cleaning The white spot inside the pattern may sometimes also have parts of the pattern inside the spot and the spot ma...
Страница 62: ...s a PLU called up Total Price 0 00 Even if you are in Auto or Pre Pack modes you can still use the PRINT key The Clear Key The C key is used to clear erroneous numeric entries and to unload or clear...
Страница 63: ...Weight PLUs can only be programmed with price per pound if you wish to use the 1 2 1 4 keys then you must have these keys enabled as well as have the Price Change enabled This feature can only be ena...
Страница 64: ...99 or 0 for all active groups and then press PRINT 4 The scale will print the report When the scale is done printing press ESC ESC SET to return to the Initial State or go to step 3 if you want a repo...
Страница 65: ...e or go to step 3 if you want a report for another PLU Below is an example of a PLU Sales Report which is printed on a blank label PLU Reports explained The 1st line contains the PLU name The 2nd line...
Страница 66: ...es data 4 When the scale is done printing press ESC ESC SET to return to the Initial State Below is an example of a Scale Sales Report which is printed always on two labels Scale Reports explained The...
Страница 67: ...aken on this scale The 4th line contains the Non Resetting Grand Total NRGT dollar amount The 5th line contains the date of the last time that the Z Scale Report was done Note If you do not wish to us...
Страница 68: ...Software Package You can also make either cable yourself by using the following diagrams LS 100 Scale to Scale Cable LS 100 LS 100 DB 9 Pin DB 9 Pin Male Male TX 3 2 RX RX 2 3 TX SG 5 5 SG LS 100 PC...
Страница 69: ...transfer data from PC to Scale 1 Place the PC and the scale together 2 Make sure that the Power Switch is off on both the PC and the LS 100 scale 3 Connect the PC to Scale cable the female side goes t...
Страница 70: ...t the LS 100 supports For the most up to date Label Format Library please look at the Label Format Manual located on our website To change the label format number from the Main Menu Press 7 2 enter th...
Страница 71: ...format number from the Main Menu Press 7 2 enter the format and press PRINT ESC Style Label Format Numbers Details mm 48 49 50 CAS 60x60 8020 36 37 38 CAS 50x60 8030 39 40 41 CAS 60x60 8040 60 63 61...
Страница 72: ...ormat number from the Main Menu Press 7 2 enter the format and press PRINT ESC Label Style Label Format Numbers Details mm 80 81 82 Digi NBI 62x40 103 104 105 TEC 40x48 2810 106 107 108 TEC 54x48 2730...
Страница 73: ...endix A Label Format Library 69 To change the label format number from the Main Menu Press 7 2 enter the format and press PRINT ESC Label Style Label Format Numbers Details mm 123 124 125 TEC 63x58 61...
Страница 74: ...lectronic literature As a service to our Dealers Distributors and you the customer we make every effort to keep our website and Customer Service centers up to date The most up to date label formats or...
Страница 75: ...71 Notes You Easy Weigh Dealer is...
Страница 76: ...Easy Weigh www atronsystems com Copyright 2005 All rights reserved 800 17007 02000E...