background image

Assembly Instructions

Before commencing assembly please read the instructions carefully

Safety Precautions.

This radio control model is not a toy, it is recommended for 14yr olds upwards. 

Please pay attention to where you fly and the local flying environment and 

operate it correctly. If you are a beginner then you must have an experienced 

pilot to guide and help you to fly this model. Teenagers should have there parent 

or guardian with them whilst flying.

Содержание YAK54

Страница 1: ...model is not a toy it is recommended for 14yr olds upwards Please pay attention to where you fly and the local flying environment and operate it correctly If you are a beginner then you must have an experienced pilot to guide and help you to fly this model Teenagers should have there parent or guardian with them whilst flying ...

Страница 2: ...selage for easy assembly Powered by a huge 800KV brushless powerful OUTRUNNER motor and 14X7 propeller it gives maximum thrust in all manoeuvers This Yak 54 will do vertical manoeuvers and 3D flying with ease and style The Yak 54 was designed from the ground up to be a top performing aircraft generous control surfaces and an awesome performace make this a plane you ll want to fly every time you vi...

Страница 3: ...y near fire or high temperature or tinder 2 Do not leave the battery alone during charging and remove from the charger as soon as the charge cycle is complete 3 Keep children away from the battery and charger 4 Do not disassemble or modify the battery or charger in any way 5 Do not completely drain the battery or it will cause the battery permanent damage 6 Allow the battery to cool before attempt...

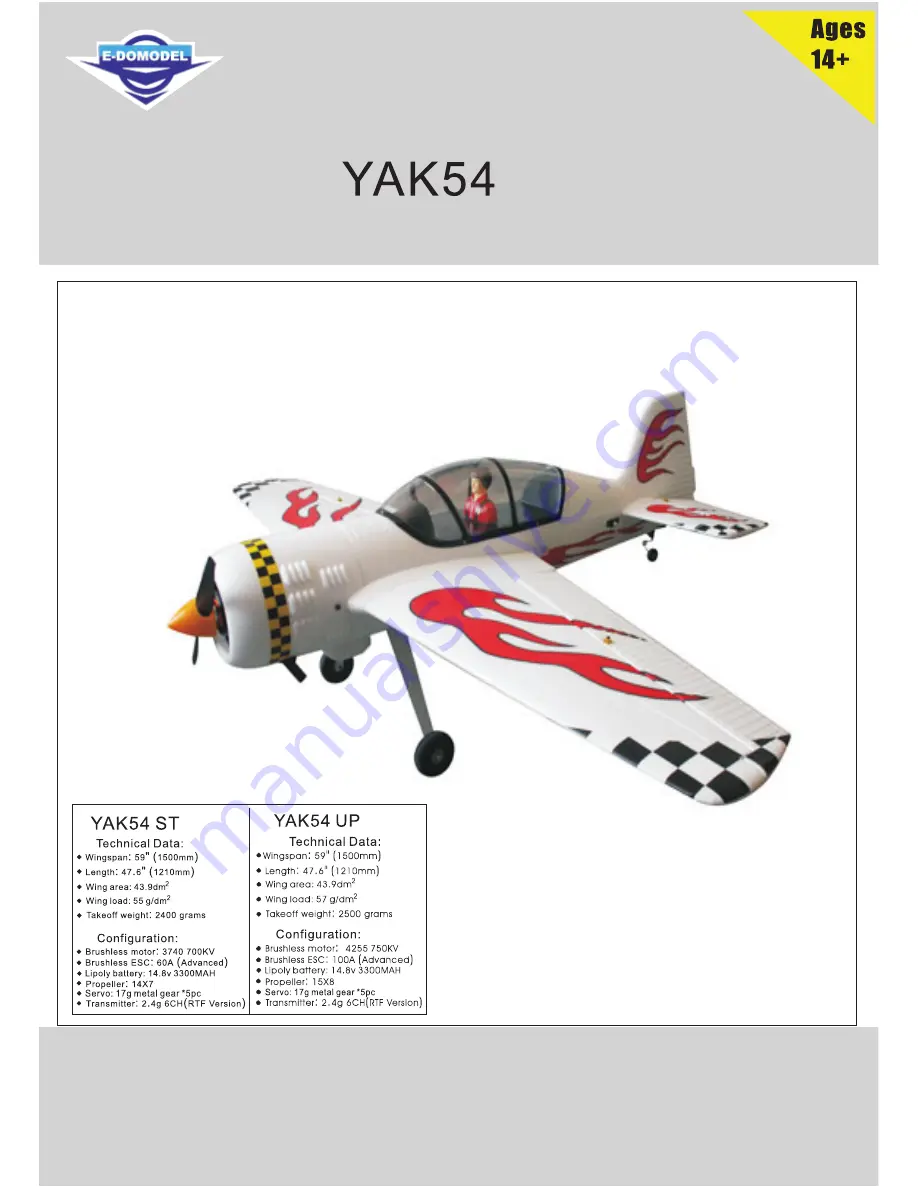
Страница 4: ...Technical Data Configuration CG Center of Gravity YAK54Manual ...

Страница 5: ...Use of epoxy glue Mix equal parts of the epoxy glues A B parts onto a clean disposable surface and mix well Apply to the joint and hold the parts together for about 5mins until cured Use only a thin layer of epoxy as any excess only adds weight not strength Tail Assembly Glue the fuselage and tail part together as shown Tip Apply the glue to the joint and join the parts hold in place with masking ...

Страница 6: ...ictures screw the rudder and the elevator to the fuselage Screw 3X60mm x2 3 Rudder Elevator servo assembly Feed the servo wires through the fuselage and fix the servo s into place with screws do the same to install the other servos The servo on the left and the servo on the right should turn in opposite directions ...

Страница 7: ...ilwheel assembly Install the tailwheel and screw into place using the provided allen wrench Screw 3x30 x2 I 5 Elevator rudder servo installation Fixed the metal horns to the elevators and rudder as shown in the pictures ...

Страница 8: ...t to the servo horn as shown Main landing gear installation Place the main landing gear into the position shown below and secure in place using the 4 screws provided 8 Main landing gear cover assembly Remove the backing tape from the double sided tape under the cover and press into place as shown in picture below Screw 3x45 X4 ...

Страница 9: ...d fix it with the screws as shown Tips Put some threadlock on the screws so that they will not loosen with vibration 10 Brushless ESC assembly Fix the ESC under the motor mount with the cable ties as shown 11 Scale parts assembly Glue the scale parts into place on the cowl as shown ...

Страница 10: ...propeller adapter to the motor with the screws provided Place the spinner backplate onto the shaft then the propeller fit the propeller nut and tighten Finally screw in place the spinner cone 14 Pilot figure and canopy assembly Remove the backing from the double sided tape under the pilot figure and firmly place it in the position shown below Screw into place the canopy as shown ...

Страница 11: ...n wing assembly Main wing assembly YAK 54 Manual 1 Install the metal control horns to the ailerons as shown below Install the aileron servo s to the wings using the screws provided 2 Aileron servo assembly ...

Страница 12: ... assembly YAK 54 Manual Install the aileron pushrods as shown in the picture below Glue the servo covers into place as shown below 1 Fiberglass wing tube assembly Pass the fiberglass wing tube through the fuselage as shown below ...

Страница 13: ...ws provided as shown 3 Connection of elevator Y lead and rudder extension leads Connect the lead of the rudder servo to the extension lead and the elevator servo s to the Y extension lead 4 Receiver assembly Connect the servo s into the 1st to 4th channels of the receiver as shown in the diagram near the end of this manual Then remove the backing from the double sided tape on the receiver and atta...

Страница 14: ...ttle is in the closed position down before installing the batteries 6 Lipa battery assembly Fix and connect the battery into place in the front of the fuselage as shown 7 Cockpit installation Fix the cockpit to the fuselage by the elastic band as shown in the pictures below ...

Страница 15: ... 2 left th rattle 1 1 c t tiU iJ ir 1 Ti ifJl 1 c t lS tr o Move the right stick left and right to control the left and right roll of the airplane UP 4 DOWN UP Move the right stick up and down to control the airplanes elevator ...

Страница 16: ...ick up and down to adjust the speed of the electric motor Down is off and at the top it is full throttle Move the left stick left and right to control the rudder on the airplane 4 tc t tL 1iJlfi frJ1ftt tc t ffl 1 cmr JoJ I I I I I I ...

Страница 17: ...Move the right stick left and right to control the left and right roll of the airplane Move the left stick up and down to control the elevator ...

Страница 18: ...right stick throttle stick up and down to adjust the speed of the electric motor Down is off and at the top is full throttle Move the left stick left and right to control the airplanes rudder left and right 4 li ti tiz 9JiJlil ilrJl li tiff Z91 liiJ fHlfoll ...

Страница 19: ..._ andle JE f Carrying h _ andle reef Rower indicator _ itlill Ji l IJ i r Audder ___________ CH 6 Flapcontrol lllPF ic Neckstrap hook t i HD Elevator tnm lever ft W i lj Aileron elevator controlstick JllUVft 1 Aileron trim lever IIJ ltllli IJ Servo reversers Charging jack 1tF lilii ili k ___________ CH 6 Flapcontrol IUUF ic Neckstrap hack tt IHD Servo reversers Elevator trim lever i1bf1ll il l Thr...

Страница 20: ...Circuit connection diagram ...

Страница 21: ...Parts NO 880103 NO 880104 NO 880112 NO 880102 NO 88101 NO 880107 NO 880114 Tailwheel assembly YAK 54 Manual ...

Страница 22: ...YAK 54 Manual Brushless motor ESC Lipo battery 17 gram servo Propeller Spinner plastic NO 880117 Glue Decals set Radio transmitter ...

Страница 23: ...MADE IN CHINA 0 CE Fe ...

Отзывы: