Page 1 of 12
Updatemydynaco
Dynaco Stereo 400/410/416
Replacement RCA Jack Installation
(ST400RCAJ)
© 2021 AkitikA LLC
All rights reserved
Revision 1p02
March 9, 2021
Страница 1: ...Page 1 of 12 Updatemydynaco Dynaco Stereo 400 410 416 Replacement RCA Jack Installation ST400RCAJ 2021 AkitikA LLC All rights reserved Revision 1p02 March 9 2021...
Страница 2: ...g the ST400 12 Table of Figures Figure 1 bending the RCA jack ground lugs 5 Figure 2 Assembling RCA jacks to the mounting PCB s 5 Figure 3 Building the new RCA jack assembly front view 6 Figure 4 Buil...
Страница 3: ...mple hand tools like screwdrivers wire cutters and pliers 3 Read and follow directions It helps if you 1 know a bit about electronics or 2 have a friend who knows a bit about electronics 3 can get to...
Страница 4: ...ocks Build with a buddy nearby If you ve ignored all the previous advice they can dial 911 or get you to the hospital Read and understand the safety manuals of all the tools you use About Components W...
Страница 5: ...sy to find the parts and keeps them from getting lost Is something in this manual confusing Does something look wrong Send your questions by email to dan akitika com or dan updatemydynaco com You ll h...
Страница 6: ...liers on the base widest part of the front side of the RCA jack and an 11 32 nut driver on the nut Turn the nut to make a snug mechanical connection The lug will move clockwise a bit stopping in the r...
Страница 7: ...nto the chassis base Remove the perforated metal cover Even after the screws are gone it may take considerable force if it has been a long time since the front cover was taken off In addition you may...
Страница 8: ...non fan side of the chassis Figure 7 Remove two side screws non fan side Turn the Stereo 400 on its side with the transformer side on the table to get access to and remove 9 screws on the bottom Once...
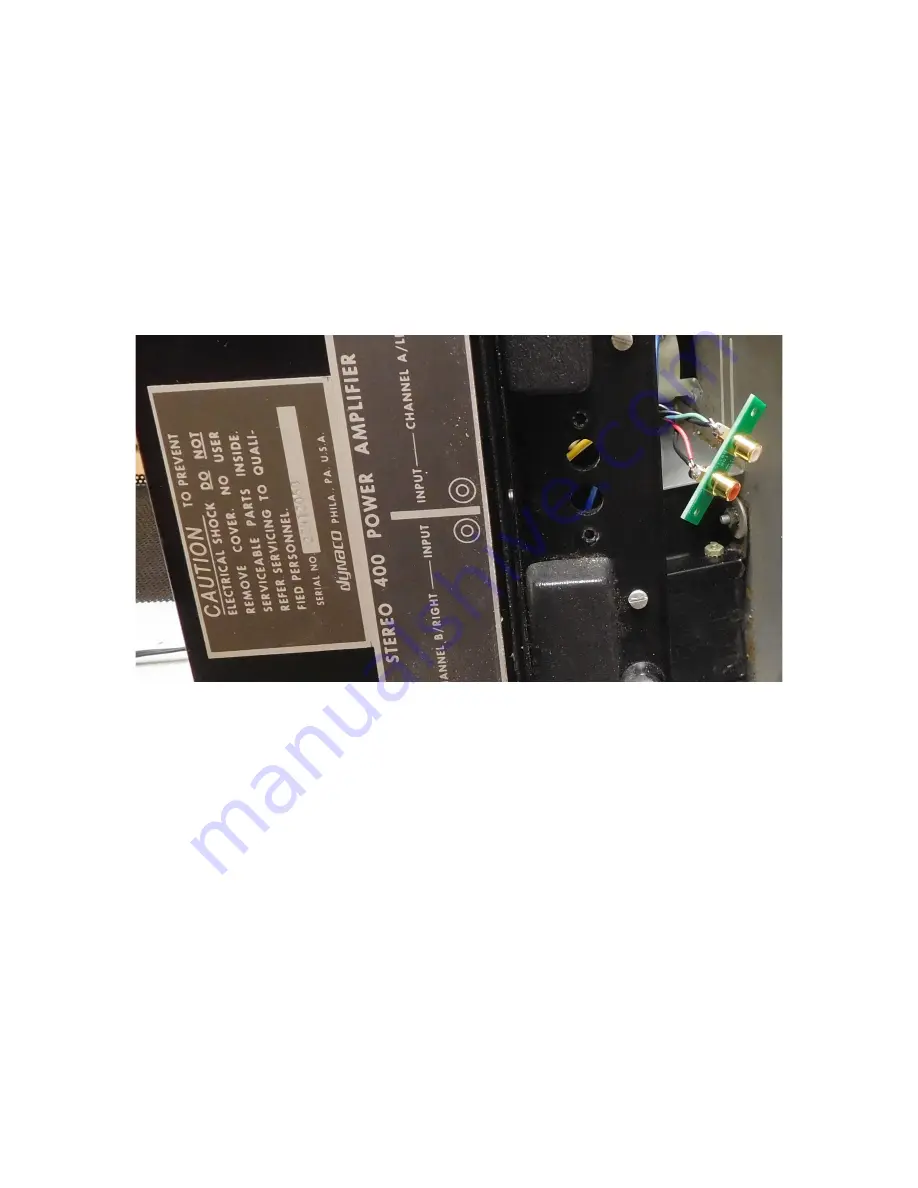
Страница 9: ...he chassis Gently pull the old RCA jack assembly into the clear space between the heatsink assembly and the chassis as shown in Figure 9 Notice the two twisted pairs connected to the RCA jacks 1 Green...
Страница 10: ...lug of the white RCA jack If you d like you can now fold the wire ends over converting the L shape to a U shape Either way it s time to solder the 4 connections to the jacks Figure 9 Back is rotated a...
Страница 11: ...fasten the new RCA jack assembly to the heatsink There will be a little bit of play between the mounting holes screws and RCA jack PCB Your goal is to end up with the RCA jacks centered in their hole...
Страница 12: ...s you work it back into place Depending upon your preferences a You may find that it s easier to set the amp on its feet so that gravity could help guide the heat sinks assembly back into place Then i...