background image

©2014 Parata Systems, LLC

page 1 of 4

Parata Technical Assistance Center

120-0493 Rev 01

1-888-PARATA1 (727-2821)

Customer Guide

DYMO LabelWriter 450 Turbo Printer Installation

PASS

This is the process for installing a DYMO LabelWriter 450 Turbo printer on a PASS workstation 
running PASS Ware or PACMED Server Plus.  The process is the same for both applications. 

Refer to the DYMO Quick Start Guide that came with your printer for instructions on loading 
labels. 

1.

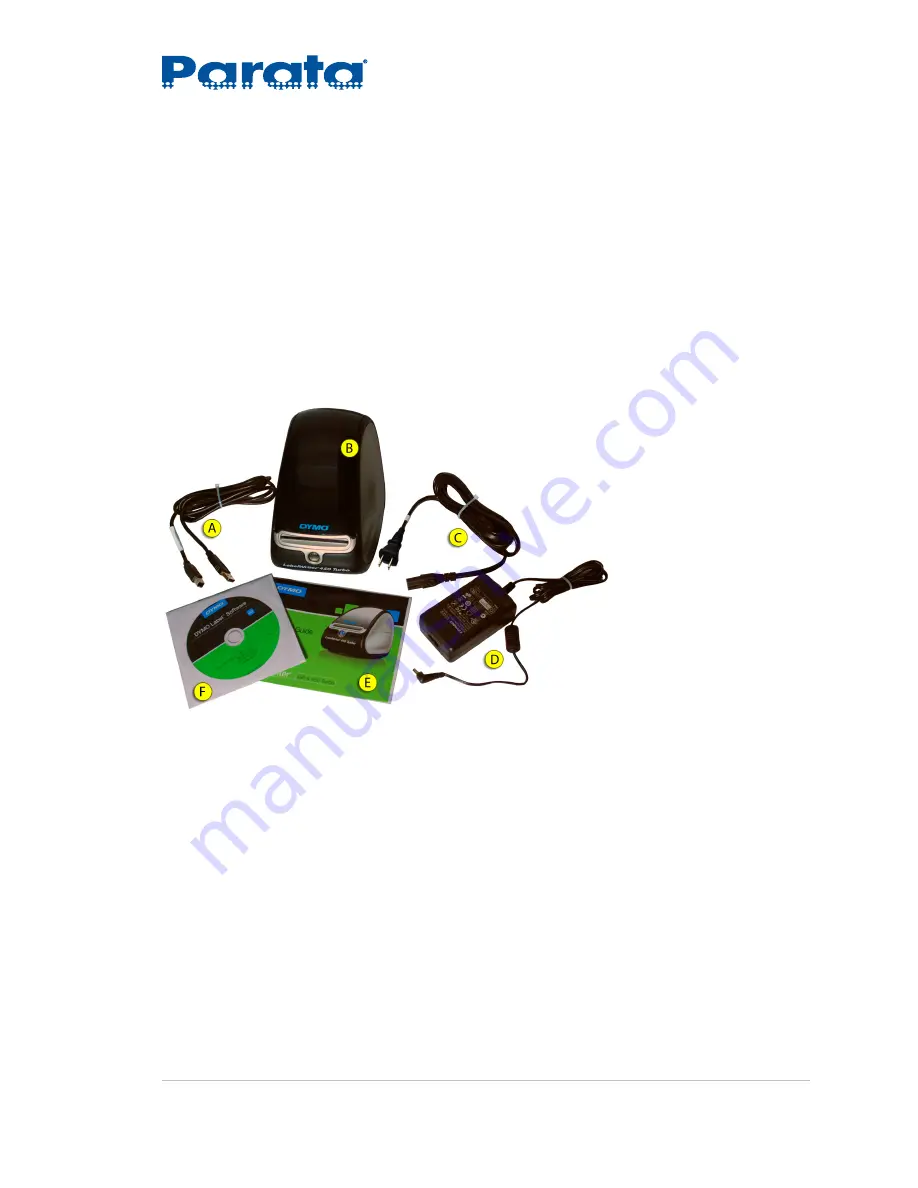
Open the DYMO printer box and remove the printer, USB cable, power cord, power adapter, CD, 
and Quick Start Guide.  

2.

Connect the power and USB cables to the DYMO printer:

2.1

Connect the power cord to the power adapter. 

2.2

Connect the power adapter cord to the power connection on the bottom of the printer, 
then plug the power cord into an AC outlet.

2.3

Connect the square end of the USB cable into the USB port on the bottom of the printer.

A

 USB cable

B

 DYMO printer

C

 Power cord 

D

 Power adapter

E

 Quick Start Guide

F

 CD

Содержание LabelWriter 450 Turbo

Страница 1: ...rt Guide that came with your printer for instructions on loading labels 1 Open the DYMO printer box and remove the printer USB cable power cord power adapter CD and Quick Start Guide 2 Connect the power and USB cables to the DYMO printer 2 1 Connect the power cord to the power adapter 2 2 Connect the power adapter cord to the power connection on the bottom of the printer then plug the power cord i...

Страница 2: ...esired location NOTE Do not connect the other end of the USB cable to the workstation at this time 3 Load the software and drivers on the PASS workstation 3 1 Log on using an Operator account NOTE An Administrator account is not required 3 2 Close all open programs 3 3 Insert the DYMO LabelWriter CD into the workstation DVD drive 3 4 In the AutoPlay window select RunDLS8Setup exe 3 5 The Select La...

Страница 3: ...Parata Systems LLC page 3 of 4 Parata Technical Assistance Center 120 0493 Rev 01 1 888 PARATA1 727 2821 3 6 Click Next on the Welcome screen 3 7 On the License Agreement screen click I Agree 3 8 On the Installation Type screen select Express installation and click Next ...

Страница 4: ... 120 0493 Rev 01 1 888 PARATA1 727 2821 3 9 Click Finish in the DYMO Label Setup is complete screen 3 10 Connect the USB cable to the PC A Your new hardware is installed and ready to use message will display at the bottom of the screen when the setup is complete 4 Refer to the DYMO Quick Start Guide for instructions on loading labels ...

Отзывы: