background image

-5-

Note:    Proper  signal  levels  are  very  important  to  the  operation  of  this  product.  If  improper 
operation of the unit occurs and the unit has power, the most likely cause of the problem is high 
or low signal levels, use of a low quality cable, or the use of the wrong type of input cable.

4.3  Connecting Power to the Unit

This unit is shipped with an External AC Power Adapter that converts 100~240VAC@ 
50-60Hz to 5VDC.  Connect the DC Output Cord from the Power Adapter to the back 
of the unit and then plug the Power Adapter into an AC power receptacle.  When AC 
power is applied in this fashion, the Power LED indicator will illuminate.

5.0  OPERATING THE UNIT

5.1  On-Screen Menus

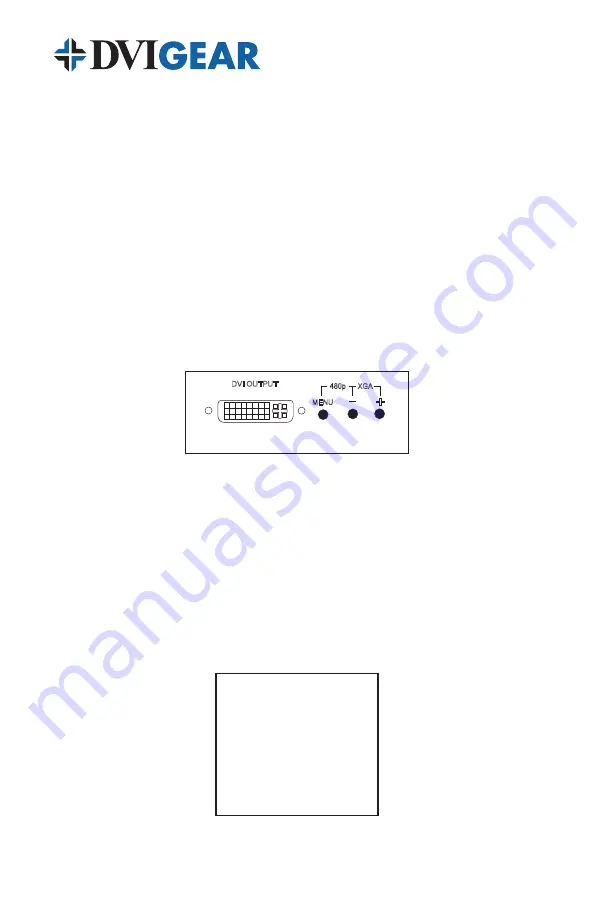
The DVI-3210a is controlled via three buttons with status indicated by an On-Screen 
Display (OSD).

DVI OUTPUT

MENU

480p

XGA

+

DVI-3210a 

• 

Menu Button:

  This Button displays the Menu Options via the On-Screen 

Display on the display device connected to the output.  

• 

+ and 

 Buttons

:  These Buttons allow navigation within the Menu and 

adjustments of the parameters available. 

• 

XGA Reset

:  Simultaneously depressing the – and + buttons returns 

settings to factory defaults and sets the output to XGA@60 Hz.

Pressing the Menu Button results brings up the 

Main Menu

.  Move the cursor to 

the desired setup option by using the + and – buttons.  Press the Menu Button 
again to call up that option.

INPUT SETUP
OUTPUT SETUP
PICTURE ADJ.
H V ADJUST
OSD ADJUST
SYSTEM INFO
AUTO ADJUST
EXIT

Once the desired option is selected, a new Menu will appear.  Once again use 
the + & – Keys to select the parameter you wish to change or adjust.

Содержание DVI-3210a

Страница 1: ...DVI D Fiber Optic Cable User Guide VGA to DVI Scaler Converter DVI 3210a...

Страница 2: ...ts Section Page 1 0 Introduction 1 2 0 Specifications 3 3 0 Checking Package Contents 4 4 0 Connecting the Hardware 4 5 0 Operating The Unit 5 6 0 Troubleshooting 7 7 0 Limited Warranty 8 8 0 Regulato...

Страница 3: ...ctronic or mechanical including photocopying recording or by any information storage or retrieval system without the written consent of the publisher DVIGear reserves the right to revise any of its ha...

Страница 4: ...play Device This plays a major role in the final result Long distances are possible but special measures should be taken in order to avoid cable losses These include using high quality coax type VGA c...

Страница 5: ...Adapter 100 240VAC 50 60Hz to 5VDC 2 0A Output Signal Specifications PC Resolutions Vertical Rate Format Scan Type VGA VESA85 VGA70 SVGA XGA MAC WXGA 1280A SXGA 640x480 640x480 720x400 800x600 1024x7...

Страница 6: ...PC HD INPUT DVI OUTPUT MENU 480p XGA DVI 3210a Input Output Panels 4 1 Connecting the Input The DVI 3210a can accept both VGA and HDTV inputs When connecting a VGA format input use the provided HD15 V...

Страница 7: ...VI 3210a is controlled via three buttons with status indicated by an On Screen Display OSD DVI OUTPUT MENU 480p XGA DVI 3210a Menu Button This Button displays the Menu Options via the On Screen Displa...

Страница 8: ...you want to adjust then press the Menu button to highlight your selection Once a parameter is highlighted use the or buttons to increase or decrease the value of the setting Press Menu again to leave...

Страница 9: ...een Auto Adjust When selected the DVI 3210a will automatically reset all adjustment parameters to their factory default values Exit Select to exit from the current menu page Notes The default output r...

Страница 10: ...cy the original purchaser must obtain a Return Authorization Number from DVIGear and return the product freight prepaid to a location designated by DVIGear After repairs are complete the product will...

Страница 11: ...te 425 Chapel Hill NC 27517 Toll Free 888 463 9927 Phone 919 969 6681 Fax 919 869 1310 www dvigear com www dvigear com Toll Free 888 463 9927 DVIGear Inc Phone 770 421 6699 1059 Triad Court Suite 8 Fa...

Отзывы: