background image

A

NTI

-M

ODE

TM


X2


                  U

SER

S

 G

UIDE


1.Overview

What's included in the box

The Anti-Mode

TM

 X2 unit

A power supply for your country / region

A calibration microphone

An infra-red remote controller (with batteries)

This guide

Not included

USB Type-C cable is not included

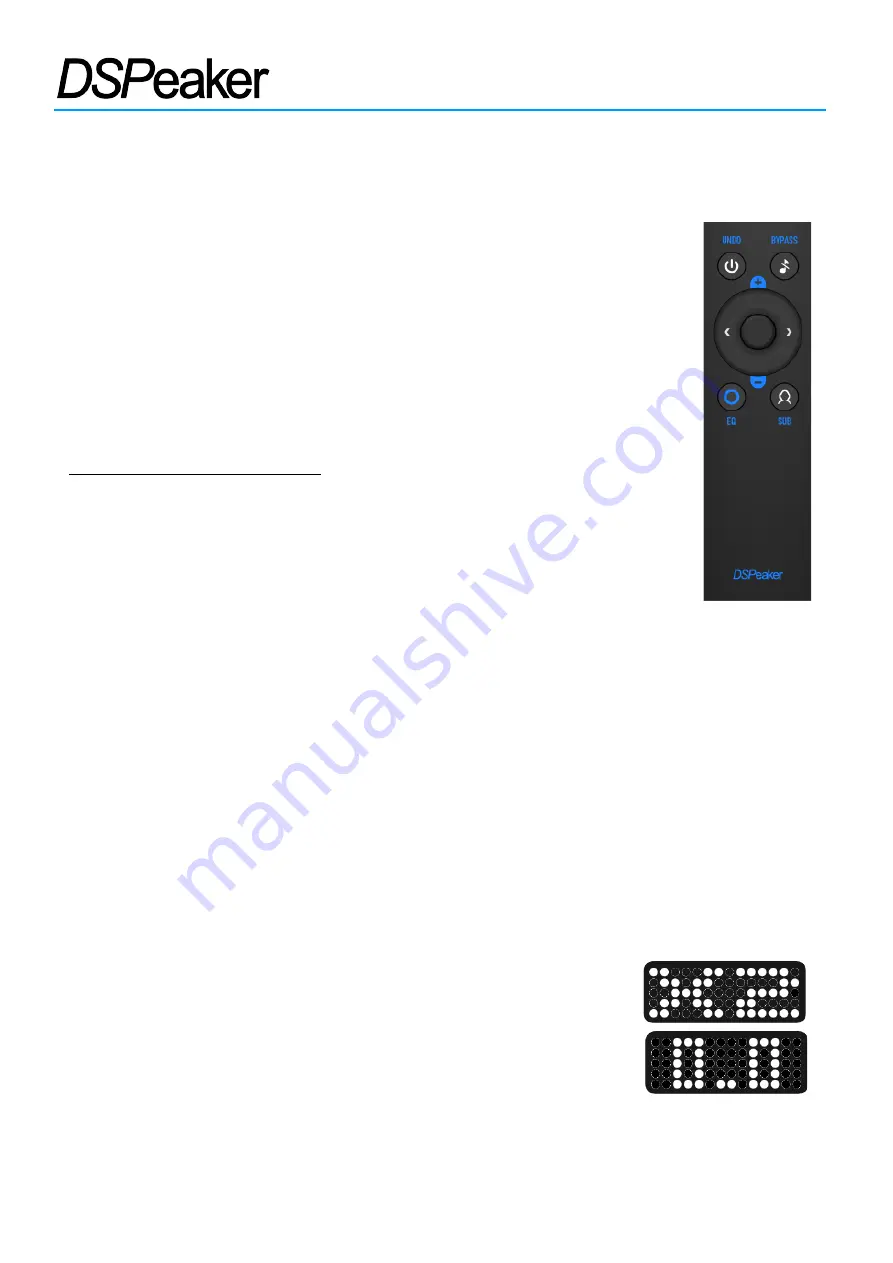
Remote Control Layout

The remote control layout is depiceted on the right. When this guide references a
button, it usually refers to a press of the corresponding button. 

i

 represents the

center button (Ok / Confirm).

Basic Information

Anti-Mode

TM

  X2 is an automatic room & speaker optimizer with a preamplifier function. Running the

automatic calibration procedure using the provided microphone is required to utilize the optimization
feature and to establish the correct speaker configuration when a subwoofer is used. See Chapter  2
Calibration on page 9 for details.

Connections

Connect the left and right outputs to a pair of powered speakers or to your amplifier. If you have a
subwoofer, connect it to the "sub" output connector. Up to 3 digital audio sources can be connected:
Optical S/PDIF using Toslink, USB Audio 1.0 using USB-C, and Coaxial S/PDIF. If an analog audio source is
connected to the "Line In" inputs, the Coaxial S/PDIF connector can not be used at the same time.

Then  connect  the  power  supply  to  the  wall socket  and the plug  to the
Power input of the Anti-Mode X2. The unit will automatically start and show
“X2”   on   the   screen.   After   that   “0.0”   is   shown   shortly   if   there   is   no
calibration data. “2.0” or “2.1” is shown otherwise, depending on the mode
chosen in a previous calibration.

If   your   amplifier   doesn’t   have   a   gain   setting   or   it   is   set   quite   high,
remember to check the volume setting of the Anti-Mode X2 before proceeding. The default volume is
-40dB, you may need to increase it for normal operation.

Rev. 1.1

2022-08-10

Page 4 (12)

Содержание Anti-Mode X2

Страница 1: ...Anti ModeTM X2 User s Guide ...

Страница 2: ... performance Anti ModeTM X2 is intended to be used with cables of up to 3m in length With longer cables observe electrostatic discharge precautions when connecting or disconnecting them to avoid damage to equipment Longer cables may also be susceptible to electromagnetic interference CAUTION The remote control contains two AAA batteries Only replace it with the same type and in the correct orienta...

Страница 3: ... 4 Connections 4 Front Panel 5 Rear Panel 5 Home Screen 6 Selecting Input 6 Adjusting Volume 6 Standby 6 Tone Control 7 By Pass Mode 7 Subwoofer Output Level 7 Sound Profiles 7 Menu 8 2 Calibration 9 3 Hints and Tidbits 10 4 Firmware update 11 5 Manufacturer 11 Contact 11 6 Technical Specifications 12 Rev 1 1 2022 08 10 Page 3 12 ...

Страница 4: ...ion on page 9 for details Connections Connect the left and right outputs to a pair of powered speakers or to your amplifier If you have a subwoofer connect it to the sub output connector Up to 3 digital audio sources can be connected Optical S PDIF using Toslink USB Audio 1 0 using USB C and Coaxial S PDIF If an analog audio source is connected to the Line In inputs the Coaxial S PDIF connector ca...

Страница 5: ...USB in the Anti Mode X2 for the computer to be able to discover the device 4 Subwoofer output connection optional 5 Right analog output 6 Left analog output 7 Right analog input 8 Left analog input Coaxial S PDIF input Notice Stereo analog input and coaxial S PDIF inputs are mutually exclusive 9 Toslink Optical S PDIF input Notice You can connect CD DVD players TVs media servers and other audio so...

Страница 6: ... example C indicates the coaxial input 96 indicates 96kHz rate If all 10 dots in the signal level bar are lit the signal is at maximum level Each dot represents 3 dB If no dots are lit the signal level is 30 dB or lower Selecting Input Use g and h to select the active input This function is available in the home screen The selected input becomes active when the unit returns to the home screen Abbr...

Страница 7: ...ss Mode Pressing d and then b enters a bypass mode In this mode the Anti ModeTM room correction is not active Some enhancements made by the system remain active These include the crossover between subwoofer and main channels in the 2 1 configuration and speaker level matching Press any button to leave the bypass mode then d or i to return to the home screen Subwoofer Output Level Pressing d and th...

Страница 8: ...enu but note that h chooses the default home screen and g chooses the alternative home screen i to return i to adjust f e or g h to adjust brightness from 0 to 4 i to return i pressed i pressed down for 4 seconds until the settings are reset and OK is briefly displayed i to adjust f e or g h to toggle infrasonic filter on off i to return Rev 1 1 2022 08 10 Page 8 12 ...

Страница 9: ...quency to the maximum value With Anti Mode the best place for a subwoofer is near the corner of the room Make sure your active speakers or power amplifiers and or subwoofer are connected to the correct outputs of the Anti Mode X2 and turned on It is good to adjust the gain of all connected speakers and subwoofer so that the main speakers and subwoofer are approximately equally loud Running the cal...

Страница 10: ...ul trivia about the product most useful first In the 0 0 uncalibrated mode the subwoofer output will reproduce the low passed version of the stereo outputs There is no cross over in this mode In the 2 1 mode the cross over frequency is 80Hz Adjustment will be possible in a later version You can connect more than one subwoofer using daisy chaining or a Y splitter The Anti Mode calibration is only c...

Страница 11: ...e process After finishing installation the system reboots and the home screen is displayed Now the USB stick can be removed The firmware is not updated if the unit already contains the same version of the firmware In this case after checking the contents of the USB stick the unit will start normally If you encounter any problems during the update make sure the USB stick is properly connected and c...

Страница 12: ...update Analog Specifications typical Frequency Range analog to analog 5Hz to 22kHz Analog input 2 3 Vrms max SNR 100dB THD 6dB level 0 002 Stereo output 2 2 Vrms max SNR 107dB THD 6dB level 0 0015 Subwoofer output 2 3 Vrms max SNR 100dB THD 6dB level 0 03 Power consumption active 1 5W stand by 0 1W Firmware Highlights Anti Mode 3 room calibration algorithm Cross over for speakers and sub s automat...

Отзывы: