Clutch
CL-5
Check
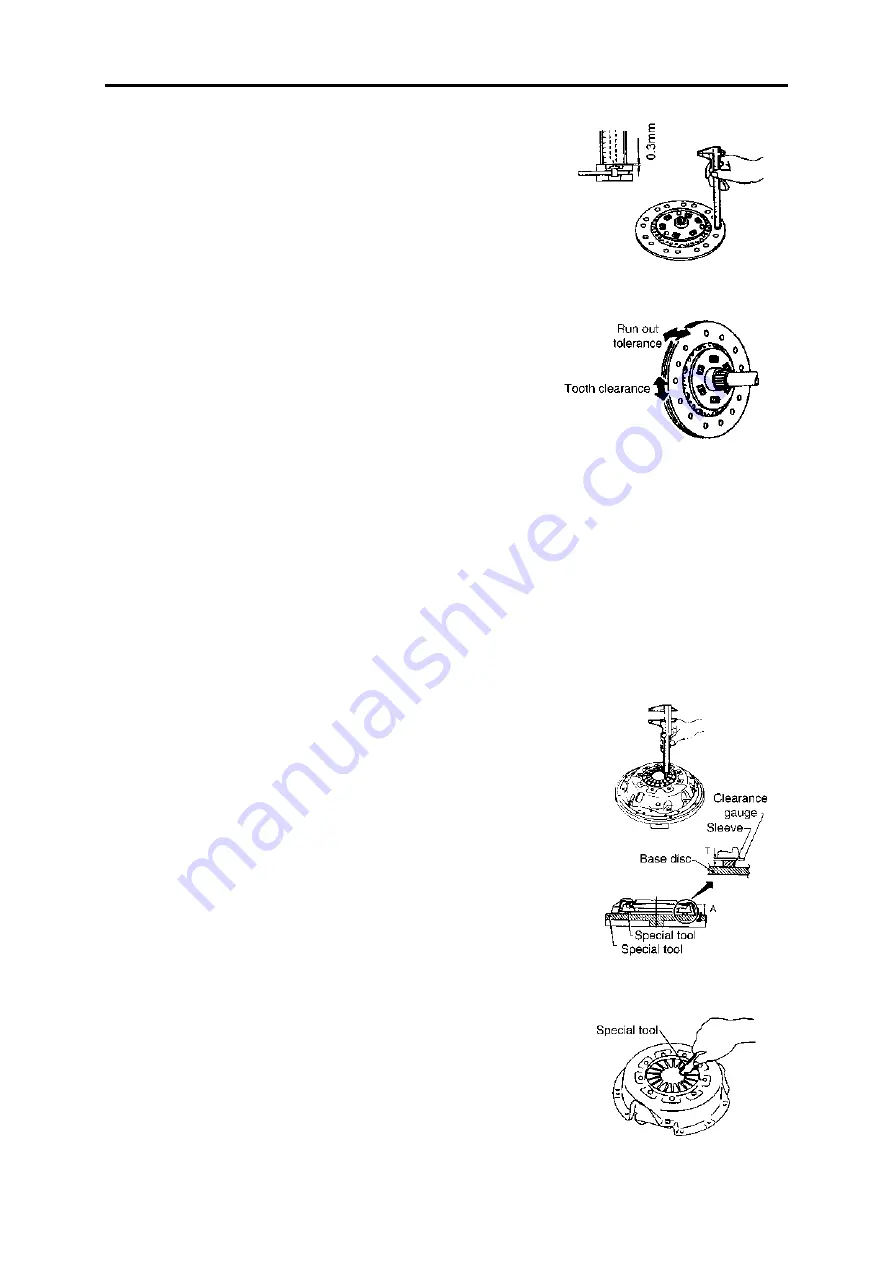
Check the degree of wear of the driven disc surface.
Wear limit:(from friction surface to the rivet head) 0.3mm.
Check the spline tooth clearance and the run out tolerance of driven
disc.
Check the driven disc for ablation, color changed, or contaminated
by oil or grease. Replace if necessary.
Installation
Smear some grease on the connecting surface and the spring.
Overmuch grease may damage the surface of the driven disc.
Clutch pressure plate
Check and adjust
Check the height and plainness of the diaphragm.
When checking the height of the diaphragm, set a clearance
gauge(T=0.2mm) on the distance bushing.
Height of the diaphragm: 41~43mm (base disc to the top of the dia-
phragm)
If the height is not in the range of the specific range, you need to
replace the pressure plate.
Shake the pressure plate gently, listening and check the wear or dam-
age of the diaphragm supporting ring. Or you can knock the rivet head
gently to find if there is cracks. Replace the pressure plate if necessary.
Check the surface of the pressure plate for any ablation or dirt, make
use of the corundum paper to get rid of them if necessary.
Check the connecting side of the pressure plate and the driven disc for
any distorsion or damage, and replace them if necessary.
Adjust the plainness of the diaphragm by tools.
Plainness: <0.7mm
When install the clutch pressure plate and driven disc, insert the spe-
cial tool into the clutch driven disc spline(used to align and orient).
Screw down the fixing bolt of the clutch cover.
Screw down the bolt in an acrossed sequence, following two steps.
Содержание DFA1101GZ5AD6J-907
Страница 1: ...DFA1101GZ5AD6J 907 SERVICE MANUAL DONGFENG AUTOMOBILE CO LTD 2006 05 ...
Страница 24: ...Clutch CL 8 ...
Страница 34: ...Transmission MT 9 16 Lift the countershaft out by using crane or hoist Transmission mainshaft ...
Страница 63: ...Transmission MT 38 ...
Страница 100: ...Suspension System FA Table of Contents Trouble Analysis FA 1 Structure FA 2 Disassembly FA 4 Check FA 7 Assembly FA 8 ...
Страница 123: ...Brake System BR 12 ...
Страница 131: ...Cab BF 7 Cab External Trims ...
Страница 133: ...Cab BF 9 Front and rear window Cab door seal strip ...
Страница 134: ...Cab BF 10 Door outside molding Foot step shield and mat ...
Страница 149: ...Air conditioner and Heater BF 25 Schematic Circuit of Air condition System ...
Страница 150: ...Air conditioner and Heater BF 26 ...
Страница 163: ...Electric and Instrument EL 12 Accessories Wiper motor Power 50 Revolution Low speed 40 High speed 60 6 2 3 ...
Страница 165: ...Electric and Instrument EL 14 Electric wiring diagram ...


