background image

1

Read all instructions before assembly and use.

KEEP INSTRUCTIONS FOR FUTURE USE.
      

ADULT ASSEMBLY REQUIRED

Due to the presence of small parts during assembly,keep 

out of reach of children until assembly is complete.

THIS PRODUCT IS NOT INTENDED FOR INSTITUTIONAL OR COMMERCIAL USE.

When contacting Dream On Me you 

will need to reference the above 

numbers .They can also be found on 

the label on the Crib End bottom rail.      

To register your product for important safety alerts and updates to your product 

please visit www.dreamonme.com and click on Product Registration.    

style #:   637        

MFG date: Aug,2020

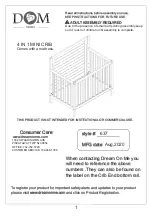
4 IN 1 MINI CRIB

 Consumer Care:

www.dreamonme.com

1532 S WASHINGTON AVE 

PISCATAWAY TWP NJ 08854 

OFFICE: 732-752-7220

CUSTOMER SERVICE: 732-366-1788 

 Comes with a mattress.

Содержание Dream On Me 4 IN 1 MINI CRIB 637

Страница 1: ... When contacting Dream On Me you will need to reference the above numbers They can also be found on the label on the Crib End bottom rail To register your product for important safety alerts and updates to your product please visit www dreamonme com and click on Product Registration style 637 MFG date Aug 2020 4 IN 1 MINI CRIB Consumer Care www dreamonme com 1532 S WASHINGTON AVE PISCATAWAY TWP NJ...

Страница 2: ...backs to sleep unless otherwise advised by your physician Infants can suffocate on soft bedding Never add a pillow or comforter Never place additional padding under an infant Strangulation Hazard STRINGS CAN CAUSE STRANGULATION Do not place items with a string around a child s neck such as hood strings or pacifier cords Do not suspend strings over a crib or attach strings to toys Strangulation Haz...

Страница 3: ...or a damp cold basement These extremes can cause a loss of structural integrity Inspect the product periodically contact Dream On Me for replacement parts or questions To preserve the luster of the high quality finish on your product it is recommended to place a doily or felt pad under any items you place on the finish Clean with a damp cloth then a dry cloth to preserve the original luster and be...

Страница 4: ... 4 ...

Страница 5: ...S POUCH AFTER ASSEMBLY WARNINGS RELATED TO THE SAFE USE OF THIS CRIB ARE PRINTED ON THE POUCH A Front Rail 1PC B Left Front Leg 1PC D Left Back Rail Leg 1PC C Right Front Leg 1PC F Back Rail 1PC J Wooden Mattress Base 1PC E Right Back Rail Leg 1PC G Left Crib End Bottom 1PC H Right Crib End Bottom 1PC K Mattress 1PC ...

Страница 6: ...s Screwdriver not supplied a M6 x 75 mm Allen head Bolt 8pcs b M6 x 55 mm Allen head Bolt 8pcs e BARREL NUT x 16 g M4 ALLEN WRENCH SUPPLIED c M6 x25 mm Allen head Bolt 4pcs d M6 x15 mm Allen head Bolt 4pcs r Left support brackets 2PCS s Right support brackets 2PCS f Nut x 4 pcs ...

Страница 7: ...ght Crib Fixez la jambe arrière gauche D et la jambe gauche avant B sur la plancheà gauche G à l aide des boulons b Assemblez la bonne planche de tête utilisent de la même manière STEP 1 Parts and tools required to complete step NOTE AFTER ASSEMBLY THE STEPPED HOLES IN BOTH POSTS ARE ON THE SAME SIDE e BARREL NUT x 8 G Left Crib End 1PC H Right Crib End 1PC B Left Front Leg 1PC D Left Back Rail Le...

Страница 8: ...ng Bolts a Barrel Nuts e Tighten with the Allen Wrench g Use the Flat Head Screwdriver to hold the Barrel Nut in the proper alignment Fixez le rail arrière A aux ensembles à partir de l étape 1 en utilisant les boulons a les écrous de barille e Serrez avec la clé Allen g Utilisez le tournevis à tête plate pour maintenir l écrou à barillet dans le alignement correct From Step 1 A Front Rail 1PC H G...

Страница 9: ...eft support brackets 2PCS s Right support brackets 2PCS J J J r r r r s s f f j f f c c c c c X 4 X 4 Attach the Left support brackets r and Right support brackets s to the Wooden mattress base J by using allen head bolts c and Nut f Fixez les supports gauche r et droit s à la base du matelas en bois J à l aide des vis à tête à six pans creux c et de l écrou f ...

Страница 10: ...ress down as the child grows WARNING Fall Hazard When child is able to pull to a standing position set mattress to lowest position and remove bumper pads large toys and other objects that could serve as steps for climbing out d M6 x15 mm Allen head Bolt 4pcs g M4 ALLEN WRENCH SUPPLIED Attach the wooden mattress base J to the left back leg E and right back leg G and Left Front Leg F and Right Front...

Страница 11: ...ttach The Back rail F and left crib ends and right crib end using 75mm allen head bolts a barrel nuts e and allen wrench g Model shown is example only Styles may vary F Back Rail 1PC a a a a a e e g e e e M6 x 75 mm Allen head Bolt 4pcs e BARREL NUT x 4 g M4 ALLEN WRENCH SUPPLIED H G A F F ...

Страница 12: ...12 SECTION 1 Crib Assembly STEP6 From Step 5 Parts and tools required to complete step Model shown is example only Styles may vary Put the mattress K into the bed K K Mattress 1PC ...

Страница 13: ...13 SECTION 2 Day Bed Conversion STEP 1 Parts and tools required to complete step Remove the Front Rail installed in step 5 of section 1 Crib Assembly g Allen wrench Finished Crib G H A ...

Страница 14: ...14 SECTION 2 Day Bed Conversion STEP 2 The mattress support must be in the lowest positions Store all hardware safely ...

Страница 15: ...ootboard of twin bed 3 Use the back rail as the headboard of twin bed 4 Connect the front rail and the back rail to the kits legs long rails and hardware which are not included and sold separately 1 Remove the right left crib end and leave the legs on the front back rail as the parts list shown Hollywood bed frame sold separately c Allen wrench Split leg 2PCS Cross Bar 4PCS Side Bar 4PCS ...

Страница 16: ...ied droit sur les rails qui ne sont pas inclus 3 Connectez les pièces assemblées et tête de lit de lit de taille pour les kits jambes longuesrails et le matériel qui ne sont pas inclus et vendus et vendu séparément séparément 2 Use the left crib end as the footboard of Twin Bed II 3 Use the right crib end as the headboard of Twin Bed II 4 Connect the left right crib end to the kits legs long rails...

Страница 17: ... MFG available Use the space below to make note of those numbers They can be found on the label on the Crib End bottom rail STYLE No 637 COLOR FTY Lot No Pack Date Date of Purchase you should also keep your receipt LIMITED WARRANTY workmanship and agrees to remedy any such defect This is solely limited to the repair or replacement of defective furniture components and no assembly labor is included...

Страница 18: ...r Chat with us For any questions or concerns or feedback 1532 S Washington Avenue Piscataway NJ 08854 E mail info dreamonme com Customer Care 1 732 366 1788 www dreamonme com Follow us on to get your nursery featured on our social media dreamonmeinc dreamonmeinc ...

Отзывы: