4:
Operating Instructions
63
Imaging Tools
GelCapture provides you with several imaging tools to alter the appearance of an image or gain more
points of view of the raw image after it is captured. For example, it helps show very faint samples, as
well as to distinguish between close bands in the same image, or helps discern an image that is
unclear due to portions that are too dull or too dark. Use the Inverted Image, Pseudo-color and
Overexposure settings to assist you in examining the quality of the image before sending it for
analysis.
When you use Imaging Tools to make changes and then save the image, the image is saved with its
original information (without the changes made with the imaging tools). However, when the image is
reopened in GelCapture, the changes you made and saved are displayed. For example, if you invert an
image and then save it, the next time you open the image in GelCapture, the image appears inverted.
However, if you open the same inverted and saved image in other imaging analysis software, the
image appears as it did when you originally captured it, i.e. not inverted. Read the following section
to learn more about Imaging Tools.
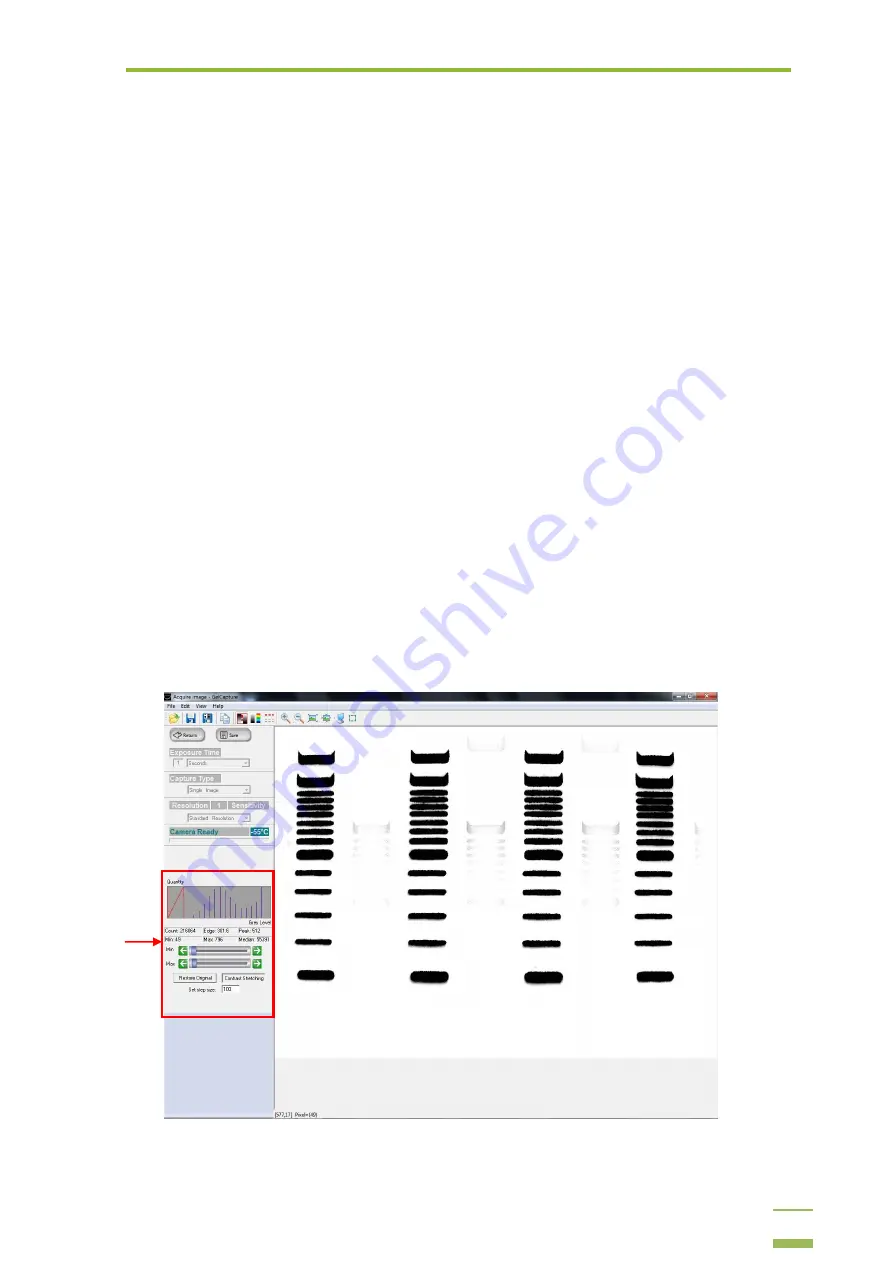
Image Statistics
The Image Statistics Graph provides you with an illustrated version of the image data to help you
capture images optimally. This feature is very useful when you want to compare information between
images (by comparing the graph data), or when you need specific statistical information of an image,
and in order to reveal very faint samples (by using the stretching options).
When you detect an image, the Image Statistics Graph is displayed on the left and other information
is displayed below the graph.
Image
Statistics
Содержание MicroChemi
Страница 1: ...Welcome to the MicroChemi System...
Страница 16: ...3 Setup and Installation 15 4 Mark the checkbox if you wish to create a desktop icon and click Next...
Страница 20: ...3 Setup and Installation 19 6 Click the combo box and select the MicroChemi component from the list...
Страница 34: ...3 Setup and Installation 33 14 Click OK 15 Choose DNR Camera and click Next...


